Staring at a palette of green, lavender, and peach concealers can feel a little intimidating. I get it. But this color correcting makeup guide is here to make it all click. The whole idea is to use some basic art class principles to tackle common skin concerns, turning any discoloration into a perfectly even canvas for your foundation.
It’s a secret weapon that’s for everyone, not just pro makeup artists.
What Is Color Correcting Makeup
Color correcting is basically using color theory to your advantage to neutralize skin tones you don't want. Remember the color wheel from art class? Colors that are opposite each other on that wheel cancel each other out. In makeup, that just means dabbing a specific colored product onto an area of discoloration before you put on your foundation or concealer.
This isn’t about caking on a thick layer of product to hide things. It’s a much smarter, more strategic approach. By neutralizing the undertone first, you actually get to use less of your skin-toned makeup later, which always leads to a more natural, seamless look.
Why It Works So Well
The real magic is in creating a neutral base to work from. Let’s say you have a red blemish. If you just glob a bunch of concealer directly on top, you’ll probably end up with a weird, greyish-looking spot. That’s because the redness is still peeking through.
But, if you apply a super-thin layer of a green corrector first, you cancel out that redness completely. Now when you go in with your concealer, it only has to match your skin tone, not fight against the red popping through from underneath. The result is so much cleaner and way more effective.
The goal of color correcting isn't to add color, but to remove it. By strategically neutralizing discoloration, you create a blank canvas, allowing your foundation and concealer to work more effectively with less product.
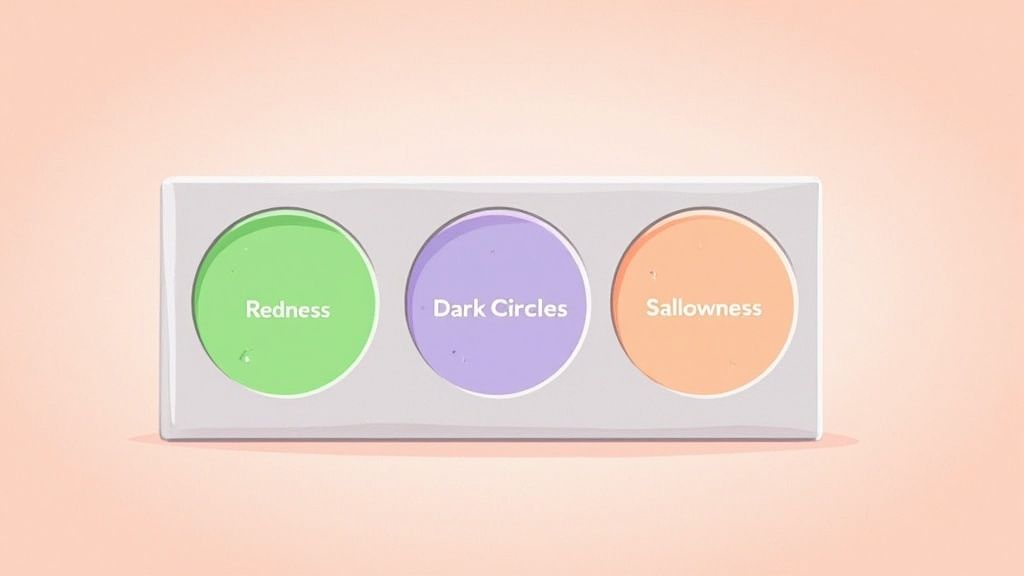
The Most Common Correctors
You definitely don't need a whole rainbow palette to get started. Most of the everyday skin concerns we deal with can be handled with just a few key shades, each designed to tackle a specific issue.
Here are the heavy hitters and what they do:
- Green: Knocks out redness from acne, rosacea, or little broken capillaries.
- Peach/Orange: The hero for blue and purple tones, like those pesky dark under-eye circles.
- Yellow: Great for combating purple or blue bruises and veins.
- Lavender: Brightens up sallow or yellowish skin for a healthier, more vibrant look.
Getting a handle on these simple pairings is the first big step. It’s a bit different than your standard BB or CC creams, which usually give a sheer, all-over tint. If you’re curious about those, you can read up on the differences between BB and CC creams to see where they fit in. Once you learn how each color corrector plays its part, you can confidently take on any discoloration for a seriously flawless finish.
How to Use the Color Wheel for Flawless Skin
The secret behind every good color correcting makeup guide actually comes from a tool you probably haven't thought about since elementary school art class: the color wheel. This is where it all clicks. Suddenly, neutralizing discoloration isn't some confusing makeup artist trick—it's a simple, intuitive way to get an even-toned complexion.
The whole game is about complementary colors. These are just pairs of colors sitting directly across from each other on the color wheel. When you mix them, they cancel each other out, creating a neutral shade like grey or brown. In makeup, we use this exact principle. We layer a corrective color over a skin concern to create a neutral canvas before foundation.
This little map breaks down the three most common pairings you'll ever need.
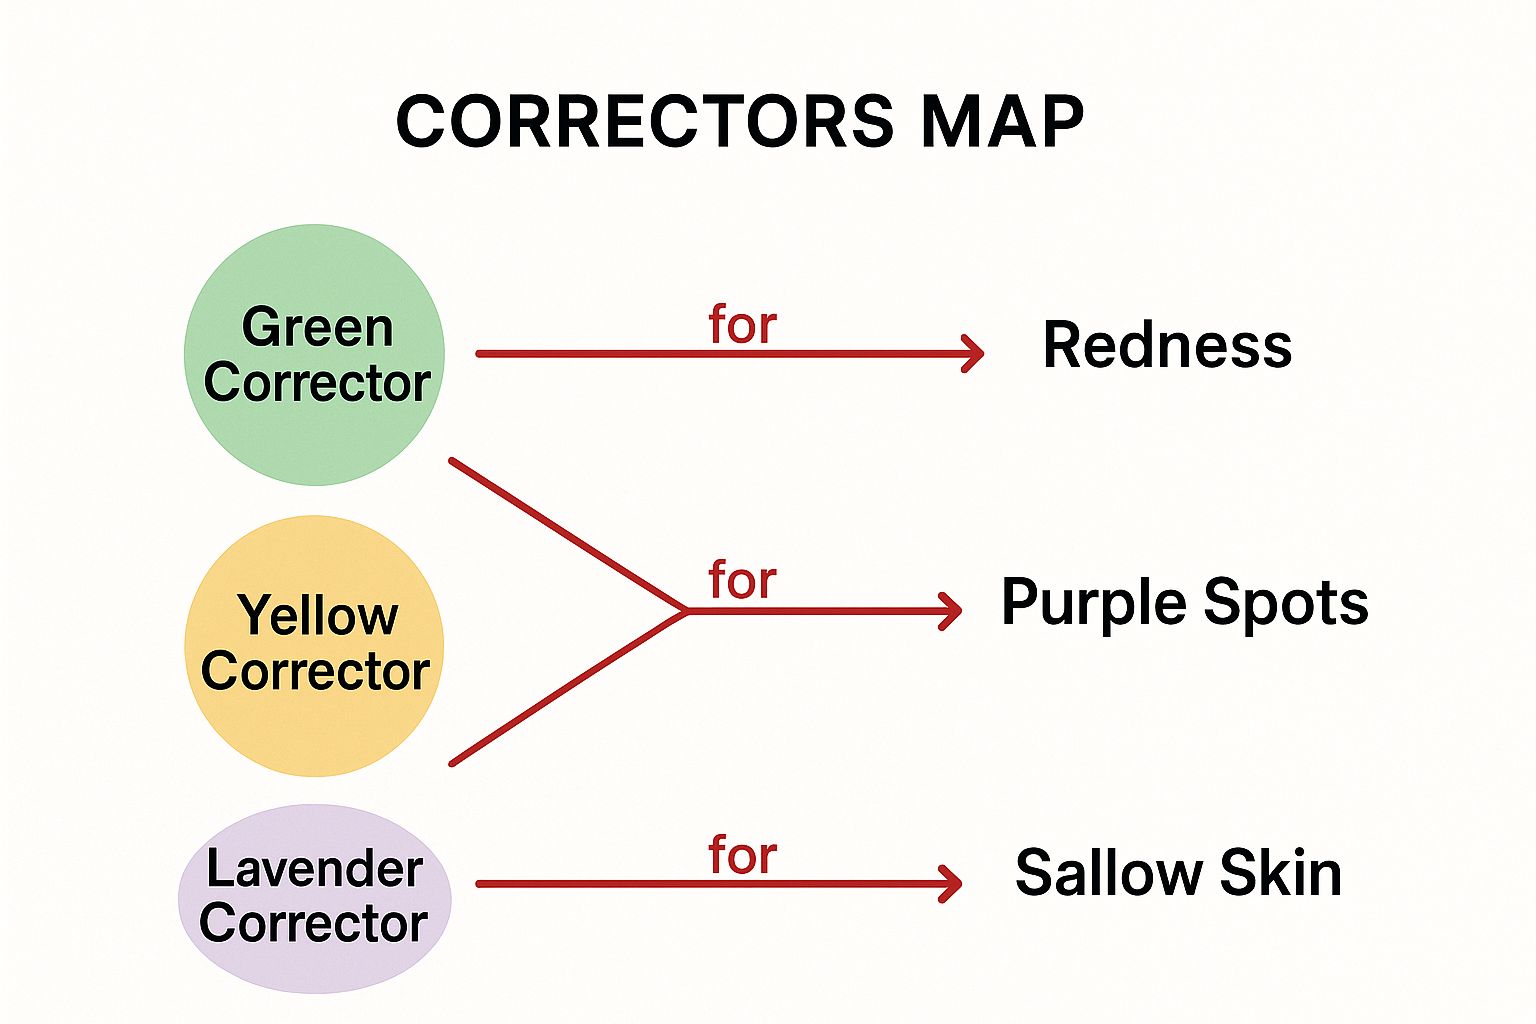
See? Each corrector is directly linked to the discoloration it's meant to neutralize. It’s a super clear visual for how color theory works for your face.
Your Guide to Choosing the Right Color Corrector
To make it even easier, think of it this way. Here’s a quick-glance table matching common skin concerns with the corrector you need to balance things out.
| Skin Concern | Corrector Color | What It Does |
|---|---|---|
| Redness (acne, rosacea, broken capillaries) | Green | Neutralizes red tones |
| Dark Circles (purple/blue undertones) | Yellow / Peach | Cancels out blue and purple shadows |
| Sallowness (yellowish skin tone) | Lavender / Purple | Brightens and counteracts yellow dullness |
| Dark Spots / Hyperpigmentation | Peach / Orange | Corrects dark shadows on medium to deep skin |
Think of this table as your cheat sheet. Find your concern, grab the corresponding color, and you're ready to create that perfect, even base.
Green: The Redness Neutralizer
Take a look at any color wheel, and you’ll see green sitting right across from red. That direct opposition makes green the perfect antidote for any kind of redness popping up on your skin.
It’s your secret weapon for things like:
- Acne Blemishes: A tiny dab of green can instantly calm down the angry red of a breakout.
- Rosacea: If you have more widespread redness on your cheeks or nose, a thin layer of green corrector will neutralize that flush.
- Broken Capillaries: Those little red veins that sometimes show up around the nose? A touch of green makes them disappear.
The key is to remember you are neutralizing, not covering. A sheer wash of green is all that's needed. When you apply your foundation over this neutralized area, it won't have to fight the red undertone, resulting in a much more natural and even finish.
Yellow & Peach: The Purple and Blue Eraser
Moving around the wheel, yellow and peachy tones are positioned opposite purples and blues. This makes them the dream team for counteracting any deep blue or purplish tones on your skin.
This is especially helpful for:
- Dark Under-Eye Circles: So many of us have purplish hues under our eyes. A yellow or peach-toned corrector brightens this area like nothing else.
- Bruises: For older bruises that have gone purple or deep blue, a yellow corrector can help mask them.
- Visible Veins: If you have bluish veins, particularly on fair skin, a light layer of yellow can make them way less noticeable.
It's no surprise that the demand for these kinds of targeted solutions is blowing up. The global color cosmetics market is expected to hit $73 billion by 2029, which just shows how many of us are embracing these more advanced techniques. Social media tutorials have really pulled back the curtain on concepts like color correcting, driving the need for clean, effective products.
Lavender: The Brightening Agent
Last but not least, let's talk about lavender. This light purple shade sits opposite yellow on the color wheel, making it the perfect tool for brightening skin that looks dull or sallow.
Sallow skin often has yellowish undertones that can make you look tired. A lavender corrector gets right to work neutralizing those specific tones, bringing a brighter, healthier vibe back to your complexion. It’s fantastic for giving your skin an all-over boost of radiance before foundation.
Getting these pairings down is the first big step. Once you understand why each shade works, choosing the right product stops being a guessing game. It also gets you perfectly prepped for the next move: finding and applying the perfect foundation over your beautifully corrected canvas. And if you need a little help there, we’ve got a guide on how to choose the right foundation shade that can help.
Choosing the Right Color Corrector for You
Okay, so you get the "why" behind color correcting. Now for the fun part: finding your perfect match. Just like with any other makeup, grabbing the right formula can totally change the game, turning a tricky application into something that just… works.
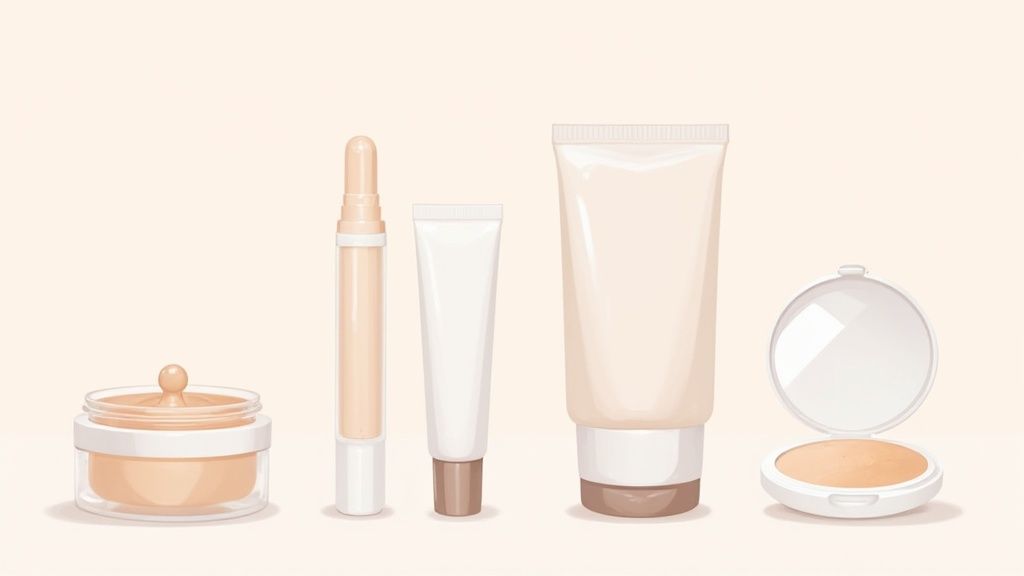
The texture of your corrector matters just as much as its color, I promise. This is where we get practical and figure out what you actually need. We'll look at creams, liquids, and sticks to find the best fit for your skin and the finish you're dreaming of.
Match the Formula to Your Skin Type
Choosing the right formula isn't just about what you prefer; it's about what performs. A product that looks gorgeous on dry skin might just slide right off an oily complexion. Figuring out what your skin needs is always step one.
- For Oily or Acne-Prone Skin: Liquid or powder correctors with a matte finish are your best friends. They're less likely to clog pores and will help keep that extra shine in check all day.
- For Dry or Mature Skin: You'll probably love cream and stick correctors. These formulas offer more hydration and blend into the skin without caking or settling into fine lines. They leave a dewy, fresh finish.
- For Combination Skin: You've got options! A lightweight cream or a buildable liquid corrector usually works best. This way, you can apply a bit more on dry patches and use a lighter hand on oilier spots like the T-zone.
Finding the Right Shade Intensity
Color correcting isn't a one-size-fits-all situation, especially when it comes to the shade itself. The depth of your skin tone is the key to figuring out which version of a corrector you should use. If you pick a shade that's too light, it can look ashy. Too dark, and you'll have a whole new color to cover up.
The secret is to match the intensity of the corrector to the depth of your skin tone. A light peach beautifully cancels out blue tones on fair skin, but you'll need a deeper, more vibrant orange to neutralize that same discoloration on dark skin.
This simple principle makes sure the corrector blends away seamlessly, creating a truly neutral canvas instead of another problem to solve. Think of it as fine-tuning that color wheel to work perfectly for you.
How to Select Clean and Conscious Options
In a world overflowing with choices, picking products that align with your values shouldn't be a headache. When you opt for clean, vegan, and cruelty-free correctors, you get a flawless look without compromising. In fact, many of the best organic concealers out there now include color-correcting benefits with ingredients that are actually good for your skin.
When you're shopping, look for clear labels and certifications. Here are a few things to keep an eye out for:
- Avoid Sketchy Fillers: Look for products made with ingredients you recognize, like plant-based butters and oils. These actually nourish your skin instead of just sitting on top of it.
- Check for Certifications: Trustworthy labels like Leaping Bunny or PETA's Beauty Without Bunnies program give you peace of mind that no animal testing was involved.
- Prioritize Sustainable Packaging: Brands that care about the planet often use recyclable or plastic-free packaging. At Axiology, we believe that what’s good for you should also be good for the Earth. Simple as that.
Making a conscious choice is about so much more than makeup. It’s about supporting brands that care about ethical sourcing, animal welfare, and the environment, so your beauty routine can be part of making the world a little bit better.
Applying Color Corrector for a Seamless Finish
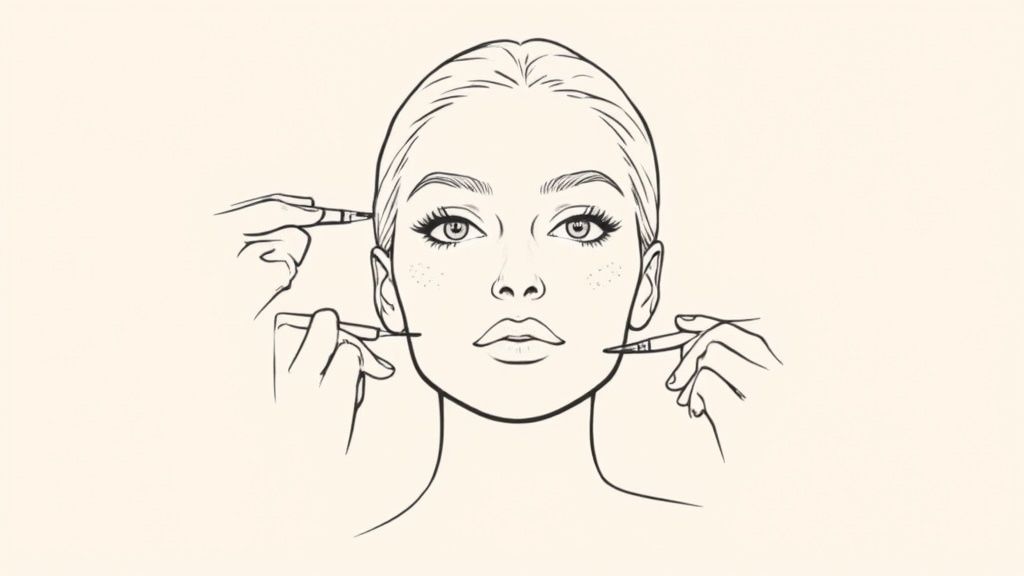
This is where the magic happens. Knowing which color to grab is one thing, but actually applying it for a natural, “I woke up like this” finish is the real art form. The goal is for the corrector to completely disappear, leaving behind nothing but an even, balanced complexion.
If you take one thing away from any color correcting makeup guide, let it be this: less is more. Seriously. These products are packed with pigment, which means a tiny dot goes a very, very long way. Piling it on will just create a heavy, cakey situation that’s impossible to blend and even harder to cover up.
Step 1: Prepare Your Canvas
Before you even think about dabbing on a corrector, you’ve got to prep your skin. It’s just like painting a wall—you wouldn’t just slap paint on without cleaning and priming it first, right? A smooth, hydrated base is everything for getting makeup to blend seamlessly.
Start with your usual skincare routine to make sure your face is clean and moisturized. Pay a little extra attention to any dry areas, since correctors love to cling to flaky patches.
Next up, primer. A good primer creates a soft, even surface for your makeup to stick to, helping it last all day. More importantly, it smooths everything out, giving you the perfect canvas to work on.
Your corrector will only look as good as the skin underneath it. A consistent skincare routine is the true foundation of any flawless makeup application. Taking those few extra minutes to cleanse, hydrate, and prime makes all the difference.
Step 2: Apply with Precision
Alright, it’s time for the main event. This step is all about targeted, precise application. Remember, you’re not slathering this all over your face—only on the specific spots that need a little neutralizing help.
Using a small brush or even your ring finger, pick up the tiniest amount of product. Gently tap the corrector directly onto the area you want to address. For a blemish, that means just on the red spot itself. For under-eye circles, focus only on the darkest purple or blue parts.
Whatever you do, don't swipe or rub. A gentle tapping motion deposits the pigment right where you need it without irritating your skin or spreading the color around.
Step 3: Choose Your Blending Tool
How you blend is just as important as how you apply. The right tool will diffuse the corrector, melting it into your skin for that invisible finish we’re after. You’ve got a few great options here.
- Your Fingertips: The warmth from your skin is amazing for melting creamy products, creating a super natural blend. Use your ring finger (it has the gentlest touch!) to lightly tap around the edges and soften them.
- A Damp Makeup Sponge: A sponge is perfect for pressing the product right into the skin, giving you a seamless, almost airbrushed effect. Use light, bouncing motions to blend the edges without lifting the corrector away.
- A Small, Fluffy Brush: For really precise blending, a small concealer brush is your best friend. Use it to gently feather out the edges until there are no harsh lines left.
No matter which tool you pick, the idea is to blur the line between the corrector and your skin. You shouldn't see a clear patch of green or peach. Instead, the area should just look neutralized—maybe a little dull or grayish. That’s when you know you’ve nailed it.
Step 4: Layer Foundation and Concealer
Now that you’ve neutralized the discoloration, you can move on to your regular base makeup. The trick here is to be gentle. You don't want to mess up all that careful work you just did!
Apply your foundation using a stippling motion with a brush or a bouncing motion with a sponge. Don't drag or wipe, because that will just smear the corrector underneath and mix the colors together.
After foundation, take a look. Still see a little discoloration peeking through? Now’s the time to apply a small amount of your regular, skin-toned concealer right on top. This one-two punch of neutralizing and then covering is the secret to a completely flawless, natural look. And bonus: you’ll find you need way less product overall.
Targeting Specific Skin Concerns Like an Expert
Okay, you’ve got the basics of color theory down. Now, let's get into the specifics. While the color wheel gives us the "why," real-world makeup is all about nuance. This is where you go from just knowing the rules to using them like a pro on your own unique skin.
Think of it as switching from a general road map to a detailed satellite view. We’re zooming in on common frustrations like dark circles, redness, and hyperpigmentation to arm you with targeted strategies. This is how you make a color correcting makeup guide actually work for you.
Mastering Dark Under-Eye Circles
Here's the thing about dark circles: they're not all the same. Using the wrong corrector can actually make them look worse. The secret is figuring out the main undertone of your circles, which can be different depending on your skin depth and genetics.
Take a good look in natural light. Are your circles leaning more blue, purple, or maybe a brownish color? Answering that question is the key to picking the perfect neutralizing shade.
Here’s a quick breakdown to help you out:
- For Blue-Toned Circles: Often seen on fairer skin, these circles need a peach-toned corrector. The warm, orangey notes in peach are a direct hit against cool blue tones, instantly brightening up your under-eye area.
- For Purple-Toned Circles: These are common across a lot of skin tones and are best canceled out with a yellow-toned corrector. Yellow is purple's opposite on the color wheel, making it the perfect choice to erase that tired, bruised look.
- For Brownish or Deep Circles: Common on deeper skin tones, these circles usually have a mix of undertones. You'll need a vibrant orange or red-toned corrector here to neutralize the deep discoloration without looking ashy.
The goal is to apply the corrector only where you see discoloration, not all over the under-eye. Use a small, precise brush to tap the product onto the darkest shadows, then gently blend out the edges so it melts right into your skin.
Calming Redness from Rosacea and Acne
Dealing with redness, whether it’s from a breakout or rosacea, calls for a light touch. The biggest mistake people make is slathering a thick layer of green corrector everywhere, which can leave a weird, greenish tint. Trust me, precision and a "less is more" approach are your best friends here.
For a single blemish, use a tiny pointed brush to dot green corrector right on the red spot. For more widespread redness, like on your cheeks or around your nose, the strategy changes. Try mixing a tiny drop of green liquid corrector with your primer or moisturizer.
This creates a super sheer, color-neutralizing base that tones down the overall redness without leaving a noticeable green layer. It's a subtle trick that creates a much more natural, even canvas before your foundation even comes near your face.
Brightening Dull Skin and Sallowness
If your skin is looking a bit dull, yellowish, or sallow, a lavender corrector will be your new best friend. Since yellow and purple are opposites, a light wash of lavender can instantly counteract those tired-looking undertones and bring a healthy glow back to your complexion.
Instead of spot-treating, you can apply a lavender-toned primer all over your face before foundation. This gives a subtle, all-over brightening effect that makes your whole face look healthier and more luminous. It's an easy win for those days when your skin just needs a little pick-me-up.
For a truly flawless finish, make sure your skin is prepped and happy. Integrating quality skincare, like squalane skincare products for healthy skin, can help target and improve underlying concerns.
Camouflaging Hyperpigmentation and Sun Spots
Hyperpigmentation, sun spots, and melasma usually show up as brown or grayish patches. A peach or orange corrector works wonders to neutralize these darker areas, especially on medium to deep skin tones.
The key is to match the intensity of the corrector to your skin depth and the darkness of the spot. A light peach is great for subtle spots on fair skin, while a deeper orange is needed for more noticeable hyperpigmentation on darker complexions. Getting this right is what prevents the area from looking ashy or gray.
The demand for products that offer these kinds of targeted solutions is huge. The face color cosmetics category, which includes these correctors, brought in about $2.3 billion in the U.S. in 2023 alone. It just goes to show how essential these little tools have become in our makeup bags.
Your Color Correcting Questions Answered
So you’ve got the color wheel down and you’re feeling good about your application game, but a few little questions are still nagging at you. Totally normal. Let's clear up those final bits of confusion so you can feel 100% confident.
Think of this as your personal troubleshooting guide for the most common color correcting curveballs.
Can I Use a Color Corrector Without Foundation?
You totally can, but it’s an art form. The key is to be incredibly subtle. Going foundation-free with a corrector means you have to blend like you’ve never blended before.
For something minor, like a little redness around your nose, use the teeniest, tiniest dot of product. Then, blend the edges until they literally vanish into your skin. You can set it with a light dusting of translucent powder or even a powder foundation that’s a perfect match for your skin tone. This locks it in place without looking like makeup.
But for more obvious stuff like dark under-eye circles? It’s usually better to pop a thin layer of a skin-toned concealer over your corrector. This two-step process—neutralize first, then conceal—is what gives you that flawless, I-woke-up-like-this finish, no full face of foundation required.
Why Does My Color Corrector Look Ashy or Grey?
Ugh, this is the worst, right? But thankfully, it's almost always a super easy fix. If your corrector is looking grey or ashy, it’s one of two things: you’ve picked the wrong shade, or you’ve put on way too much.
First, let’s talk shade. The corrector might be too light for your skin tone or simply the wrong undertone for the job. For example, dabbing a light peach corrector on deep skin with dark circles is a classic recipe for a grey cast. You need a richer, more vibrant orange to really counteract that deep blue or purple.
Quick reminder: Color correctors aren't concealers. Their job is to neutralize color, not cover it up. They are packed with pigment, so a super thin, sheer layer is all you need to cancel out unwanted tones.
Second, check your application. Always, always start with a tiny dot. Blend it out. You can always add more if you need it. And remember to layer your regular skin-toned concealer or foundation on top to bring everything back to a natural, even complexion.
What Is the Correct Order to Apply Color Corrector?
Order matters. A lot. For a truly seamless look, your color corrector goes on after skincare and primer but before foundation and concealer.
Think of it like building layers for the perfect look:
- Skincare: Start with clean, moisturized skin. Serums, moisturizer, and—most importantly—SPF.
- Primer: This creates a smooth canvas for everything that comes next.
- Color Corrector: Now’s the time to spot-treat. Apply the corrector only on the specific spots that need neutralizing.
- Foundation: Gently press or stipple your foundation over your face. Try not to swipe or rub, or you’ll undo all your hard work!
- Skin-toned Concealer: Add this last touch for any extra coverage needed or for brightening areas like under your eyes.
Following this order lets the corrector do its magic directly on the discoloration, creating an even base for your foundation to perfect.
Do I Need to Color Correct My Entire Face?
Nope! Definitely not. In fact, please don’t. Color corrector is a precision tool, not an all-over paint.
Color correcting is targeted problem-solving. You only apply it exactly where you see the discoloration—the red bits by your nose, the purple under your eyes, that one stubborn dark spot on your chin. Putting it anywhere else just adds a weird, unnatural tint to your skin, which is the opposite of what we’re going for.
The goal is to spot-treat the issues first. Then, your foundation and concealer come in to unify your entire complexion for that flawless finish. It’s all about balance.
How Do I Prevent My Corrector from Creasing?
Creasing, especially under the eyes, is the bane of every makeup lover's existence. But you can fight it! A few simple tricks can keep your makeup looking smooth all day.
First, skin prep is everything. The skin under your eyes is delicate and often thirsty, so a good, hydrating eye cream is a must. Let it sink in completely before you even think about putting makeup on. A hydrated canvas is a smooth canvas.
Second, less is more. This is probably the number one rule. An extra-thick layer of product is just begging to settle into fine lines. Use a small brush for precision, then gently tap the product into the skin with your ring finger. The warmth helps it melt right in.
Finally, set it right. As soon as you’re done blending your corrector and concealer, lock it down with a very light dusting of a fine, translucent setting powder. Use a fluffy brush or a puff to gently press—not swipe—the powder on. This keeps everything in place and stops creasing in its tracks.
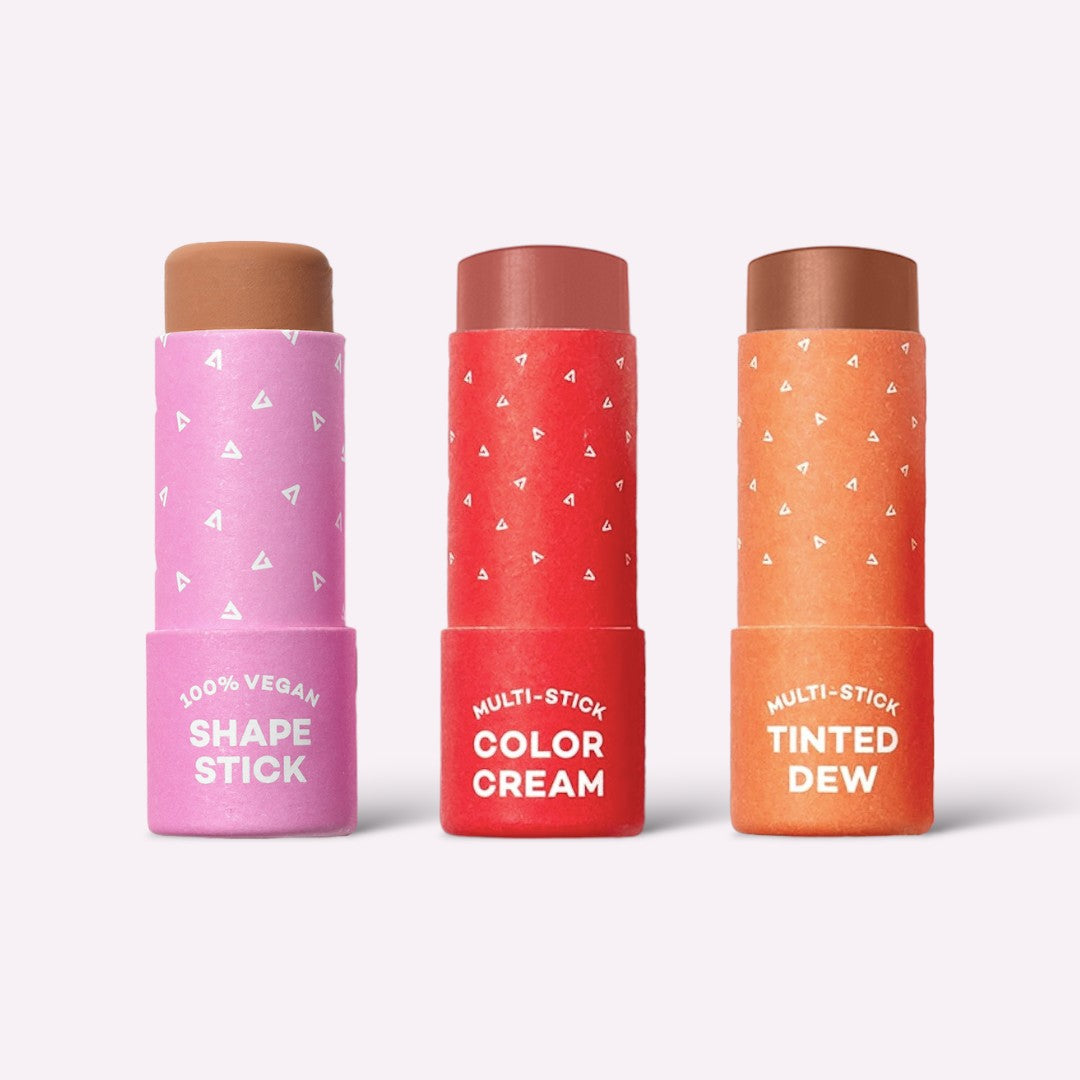
At Axiology, we believe getting that flawless look shouldn’t cost the planet. Our clean, vegan, and cruelty-free products are made to work beautifully while honoring our commitment to sustainable, plastic-free beauty. Discover makeup that makes you feel good, inside and out. Explore our collection at axiologybeauty.com.