When you hear "apply foundation with a sponge," what comes to mind? For me, it’s all about using a damp sponge to bounce or stipple my way to a seamless, almost airbrushed finish. It’s a simple trick, but it stops the sponge from drinking up all your product (like our beloved Axiology Fungdation) and leaves you with an even, totally streak-free look.
Your Guide to a Flawless Sponge Foundation Application
Nailing your sponge application is less about a strict set of rules and more about getting the hang of a few key ideas. Once you do, you’ll unlock that perfect second-skin finish that brushes just can't seem to replicate. The whole point is to make your makeup look less like it's sitting on your skin and more like it's a part of it.
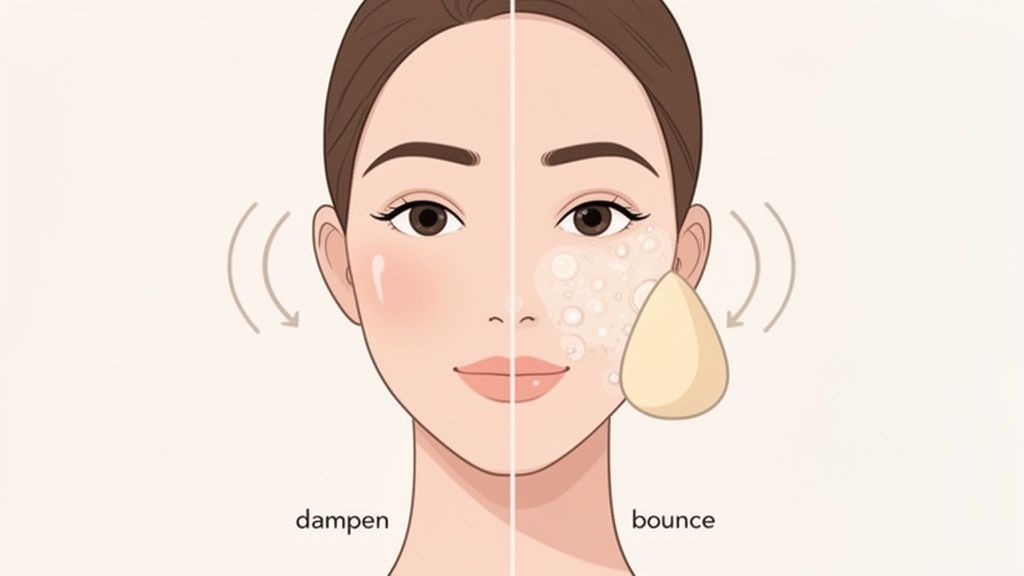
The biggest, most non-negotiable secret? A damp sponge. Seriously. A dry sponge is like a thirsty little bandit, soaking up all your precious foundation before it even gets to your face.
When you dampen it, the sponge’s pores fill with water. This allows the foundation to sit right on the surface, ready to be transferred beautifully and evenly onto your skin.
Core Principles for Success
Before we jump into the nitty-gritty, let's go over a few essentials. Think of these as the foundation (pun intended) for a perfect application, every single time.
- Sponge Prep is Everything: Your sponge needs to be clean and perfectly damp. We’re talking soft and expanded, not sopping wet.
- Good Skincare is Your Canvas: A great finish starts with hydrated, happy skin. Foundation always looks better on a face that's been properly cleansed and moisturized.
- Technique Matters: Different motions give you different results. We’ll be diving into the big three: bouncing, stippling, and pressing.
To get you started, here’s a quick rundown of the process.
Sponge Application At a Glance
This table breaks down the key stages. We'll get into the details of each step, but this gives you a great high-level view of what we're aiming for.
| Stage | Key Action | Why It Matters |
|---|---|---|
| Preparation | Dampen the sponge until it expands, then squeeze out all excess water. | A damp sponge prevents product absorption and ensures a smooth, even application without streaks. |
| Application | Dot foundation on your skin, not directly on the sponge. | This gives you better control over placement and helps you build coverage gradually where you need it most. |
| Blending | Use gentle bouncing or stippling motions to press the foundation into your skin. | This "melting" technique blends the product seamlessly for a natural, second-skin finish. |
| Finishing | Use the pointed tip of the sponge for hard-to-reach areas like around the nose and under the eyes. | Precision is key for a flawless look, ensuring no corner is left unblended. |
Think of these as your building blocks for creating that effortless, glowy look.
The goal isn't to mask your skin but to enhance it. A makeup sponge, when used correctly, melts foundation into the skin for an undetectable, natural-looking glow.
The love for this little tool is more than just a trend; it's a huge part of the beauty industry. The market for cosmetic applicator foams (which includes those iconic egg-shaped sponges) was valued at a whopping USD 1.27 billion in 2024 and is expected to hit USD 2.84 billion by 2032. If you're curious, you can learn more about the growth of cosmetic applicator foams from recent market analysis.
That massive number shows just how many of us rely on this simple tool. Let's make sure you're getting the most out of yours.
Prepping Your Tools and Canvas for Perfection
A flawless foundation finish starts way before the makeup ever touches your face. Think of it like painting: the smoother the canvas, the more beautifully the paint glides on. The same idea applies to your skin and your makeup sponge.
Your skin needs to be clean, hydrated, and smooth for foundation to look its absolute best. I always start with a gentle cleanser to get rid of any impurities. Following up with a good moisturizer is a total non-negotiable; it plumps up the skin and stops products like our Fungdation from clinging to any dry patches.
For a seriously smooth canvas that makes foundation application a dream, some people swear by professional Hydrafacial treatments to really optimize their skin's texture.
Activating Your Makeup Sponge
Once your skin is prepped and ready, it’s time for the star of the show—the sponge. I see this mistake all the time: using a dry sponge. A dry sponge just soaks up way too much product, which can lead to a cakey, uneven look. The real secret is to "activate" it with water.
Just hold your sponge under running water and give it a few good squeezes until it’s fully expanded, often doubling in size. Then, wring it out completely. The goal is a soft, plump, and damp tool, not something sopping wet. This simple step makes all the difference, ensuring the foundation sits on the surface of the sponge, ready to be blended seamlessly onto your skin instead of getting lost inside the tool.
Pro Tip: A clean sponge is just as important as a damp one. Starting with a fresh, sanitized tool not only keeps bacteria off your skin but also makes sure the true color of your foundation shines through, without getting muddied by old product residue.
Why Sponge Hygiene Matters
Keeping your tools clean isn't just a minor detail—it's key to a healthy, clear complexion. A dirty sponge can be a breeding ground for bacteria and old makeup, which can lead to clogged pores and breakouts. For a consistent, pro-level finish every single time, you need to start with a clean slate.
We've put together a simple guide on how to clean makeup sponge to help keep your tools in top shape.
This prep work lays the groundwork for all the application techniques that follow. Beauty blenders and makeup sponges are essential for that professional-looking stippling technique. Picture it: priming your face, squeezing out a little Fungdation onto the back of your hand, and pressing the damp sponge in dabbing motions for an airbrushed finish. It's no wonder they dominate the market, capturing a whopping 61% of all sponge-based applications worldwide.
Mastering Sponge Techniques for Custom Coverage
Alright, your skin is prepped and your sponge is ready to go. Now for the fun part. The way you actually move the sponge across your skin completely changes the final look, giving you total control over your coverage. We're moving beyond one-size-fits-all dabbing here. Mastering a few key moves is how you’ll get everything from a sheer, dewy glow to a perfectly polished, medium-coverage finish.
The right technique isn’t just about blending; it's about making your foundation work for you. A really versatile formula like Axiology's Fungdation, for example, is amazing because it reacts differently to pressure and motion, which lets its buildable texture really shine.
Let’s get into the methods that will take your foundation game from pretty good to wow.
The Bouncing Motion for an Airbrushed Finish
This is the one you’ve probably seen everywhere, and for good reason. The bouncing or stippling motion is classic. You just gently and repeatedly tap the rounded end of your damp sponge against your skin. Think of it as lightly bouncing the sponge, pressing the product into your skin with each tap instead of just sliding it around.
This move is your ticket to a seamless, streak-free finish that honestly looks like a second skin. It deposits a super thin, even layer of foundation and just melts it into your complexion. For everyday wear, this is the gold standard.
That gentle pressing motion is the secret. It mimics your skin's natural texture, creating a blend that's so good you can't see where it starts or ends. No harsh lines, no cakey finish.
The Press and Roll for Building Coverage
Sometimes you need a little extra help in certain spots—like over redness around your nose or a blemish that just won't quit. This is where the press and roll technique becomes your best friend. Instead of bouncing, you'll press the sponge onto the area and then gently roll it outwards at the edges.
This motion concentrates the product right where you need it without messing up the foundation you've already applied. It’s the perfect way to build coverage with a product like Fungdation, letting you go from sheer to medium in seconds just by switching up your technique on specific spots. The rest of your face stays looking natural, and you get coverage only where you want it.
Before you even start blending, though, it's all about the prep work. This little visual breaks down those crucial first stages.
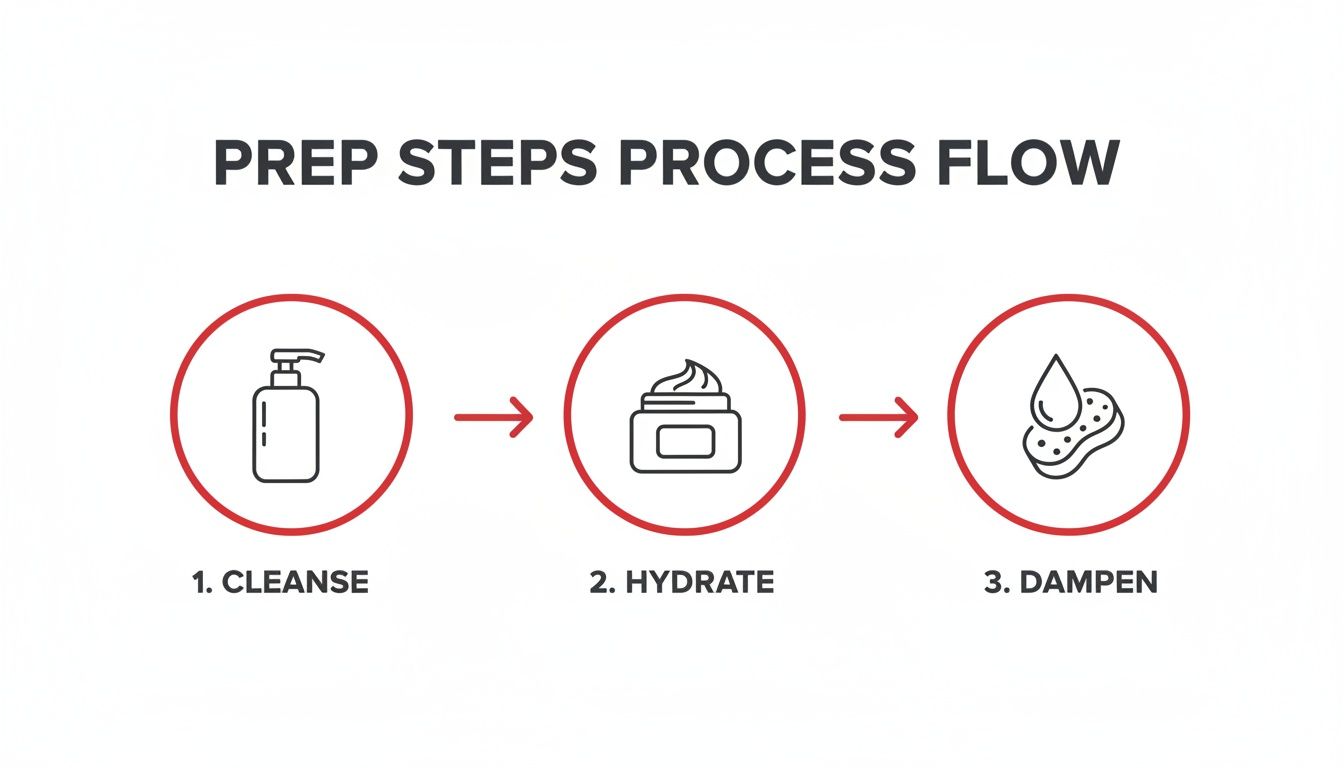
It’s a great reminder that a flawless finish really begins with a happy, prepped canvas and a properly dampened sponge. Get that right, and these techniques will work their magic.
Picking the right technique depends entirely on the look you're going for. Here’s a quick breakdown to help you decide which one to use.
Choosing Your Sponge Technique
| Technique | Best For | Resulting Finish | Pro Tip |
|---|---|---|---|
| Bouncing / Stippling | Everyday, even coverage | Natural, airbrushed, seamless | Use the large, rounded end for broad areas and the pointed tip for corners. |
| Press & Roll | Covering blemishes, redness, or hyperpigmentation | Medium, buildable coverage in targeted spots | Press firmly but gently, then roll the edges to feather out the product seamlessly. |
| Light Sweeping | Sheering out excess product | Sheer, minimal | Use this sparingly! It’s a correction tool, not a primary application method. |
Think of these as tools in your makeup kit. You might even use all three in one application for a truly custom finish.
When to Avoid the Swipe
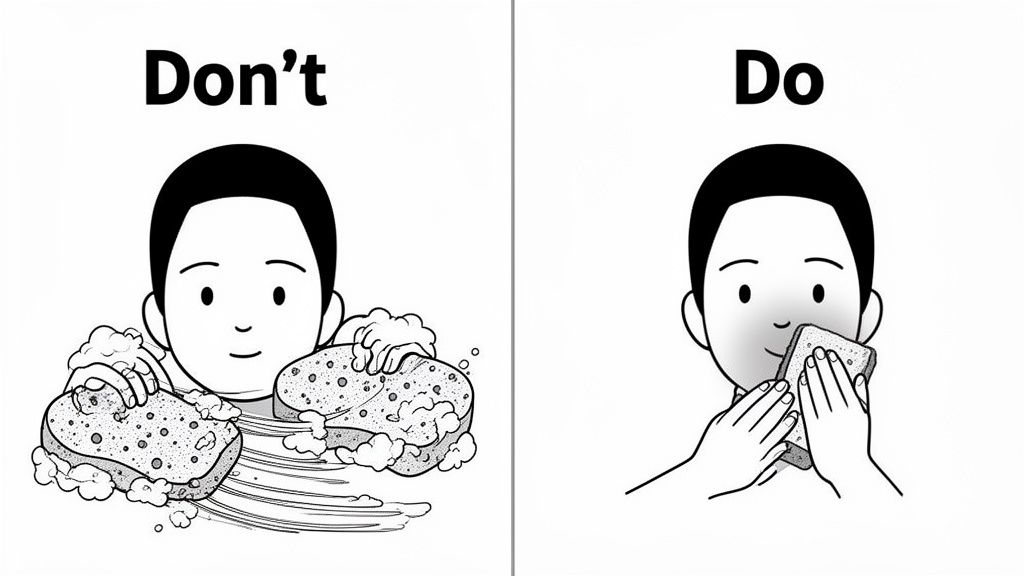
Here’s a common mistake we’ve all probably made: swiping or dragging the sponge across the skin. This almost always leads to streaks. It just pushes the foundation around instead of blending it in, leaving you with a patchy finish that looks more like paint than skin.
There is one rare exception. A very, very light, feathery swipe can occasionally help sheer out an area where you’ve accidentally put on too much product. But as your main application method? Definitely avoid it. Stick to bouncing and pressing, and you'll get a consistently gorgeous result every single time.
Adapting Your Method for Different Skin Types
Let's be real: skin is not a one-size-fits-all situation. The secret to a truly seamless foundation finish is knowing that your application technique needs to bend and shift depending on what your skin is doing on any given day. Whether you're dealing with dryness, an oily T-zone, or things like breakouts and fine lines, a little tweak in how you use your sponge can make all the difference.
This is what takes your makeup game from pretty good to genuinely flawless.
Techniques for Dry or Dehydrated Skin
If your skin is on the drier side, you already know the frustration of foundation catching on flaky patches. The goal here is all about hydration and pressing the product in, never dragging or buffing.
A damp makeup sponge is already your best friend, but here's a pro-tip to level up: try adding a single drop of your favorite facial oil directly onto the damp sponge before you dip into your foundation. It infuses a little extra moisture right where you need it. Use a gentle pressing motion to melt the foundation into your skin. This technique avoids kicking up any dry spots and leaves you with a luminous, hydrated glow.
Strategies for Oily and Combination Skin
For those of us with oily or combination skin, the challenge is getting coverage that lasts without looking heavy or making us shinier. This is where the bouncing or stippling technique truly shines. It builds coverage in super thin layers that really grip the skin, preventing your foundation from slipping and sliding around as the day goes on.
Here’s another trick: after your foundation is on, use a clean side of that same damp sponge to set your makeup. Just dip it into a bit of translucent setting powder and gently press it over your T-zone or anywhere else you tend to get oily. This locks everything in place for a velvety, shine-free finish that lasts for hours.
Key Takeaway: Using your sponge for both liquid foundation and setting powder creates a cohesive, multi-layered finish that controls oil without ever looking cakey.
Addressing Specific Skin Concerns
Beyond just your general skin type, a makeup sponge is an amazing little tool for precision work on more targeted issues. Its unique shape is perfect for navigating different textures and problem areas.
- Covering Acne and Blemishes: Grab the pointy tip of your sponge. Use it to stipple a tiny amount of extra foundation or concealer right onto the blemish. The precision tip lets you build coverage exactly where you need it without messing up the makeup around it.
- Hyperpigmentation: For larger patches of discoloration, the press-and-roll method is your go-to. It deposits a bit more product but with a soft, diffused edge, so the coverage looks totally natural and seamlessly blended.
- Fine Lines and Wrinkles: The key here is to use less product, not more. After you've applied foundation to the rest of your face, use whatever is left on the sponge to lightly bounce over areas with fine lines. This sheer layer gives you a touch of coverage without settling into creases.
At the end of the day, mastering your foundation sponge is all about listening to your skin. Of course, the right product is just as important as the right technique. If you're not sure where to begin, our guide on how to choose the right foundation shade is the perfect place to find your match.
Common Mistakes and Pro Tips for a Perfect Finish
 Getting that seamless foundation finish often comes down to dodging a few common slip-ups. Trust me, even makeup pros can get stuck in habits that keep them from that perfect, skin-like look. A few small tweaks can take your application from just "okay" to absolutely flawless.
One of the biggest culprits? A bone-dry sponge. A thirsty sponge will guzzle your foundation, which means you’re wasting product and likely ending up with a streaky, heavy application. It just drags across the skin instead of blending.
Another major misstep is dragging or swiping the sponge across your face. That motion doesn't really press the product into the skin; it just shoves it around, creating harsh lines and an uneven canvas. The real goal is to melt the foundation in, not just paint it on.
Perfecting Your Sponge Technique
Let's fix these issues with a few tricks of the trade. These tips are all about using the sponge's design to your advantage and working with your foundation for a finish that looks incredible and actually lasts.
- Use Every Surface: Your sponge is a multitasking genius. Use the big, rounded bottom for sweeping across your cheeks and forehead. Then, flip to the pointed tip for getting into those tricky spots around your nose, under the eyes, and for pinpoint concealing blemishes.
- Fix Creasing in a Flash: If you see foundation settling into fine lines (hello, under-eyes!), resist the urge to add more product. Just take your damp sponge and gently bounce it over the creased area. This will smooth everything out and re-blend the makeup you already have on.
- Set It and Forget It: For makeup that needs to go the distance, your sponge is your secret weapon. After you’ve applied your foundation, give your sponge a light spritz of setting spray and gently press it all over your face. This locks everything in place without the heavy, cakey feeling of too much powder.
A damp sponge isn't just a tool; it's an extension of your technique. It allows you to build whisper-thin layers of product that look like real skin, giving you ultimate control over coverage and finish.
If you’re still battling makeup meltdowns, we have a whole guide on how to make makeup last all day with even more pro-level tips.
What's New in Sponges?
The beauty world is always changing, and that includes sponge technology. Newer materials are popping up that offer some pretty cool benefits, especially when it comes to hygiene and not wasting product.
Silicone makeup sponges, for instance, are having a real moment. Their non-porous surface means they don’t absorb a single drop of product. The global market for these is expected to grow from USD 782.2 million in 2025 to a whopping USD 1,538.7 million by 2035, mostly because we're all looking for more hygienic and reusable options. You can pump a product like our mushroom-infused Fungdation right onto one and pat it on for lightweight coverage with zero waste.
Ultimately, avoiding the common mistakes just comes down to being a little more mindful—using the right part of a damp sponge with the correct bouncing motion. You've got this.
Your Top Questions, Answered
Even when you think you’ve got it down, a few questions always seem to pop up when you're mastering a new technique. And when it comes to foundation sponges, nailing the little details is what takes your finish from just okay to truly amazing.
Let's dive into some of the most common things people ask. Getting these practical points sorted will help you feel way more confident in your routine.
How Often Should I Clean My Makeup Sponge?
Okay, real talk: you need to clean your sponge after every single use. I know, I know—it sounds like a lot. But a quick wash is all it takes to prevent a nasty buildup of foundation, skin oils, and bacteria that can lead to breakouts.
Besides, a clean sponge just works better. It applies makeup so much more smoothly. Trying to blend with a sponge that’s already caked with old, dry product is a recipe for a splotchy, uneven finish.
Why Does My Foundation Look Streaky or Patchy?
This is a super common issue, and it almost always comes down to two things: how damp your sponge is, or how you're moving it. First, check your sponge’s moisture level. It should be fully expanded and feel soft, but you should never be able to squeeze water out of it.
Next, and this is crucial, avoid wiping or dragging it across your skin. The secret to that seamless, airbrushed look is a gentle bouncing or stippling motion. This presses the product into your skin instead of just sliding it around on top.
The biggest mistake I see is a swiping motion, which pretty much guarantees streaks. Bouncing the sponge is how you melt the foundation into your skin for that undetectable, second-skin effect.
Can I Use a Sponge for Products Besides Foundation?
Absolutely! A makeup sponge is one of the most versatile tools in your kit. Its job doesn't stop at foundation.
- Concealer: The pointed tip is a dream for blending concealer under the eyes and into tricky corners around your nose.
- Cream Blush & Bronzer: Use the rounded bottom to stipple cream blush onto the apples of your cheeks. It creates the most beautiful, natural-looking flush of color.
- Setting Powder: A damp sponge is amazing for pressing setting powder into the skin. This technique, sometimes called "baking," locks your makeup in for a creaseless, long-lasting finish.
Using the same tool for multiple steps helps create a really cohesive, beautifully blended look across your whole face.
When Is It Time to Replace My Makeup Sponge?
Even if you’re a superstar at daily cleaning, your makeup sponge has a lifespan. Most pros will tell you to toss it and get a new one every three months. Over time, the sponge’s material just starts to break down. You'll see tiny nicks and tears that mess with how smoothly your makeup goes on.
More importantly, it can start to hold onto stubborn bacteria that even a good wash can’t fully get rid of. If you notice your sponge has permanent stains, is losing its soft bounce, or looks a bit ragged, it’s definitely time for a replacement. It’s a small step that makes a huge difference for both hygiene and a flawless application.
Ready to achieve that perfect, skin-like finish? The right tool makes all the difference. Discover the power of a truly buildable, skin-loving formula with Axiology’s Fungdation and see how a sponge can unlock your most radiant look yet. Explore our products today.