If you want your makeup to stay put all day, the secret isn't some magic setting spray. It's a simple, three-part approach: meticulous skin prep, strategic layering of your products, and locking everything in place. It has far less to do with a single "miracle" product and way more to do with building a durable look from your skincare up.
Build Your Foundation on Perfect Skin Prep
Ever feel like your foundation looks amazing at 8 AM but has pulled a disappearing act by lunchtime? I’ve been there. The culprit is almost always what you did before you even picked up a makeup brush. Long-lasting makeup isn't just about primers and powders; it's built on a beautifully prepped canvas.
Think of it like painting a wall. You wouldn't just slap a coat of paint on a dusty, uneven surface and expect a smooth, lasting finish. Your skin needs that same thoughtful prep.
Create a Smooth Canvas
The absolute first step to getting makeup to adhere flawlessly is making sure your skin’s texture is as smooth as possible. When dead skin cells hang around, they create a rough surface that makes foundation cling to dry patches or, even worse, slide right off.
Gentle exfoliation a few times a week is non-negotiable. It sloughs away that buildup, giving your makeup a fresh, even surface to sit on. This doesn't mean you need to scrub your face raw! A gentle chemical exfoliant or even a soft washcloth can work wonders without causing irritation. The goal is a polished surface, not a stripped one.
Hydration is Your Best Friend
Next up is hydration, and this is crucial for every skin type—yes, even if you’re oily. When your skin is dehydrated, it can do one of two things: either overproduce oil to compensate (hello, makeup meltdown) or get dry and flaky, which makes everything look cakey and uneven.
- For oily skin: A lightweight, oil-free gel moisturizer is your hero. It gives your skin the hydration it craves without adding any extra grease to the mix.
- For dry skin: Go for a richer, more emollient cream. This creates a plump, supple base that stops foundation from settling into fine lines.
- For combination skin: Get strategic! You can use a lighter moisturizer on your T-zone and a more hydrating one on your cheeks.
This little infographic breaks down the essential flow of great skin prep.
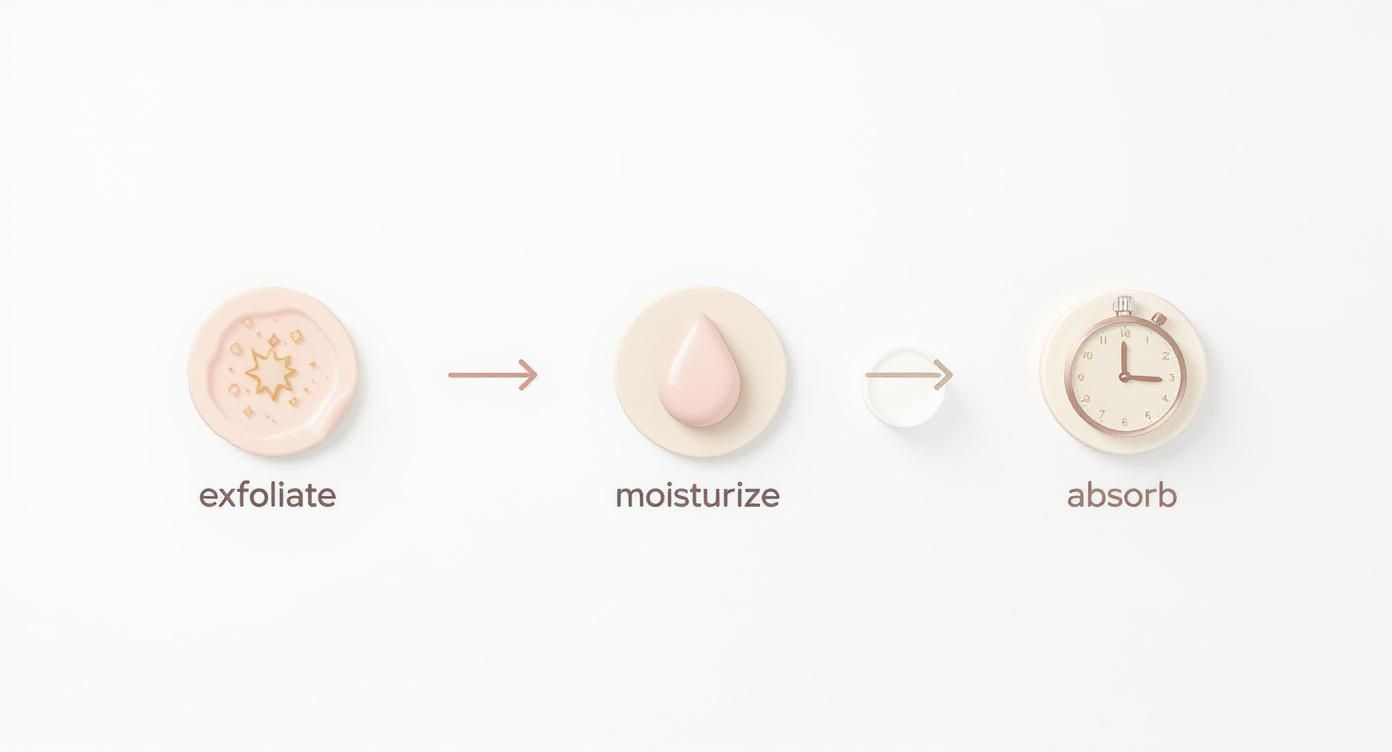
As you can see, giving your products time to absorb is just as important as the products themselves.
The single most important step people skip? Patience. You have to let each skincare product fully absorb for at least a minute before moving on. Slapping makeup onto wet skincare is the fastest way to guarantee it will slide right off your face.
Building your makeup on great skin prep also means being mindful of what you put on your face in the first place. Healthy skin simply holds makeup better. For a deeper look, it's worth understanding potential toxic ingredients in beauty products that can mess with your skin and, by extension, your makeup's longevity. You can also see how to prep your skin with a food-first approach for a truly radiant base from the inside out.
Mastering Primer For Flawless Adhesion
So, you've nailed your skincare prep and your face is a perfectly hydrated canvas. What’s next? Building the bridge between your skin and your makeup. This is where primer becomes your absolute best friend.
Think of it as double-sided tape, but for your face. It grabs onto your skin and then grips your foundation, creating a seamless base that just won't quit.
Without that crucial layer, your makeup is just sitting on your skin, totally exposed to the oils and sweat that are determined to make it slide right off. A good primer acts as a buffer, smoothing things out and keeping shine in check before you’ve even reached for your foundation.
Choosing Your Primer Formula
Not all primers are created equal, and this is where a little know-how makes a huge difference. Matching the primer formula to both your skin type and your foundation is non-negotiable if you want to know how to make makeup stay on all day.
- Silicone-Based Primers: These create that incredible, almost-airbrushed effect by filling in pores and fine lines. They're a dream for creating a super-smooth base, especially if you have oily skin.
- Water-Based Primers: Lightweight and hydrating, these are perfect for dry or sensitive skin. They feel amazing going on and won’t clog pores, giving your skin a drink of moisture that helps makeup glide on beautifully.
- Oil-Based Primers: For very dry or mature skin, these primers are a game-changer. They're deeply nourishing and leave you with a radiant, dewy glow, preventing makeup from looking cakey or flat.
Here’s a simple rule I swear by: match your primer base to your foundation base. If you’re using a water-based foundation like Axiology's Fungdation, you’ve got to pair it with a water-based primer. It’s the secret to avoiding that dreaded pilling and separation.
The right primer is so much more than just makeup glue. It actually improves your skin's texture and tackles the very things that cause makeup to break down in the first place. In fact, primers can extend the life of your makeup by up to 50% by creating a flawless surface and managing oil. If you want to nerd out, you can read more about the science behind long-lasting cosmetic formulations to see just how big of a deal this step is.
Finding the right primer can feel like a bit of a puzzle. To make it easier, I've broken down the main types and what they're best for.
Primer Types and Their Ideal Use Cases
| Primer Type | Best For Skin Type | Key Benefit | Pairs Best With |
|---|---|---|---|
| Silicone-Based | Oily, Combination, Large Pores | Fills pores, blurs texture, mattifies | Silicone-based foundations |
| Water-Based | Dry, Sensitive, Normal | Hydrating, lightweight, non-comedogenic | Water-based foundations (like Fungdation) |
| Oil-Based | Very Dry, Mature | Deeply nourishing, creates a dewy glow | Oil-based foundations |
Ultimately, choosing the right primer is about understanding your skin's needs on any given day and pairing it with the makeup you plan to wear.
The Pro Technique of Multi-Priming
Ever have one of those days where your T-zone is an oil slick but your cheeks feel like the Sahara? It's super common, which is why slapping one type of primer all over your face doesn’t always cut it. This is where multi-priming comes in. It’s a technique where you use different primers on different parts of your face.
Let's walk through a real-world scenario: you've got a long day of meetings and then dinner plans, and you need your makeup to last.
- Start by applying a mattifying, pore-filling primer only on your T-zone—that’s your forehead, nose, and chin. This will keep that midday shine under control.
- Next, grab a hydrating, illuminating primer and apply it to your cheeks and under your eyes. This will give you a healthy glow and stop your concealer from settling into fine lines.
This targeted approach gives each area of your face exactly what it needs to hold onto makeup. You're not just applying products; you're building a look with the structural integrity to last from your morning coffee to your last call. It’s this kind of detail that turns a good makeup day into a truly great one.
Applying Your Base for Ultimate Longevity
Alright, your skin is prepped and primed, so now it's time to lay down a base that will actually stick around. The real secret isn't packing on a ton of product; it’s all about how you apply it. We're aiming for a flexible, flawless finish that moves with your skin instead of sitting on top of it.
The goal is to create a second-skin effect that’s surprisingly tough. This is where your technique can make or break your look.
The Press and Blend Method
One of the biggest mistakes I see is people swiping or rubbing their foundation on with a brush. Brushes can be great, but they often leave tiny streaks that become super obvious a few hours later. My go-to tool? A damp beauty sponge. It’s a total game-changer for creating a seamless base.
When you use a damp sponge to gently press and bounce foundation into your skin, a couple of magic things happen. First, it physically pushes the product into your skin for a much better grip, rather than letting it just sit on the surface. Second, it sheers the formula out just enough to avoid that heavy, mask-like look while still giving you beautiful, even coverage.
Think of it like this: swiping foundation is like painting a fence, but pressing it in is like staining wood. One creates a layer on top, while the other becomes part of the surface itself. This integration is what gives your makeup its staying power.
If you want a full deep-dive on this technique, check out our guide on how to apply foundation with a sponge. It breaks down every step for a perfect finish.
Build in Thin Layers
Let go of the idea that you need one thick coat of foundation. The real key to a long-lasting, natural base is building it up in whisper-thin layers. Start with just a little bit of product, like our Axiology Fungdation, focusing on the center of your face and blending it outward.
This approach puts you in complete control. You can add more coverage only where you need it—maybe over some redness or a blemish—while the rest of your skin looks fresh and can actually breathe. A single, heavy layer is just asking to crack, crease, and fall apart as the day goes on.
Conceal with Precision
That "less is more" mindset works for concealer, too. Drawing a huge, thick triangle under your eyes is a fast track to creasing city. Instead, get strategic. Place tiny dots only where you need to brighten or cover, like the inner corners of your eyes or on specific dark spots.
Gently blend it out with the tip of your damp sponge or even your ring finger. This targeted approach keeps you from overloading product in areas with fine lines, which helps your concealer stay smooth for hours. Cosmetic science has our back on this; the global market for long-wear cosmetics has been growing at over 6% each year. This is all thanks to new polymer tech that creates flexible, breathable films on the skin. You can discover more insights about the eye makeup market on mordorintelligence.com. By applying these modern formulas with a light hand, you get all the long-wear benefits without any of the cakey downsides.
Layering Techniques for Indestructible Color

You’ve built a flawless base, but what about the color? Blush, bronzer, and eyeshadow are usually the first to fade. We’ve all been there.
The secret to making them last is a technique straight from the pros: layering different textures. By pairing creams with powders, you create a look with some serious staying power and gorgeous dimension.
This method basically creates a “color sandwich” that locks your pigment in place. The cream product gives the powder something to grab onto, while the powder sets the cream and stops it from sliding around or disappearing into your skin.
The Cream and Powder Color Sandwich
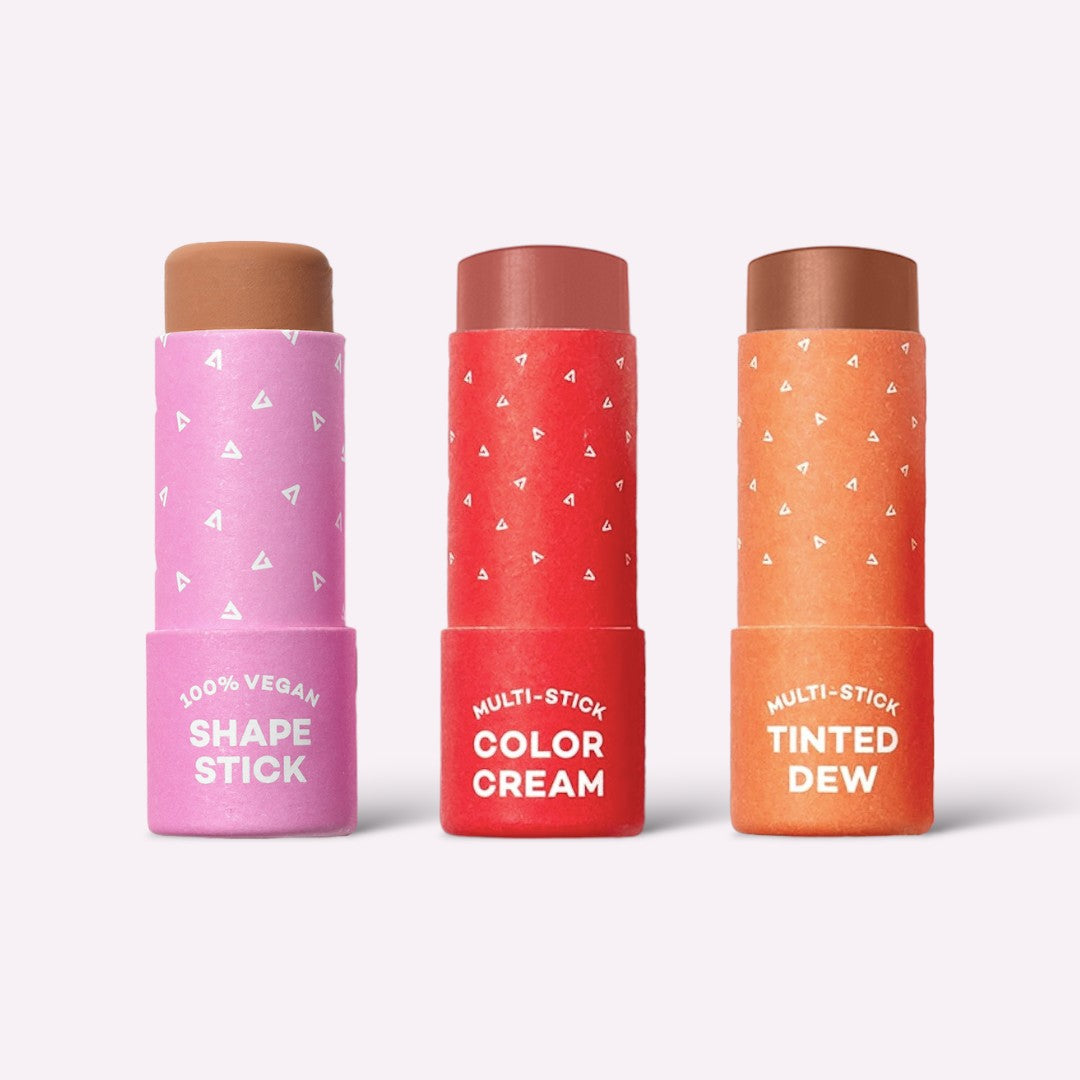
Let's talk blush. A cream blush, like one of Axiology's multi-use Color Sticks, melts into the skin for that perfect, healthy-looking flush. But on its own, it might not make it through the whole day, especially if you have combination or oily skin.
To make that beautiful color stick around, here’s the process:
- Start with the cream. Once your foundation is on, tap the cream blush onto the apples of your cheeks and blend it out. This is your vibrant, dewy base.
- Set it with powder. Grab a fluffy brush and a powder blush in a similar shade. Gently sweep it right over the cream blush.
This little trick doesn't just double the pigment; it creates a super durable finish that resists fading. The powder acts like a seal, giving the cream something to cling to for hours. Your blush will look just as fresh at 5 PM as it did at 9 AM. This same principle works wonders for your bronzer and highlighter, too.
Here’s a pro tip: use setting spray between layers. After you’ve applied your cream blush and bronzer but before the powder, a quick mist of setting spray helps everything melt together, creating an even stronger base for your powders.
Locking Down Your Eye and Lip Color
This layering idea isn't just for your cheeks. It's a total game-changer for keeping your eye and lip makeup looking fresh all day.
For Your Eyes
An eyeshadow primer is a must—no negotiating here. It’s what stops creasing and fading in its tracks by creating a smooth surface that grips onto eyeshadow pigments. From there, you can layer cream and powder shadows for a multi-dimensional look that won’t move. Start with a cream shadow as your base, then press your powder shadows over it to intensify the color and lock it all down.
For Your Lips
To make sure your lip color survives your morning coffee, layering is key. Start by lining and filling in your entire lip with a lip liner. This creates a waxy, pigmented base for your lipstick to adhere to. Apply your lipstick, blot with a tissue, and then add a second coat. It’s the best way to get true all-day wear and prevent your color from bleeding or fading.
The Final Lock with Powders and Sprays
You’ve prepped, primed, and layered your look to perfection. Now for the final, and maybe most important, step—your makeup insurance policy. This is where you lock everything down, making sure all that hard work lasts from your morning coffee right through to your evening plans.
Setting powders and sprays are the dynamic duo that makes it all happen. They might seem similar, but they play two totally different roles. A setting powder is all about absorbing excess oil and setting any cream or liquid products, especially in those spots prone to creasing or shine. A setting spray, on the other hand, is like a magic mist that melts all your makeup layers together, creating a unified, protective film over your entire face. Using both is the real secret to a bulletproof finish.
Strategic Powder Application
First, let's clear up a common mix-up. There’s a big difference between a finishing powder (which is usually milled super-fine to blur pores and give a soft-focus glow) and a setting powder (which is built for absorption and longevity). To make your makeup last all day, a translucent setting powder is your absolute best friend.
How you apply it matters just as much as the product itself. Forget dusting powder all over with a big, fluffy brush—that can kick up product and leave you looking dry. Instead, try the press and roll method.
- Lightly dip a powder puff or a damp beauty sponge into your loose setting powder.
- Tap off any extra product.
- Gently press and roll the puff onto the areas you want to set, like under your eyes, around your nose, and across your T-zone.
This simple technique pushes the powder into your skin, setting your makeup without messing up the layers underneath. It’s a total game-changer for preventing under-eye creasing and keeping oil from making an unwelcome appearance. If you've applied a cream blush, this is also how you stop it from oxidizing and changing color. And if that's an issue for you, you can learn more about how to prevent makeup from oxidizing in our detailed guide.
The Power of the Final Mist
Once your powder is on, it’s time for the final seal. Setting sprays are formulated with special polymers that create a flexible, breathable barrier over your makeup. This is what truly protects your look from humidity, sweat, and the friction from, say, your phone. In fact, research shows that sprays with these film-forming ingredients can extend makeup wear by up to six hours, which is why roughly 35-45% of makeup users rely on them to anchor their look.
The spray you choose should really depend on your skin's needs.
- For oily or combination skin: A mattifying spray is your best bet to control shine.
- For dry or normal skin: A dewy or hydrating mist will give you a gorgeous, radiant finish and keep your makeup from looking flat.
To get it right, hold the bottle about eight inches from your face and spray in an 'X' and 'T' pattern. This little trick ensures you get even, complete coverage without drenching your skin. Let it air dry completely, and just like that, your makeup is officially locked and loaded for whatever the day throws at you.
Your Long-Lasting Makeup Questions Answered
Even when you follow all the right steps, some frustrating issues can still pop up. It happens to everyone! Let’s walk through a few of the most common hurdles when you’re trying to figure out how to make makeup stay on all day.
Why Does My Makeup Look Cakey When I Try to Make It Last Longer?
This is such a classic dilemma. You’d think that adding more product would make it last longer, right? But the opposite is usually true. When you slather on a thick layer of foundation for durability, it often ends up cracking, settling into lines, and looking heavy.
The real pro trick is to build up your coverage in multiple, super-thin layers. Don’t go in with one heavy coat. Make sure your skin is hydrated but not slick, then apply your foundation sparingly, maybe with a damp sponge, focusing just on the spots that really need it. This layered approach gives you that staying power without the weight.
Can I Make Makeup Last All Day with Very Oily Skin?
You absolutely can. For my oily-skinned friends, the prep work is honestly the most important part of your whole routine. It’s all about managing that oil before it gets a chance to break down your beautiful makeup.
Kick things off with an oil-free moisturizer, then follow up with a mattifying primer, especially in your T-zone or wherever you tend to get shiny. When it's time for foundation, try pressing the product into your skin with a damp sponge—this helps it really adhere.
The real game-changer for oily skin is the one-two punch of setting powder and setting spray. The powder is amazing for absorbing that initial oil and locking down your creams. Then, the spray comes in to create a final protective film. This double-duty approach is what truly fortifies your look against shine.
And it never hurts to keep a pack of blotting papers in your bag. They’re a lifesaver for soaking up midday oil without messing up your makeup.
Do I Really Need Both Setting Powder and Setting Spray?
For that truly bulletproof, won't-budge-an-inch finish? My answer is a big, resounding yes. I know it might seem like overkill, but they do two totally different things that work together to create an indestructible look.
Here’s how I think about it:
- Setting Powder: This is your anchor. It soaks up oil and literally locks down any liquid or cream products so they can’t move, crease, or slide around. It’s a non-negotiable for me under the eyes and around the nose.
- Setting Spray: This is your seal. It’s the final step that melts all the powder and cream layers together, getting rid of any powdery finish and creating a flexible, protective shield over your entire face.
Using both isn't redundant at all; it's a technique that ensures every layer is fused together and shielded from whatever the day throws at you. Consider it the ultimate insurance policy for your face.
At Axiology, we believe in makeup that not only lasts but also cares for your skin and the planet. Our products, like the mushroom-infused Fungdation, are designed to work with these techniques for a beautiful, long-lasting, and eco-conscious look.
Discover the full collection of clean, plastic-free makeup on axiologybeauty.com