Let's be real—sanitizing your makeup brushes is probably one of those tasks that always sinks to the bottom of your to-do list. I get it. But skipping this crucial step can do a real number on your skin. Those bristles aren't just holding onto leftover product; they're a magnet for bacteria, which can lead to frustrating breakouts and even infections.
A quick sanitizing routine—cleaning off the gunk and then zapping the germs with something like isopropyl alcohol—is a total game-changer. It's not just about protecting your skin; it’s about getting that smooth, flawless makeup application you’re aiming for every single time.
Why Sanitizing Your Brushes Is a Skincare Essential
We've all been there. It feels like a chore. But here’s the gross truth: your brushes collect way more than just old foundation. They're gathering up a lovely cocktail of dead skin cells, your skin's natural oils, and all the pollutants floating around in the air.
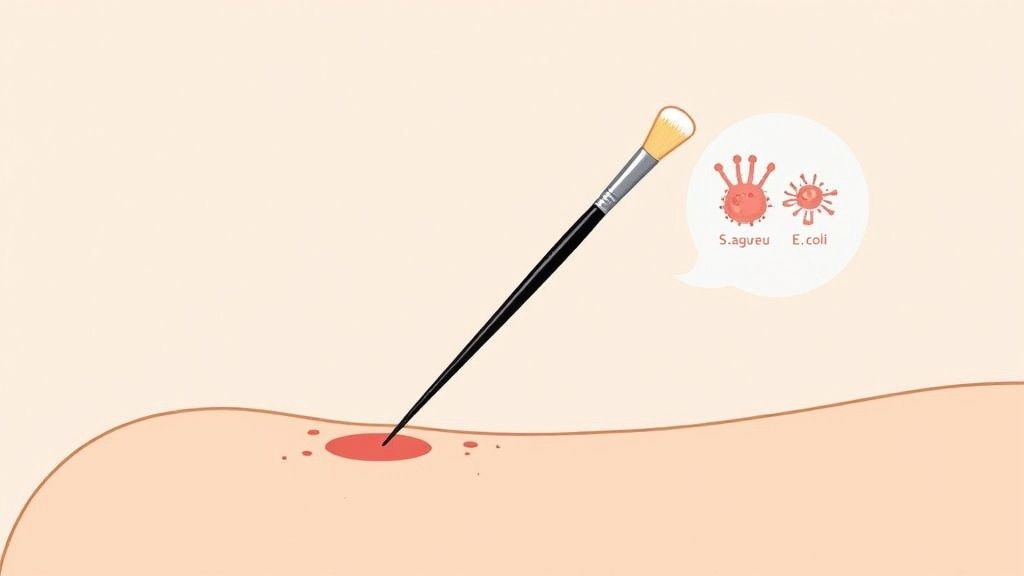
This delightful mix creates the perfect breeding ground for nasty bacteria like Staphylococcus and E. coli. So every time you use a dirty brush, you're essentially painting that bacteria right back onto your face. Yikes. This can lead to clogged pores, stubborn acne, and sometimes more serious issues like skin infections or dermatitis.
More Than Just Breakouts
The fallout from dirty brushes goes beyond zits. It messes with the performance of your makeup and shortens the lifespan of your favorite tools, too. When bristles are caked with old product, you're not going to get a smooth, even application—instead, you'll see streaks. It can even change how the colors in your expensive palettes look on your skin.
Think of it this way:
- Flawless Application: Clean bristles are soft and flexible, picking up and distributing product exactly how they're supposed to. The result? That seamless, airbrushed blend we all want.
- Product Integrity: Dipping a dirty brush into your makeup contaminates the whole pan. You're introducing oils and bacteria that can degrade the quality and texture of your products over time.
- Tool Longevity: Regular cleaning is the key to keeping your bristles from getting stiff, stained, and frayed. Take care of them, and your favorite brushes will last so much longer.
It's helpful to understand the difference between sanitizing and cleaning. Cleaning gets rid of the visible dirt and makeup residue. Sanitizing is the next-level step that actually kills and reduces bacteria to a safe level, which is what we’re really after for skin health.
An Investment in Your Skin
If you have sensitive or acne-prone skin, keeping your brushes sanitized is non-negotiable. Seriously. It can dramatically cut down on irritation and breakouts, making it a cornerstone of a good beauty routine. If you're already investing time and money into skincare products, don't let dirty tools undermine all your hard work.
And if you're looking to build a routine that's gentle all around, check out our guide on hypoallergenic makeup for sensitive skin to pair with your sparkling clean brushes.
People are definitely catching on. The global market for makeup brush cleaners was valued at around USD 150 million in 2023 and is on track to double by 2032. This isn’t just some random trend; it shows a real shift in how we think about our beauty tools. We're finally seeing brush hygiene not as a tedious chore, but as a fundamental act of self-care.
Assembling Your Eco-Friendly Sanitizing Kit
Before you can get to the good part—actually cleaning your brushes—you need to get your tools in order. Building a planet-friendly kit is way easier than it sounds, and it’s all about using things that are gentle on your brushes, your skin, and the earth. Forget harsh chemicals; we’re going for smart, sustainable choices here.
Start with a Better Cleanser
The heart of any good brush cleaning routine is, of course, the cleanser. Instead of reaching for just any old soap, go for a biodegradable, plant-based one. Unscented liquid castile soap is a fantastic, do-it-all option that cuts through oil and pigment like a dream without being harsh on natural bristles.
Another great choice is a solid brush-cleansing balm. These are usually packed with natural oils and butters, come in low-waste tins or wraps, and are absolute magic at melting away stubborn, long-wear foundation and concealer.
Choose Your Sanitizing Agent
After your brushes are clean, the sanitizing step is what really knocks out any lingering bacteria. What you use depends on how deep of a clean you're aiming for.
- For a Deep Clean: 70% isopropyl alcohol is the gold standard for true disinfection. This is a must if you're using brushes for liquid products like foundation, or if your skin has been acting up lately. Just a quick spritz or a dip after washing is all you need.
- For Routine Maintenance: For a simple weekly refresh, a solution of one part white vinegar to two parts water works wonders. Vinegar has natural antimicrobial properties that are perfect for keeping things fresh between deep cleans.
If you want to dive deeper into the "why" behind this approach, you can learn more about what is green cleaning and see how these simple swaps make for a healthier home and planet. It's a mindset that goes way beyond just your makeup tools.
Essential Tools for the Job
Beyond the liquids, a couple of key tools will make the whole process faster and more effective. You'll know exactly how to sanitize makeup brushes without accidentally ruining them.
A reusable silicone cleaning mat is a total game-changer. Seriously. Its different textures are designed to work the cleanser deep into the bristles, getting out packed-in powder and foundation so much better than just using your hands.
Quick tip: After washing, never wring out your brushes! Gently squeeze the extra water out with a soft, super-absorbent microfiber towel. It’s much kinder to the bristles and helps them dry faster without getting all frizzy.
As you continue to build out your sustainable beauty routine, it’s worth thinking about how all your product choices fit together. More and more brands are focusing on eco-conscious practices, which is something you can read about in our guide to eco-friendly makeup packaging. Putting together a thoughtful kit means your tools will be clean and safe for your skin, and kind to the environment, too.
The Definitive Brush Sanitizing Method
Alright, let's get into the nitty-gritty. This is where the magic happens. I'm going to walk you through my foolproof method for getting your brushes squeaky clean and sanitized without wrecking them. You can forget all the other complicated tutorials—this is simple, effective, and something you can actually stick with.
We have two main goals here. First, we need to dissolve and wash away all the gunk: old makeup, face oils, and dead skin cells. Gross, I know. Second, we have to kill the bacteria that can lead to breakouts and skin irritation. Nailing both is the secret to actually clean brushes.
The Initial Wet-Down and Cleanse
First things first, get your brush bristles under some lukewarm water. I can't stress this enough: avoid hot water. It can melt synthetic bristles and, worse, weaken the glue that holds the whole brush head together. The biggest rookie mistake is letting water get up into the metal ferrule (the part connecting the handle and bristles). Do that enough times, and the glue will dissolve, leading to shedding. Nobody wants that.
Once the bristles are damp, add a little of your eco-friendly cleanser. A bit of castile soap or a solid cleansing balm works wonders. You could just lather it up in your palm, but if you want a really deep clean, a silicone mat is a game-changer.
Gently swirl the soapy, wet bristles on the mat. You’ll see the makeup start to lift right away. Those little textures on the mat are designed to work their way into the dense base of your foundation and concealer brushes, pulling out product that you’d never get with just your hands.
Rinsing and Sanitizing for a Perfect Finish
After you’ve worked up a good lather and can see the makeup residue pouring out, it’s time to rinse. Hold the brush with the bristles pointing down under running lukewarm water. This keeps water from sneaking into the ferrule.
Keep rinsing until the water runs completely clear. Seriously, don't rush this part. Any soap left behind can make bristles stiff and irritate your skin. Give the bristles a light squeeze to see if any suds are still hiding in there.
Now for the sanitizing part. In a small, shallow bowl, mix your sanitizing solution—70% isopropyl alcohol or a diluted white vinegar mix will do the trick. Quickly dip just the very tips of the bristles into the solution for a few seconds. Do not soak the whole brush head. This quick dip is all you need to kill any lingering bacteria without drying out or damaging the bristles.
The key takeaway here is the separation of tasks. Cleaning removes the physical debris—the caked-on foundation and powder. Sanitizing is the targeted, final step that ensures the tool is hygienically safe for your next use.
This infographic breaks down the core components of an effective, eco-friendly sanitizing routine.
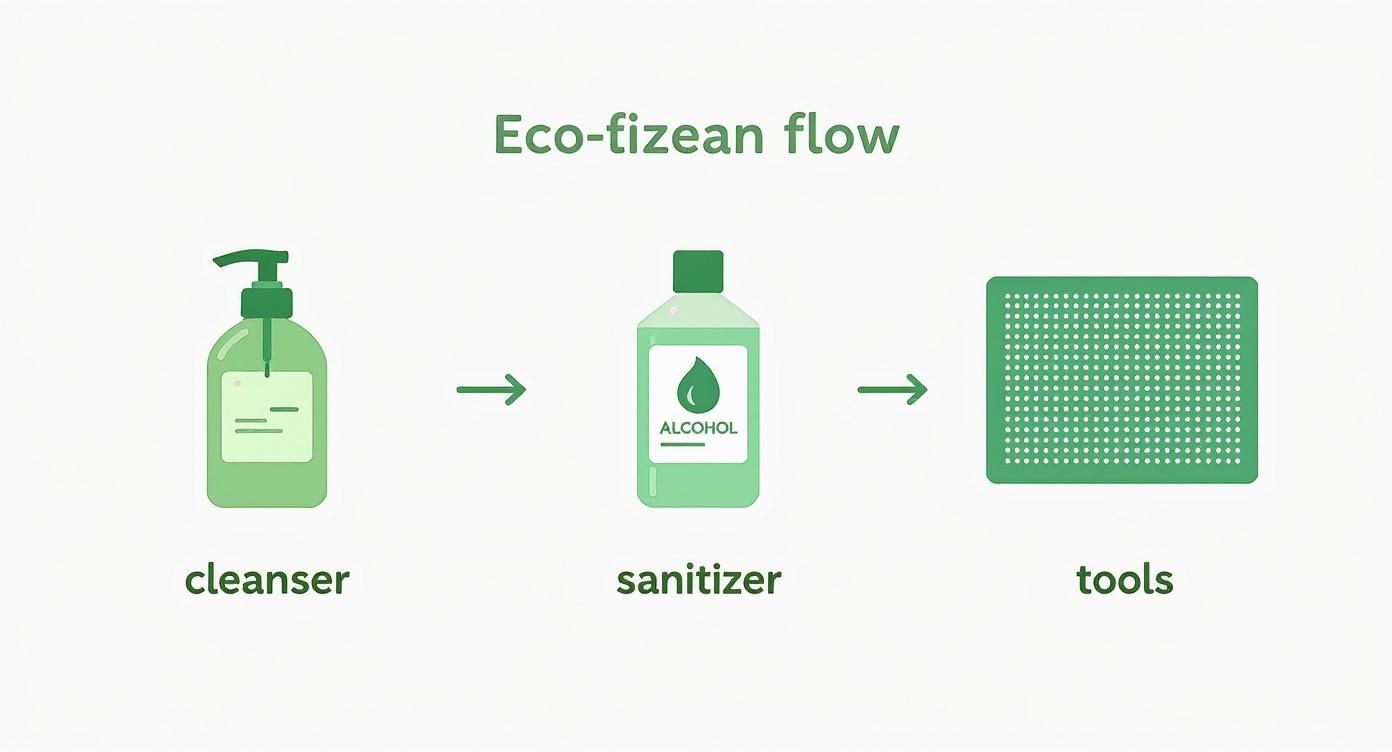
As you can see, every element—the cleanser, the sanitizer, and your tools—plays a specific role in getting your brushes truly clean and safe.
A Quick Guide to Brush Sanitizing Frequency
Not sure how often to tackle this? It really depends on what you're using the brush for. Here's a quick cheat sheet I live by to keep things simple.
| Brush Type | Used With | Recommended Sanitizing Frequency |
|---|---|---|
| Foundation & Concealer Brushes | Liquid or cream products | After every use |
| Powder Brushes (Blush, Bronzer) | Powder products | Once a week |
| Eyeshadow Brushes | Powder or cream shadows | Once a week (or more for dark colors) |
| Eyeliner & Lip Brushes | Gels, creams, or liquids | After every use |
This schedule helps prevent product and bacteria buildup, keeping both your skin and your makeup application looking fresh.
The Final Squeeze and Prep for Drying
Before you set them out to dry, you need to get as much water out as possible. Gently squeeze the bristles with a clean, soft microfiber towel. Please don't twist or wring them out! That’s a surefire way to bend them out of shape and cause breakage.
After squeezing, use your fingers to reshape the brush head back to its original form. This is a small step, but it makes a huge difference—it ensures your brush dries perfectly, ready for a flawless application next time you use it.
Now your brushes are prepped for the all-important drying phase, which we'll get into next. Once you get this routine down, you'll have a foolproof system that protects your skin, your makeup, and your investment in good tools.
Drying and Storing Brushes Like a Pro
You’ve put in all the work to sanitize your brushes, but the job isn’t quite finished. How you dry and store them is just as important for keeping them in great shape and protecting your skin. Honestly, the single biggest mistake I see is people drying their brushes upright in a cup.
It seems logical, but it’s a recipe for disaster. When your brushes are standing bristle-up, gravity pulls all that leftover water down into the metal ferrule (the part that connects the bristles to the handle).
This lingering moisture is bad news. It weakens the glue holding the bristles, which leads to shedding and a wobbly brush head. Over time, it completely ruins the tool. Plus, it creates a damp, dark environment that’s a perfect breeding ground for mildew. Yuck.
The Right Way to Dry Your Brushes
To protect your investment, you’ve got to let gravity work for you, not against you. The goal is always to have the bristles pointing down or at an angle, letting water drip away from the delicate handle and ferrule.
I swear by two simple, pro-approved methods:
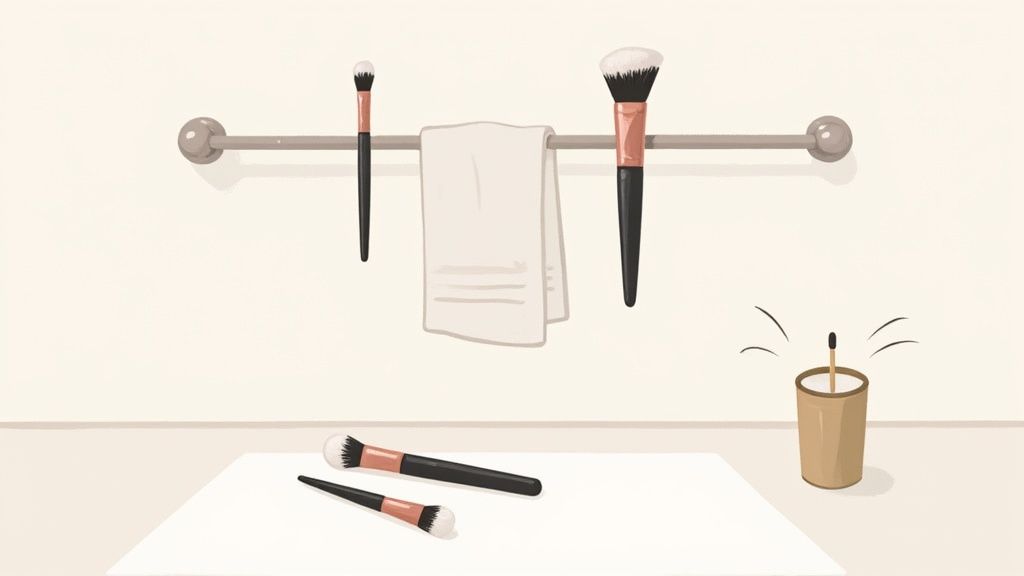
- Lay Them Flat: After gently reshaping the bristles, lay your brushes flat on a clean towel. The trick is to position them so the brush heads hang just over the edge of a counter. This lets air circulate all around the bristles for a faster, more thorough dry.
- Hang Them Upside Down: This is the gold standard. You don’t need a fancy gadget, either. A simple DIY hack is to use hair ties or rubber bands. Just loop one around the handle of each brush and hang the other end from a towel rod or even a drawer pull.
This small shift in your routine is key to truly mastering how to sanitize your makeup brushes. It ensures they dry properly and keeps them in beautiful condition for years.
"Your drying technique is the final, critical step in brush care. Laying brushes flat with heads over an edge or hanging them upside down prevents water from seeping into the handle, which is the primary cause of brush shedding and shortened lifespan."
Smart Storage for Lasting Hygiene
Once your brushes are 100% dry—and I mean completely, totally bone-dry—it's time to store them correctly. Tossing them back into a dark, stuffy makeup bag is a common habit that can undo all your hard work. A sealed bag can trap any leftover moisture and basically becomes a petri dish for bacteria.
Instead, go for storage that breathes. An upright brush holder or a cute cup on your vanity works perfectly, letting air circulate and keeping the bristles fresh.
If you need something for travel, look for a case that protects the bristles without sealing them in an airtight container. A functional pouch like this Trio Carrying Case is a great choice because it keeps brushes organized and safe from getting squished.
More and more people are realizing how important tool hygiene is, and it's fueling a booming market. The makeup brush cleaners market was valued at around USD 450 million globally and is expected to hit USD 800 million by 2033. This growth shows that we’re all starting to get it: taking care of our tools is a non-negotiable part of any beauty routine.
Common Brush Cleaning Mistakes to Avoid
Knowing how to sanitize your makeup brushes is one thing. But steering clear of the common traps that can completely ruin your favorite tools? That's a whole other ball game.
There are so many well-intentioned cleaning "hacks" floating around online that can do way more harm than good. I've seen it lead to frayed bristles, weakened handles, and a seriously shortened lifespan for beloved (and expensive!) brushes.
One of the biggest culprits is grabbing the wrong kind of cleanser. Reaching for harsh dish soap or a high-alcohol hand sanitizer might feel like you're getting a super deep clean, but those products are incredibly damaging. They strip the natural oils right out of animal-hair bristles, leaving them dry, brittle, and scratchy. And for your synthetic brushes, they'll just degrade the fibers over time.
Using the Wrong Water Temperature
Another classic mistake is using scalding hot water. I get the logic—heat kills germs, right? But for makeup brushes, it’s a total recipe for disaster.
Extremely hot water can actually melt the delicate synthetic fibers in many modern brushes, causing them to lose their shape for good. Even worse, that heat weakens the glue holding the bristles inside the metal ferrule. This is the fastest way I know to cause massive shedding, turning a once-plush brush into a sparse, useless mess.
Always, always stick to lukewarm water. It's more than effective enough to dissolve makeup residue without causing any structural damage.
Soaking the Entire Brush
This one might be the most destructive mistake of all: submerging the entire brush in water. It’s so tempting to just drop them all in a cup to soak, but this allows water to seep deep into the ferrule and down into the wooden handle.
When water gets trapped inside the handle, it not only dissolves the glue but can also cause the wood to swell and crack as it dries. This is a one-way ticket to a wobbly, broken brush. You only want the bristles to get wet—that's it.
It’s clear people are catching on to the importance of proper tool care. The market for makeup brush cleaning tools was valued at a huge USD 500 million in 2023 and is expected to climb to nearly USD 739 million by 2031. This trend shows that people are ready to invest in doing things the right way, so learning what not to do is just as important. You can find more insights on this growing market on verifiedmarketresearch.com.
By sidestepping these common pitfalls, you're not just protecting your tools. You're making sure your cleaning routine is actually effective, keeping both your brushes and your skin in perfect condition.
Got Questions About Brush Hygiene? We've Got Answers.
Even when you have a solid brush-cleaning routine, questions still come up. Let's dig into some of the most common ones so you can feel totally confident you’re doing it right.
Is Sanitizing Really Different From Just Cleaning?
Yep, and it's a difference that matters. Cleaning is what gets the visible gunk off—think leftover foundation, oils, and dirt. It’s the soap-and-water step that makes your brush look clean.
Sanitizing is what happens next. It’s all about killing off the invisible stuff: the bacteria and microbes. This is usually just a quick swirl in 70% isopropyl alcohol after you’ve cleaned and rinsed the brush. So, cleaning takes care of the mess, while sanitizing handles the germs.
Can I Get Away With Using Baby Shampoo?
Baby shampoo is one of those DIY hacks that’s everywhere, mostly because it’s gentle. But honestly? It’s not your best bet. While it’ll do in a pinch for a quick rinse, it just wasn't made to cut through the heavy-duty, oil-based ingredients in today's long-wear foundations or waterproof concealers.
You’ll probably find yourself scrubbing way harder and longer than you need to. A dedicated brush cleanser—like a solid soap or a natural castile soap—is formulated specifically to dissolve those stubborn makeup formulas without leaving any film behind.
My two cents? Keep the baby shampoo for emergencies. If you want a deep clean that actually protects the investment you made in your brushes, stick with a product designed for the job.
What’s The Best Way to Clean My Makeup Sponges?
Sponges are a whole different ballgame. Since they're so porous, they soak up a ton of product, which makes them a perfect home for bacteria. They need a wash way more often—ideally after every single use.
Here’s a quick method that works every time:
- Get it wet. Run your sponge under lukewarm water until it’s completely saturated and has puffed up to its full size.
- Lather it up. Squeeze a bit of gentle cleanser directly onto the sponge. Work it in by squishing and massaging it until you have a good lather.
- Rinse it out. Keep squeezing the sponge under running water. Don’t stop until the water runs completely clear and there are no more bubbles.
- Dry it properly. Gently wring out the excess water, then roll it in a clean towel. Let it air dry in a spot with good ventilation.
Whatever you do, don't toss a damp sponge into a closed makeup bag. That's just asking for mold and mildew. Proper care keeps your sponge hygienic and ensures you get that flawless blend you love.
At Axiology, we believe a truly beautiful routine starts with clean, conscious choices. Our commitment to the planet is woven into everything we do, from our plastic-free packaging to our vegan and cruelty-free ingredients. We make makeup that’s as kind to your skin as it is to the earth. Check out our collection at axiologybeauty.com.