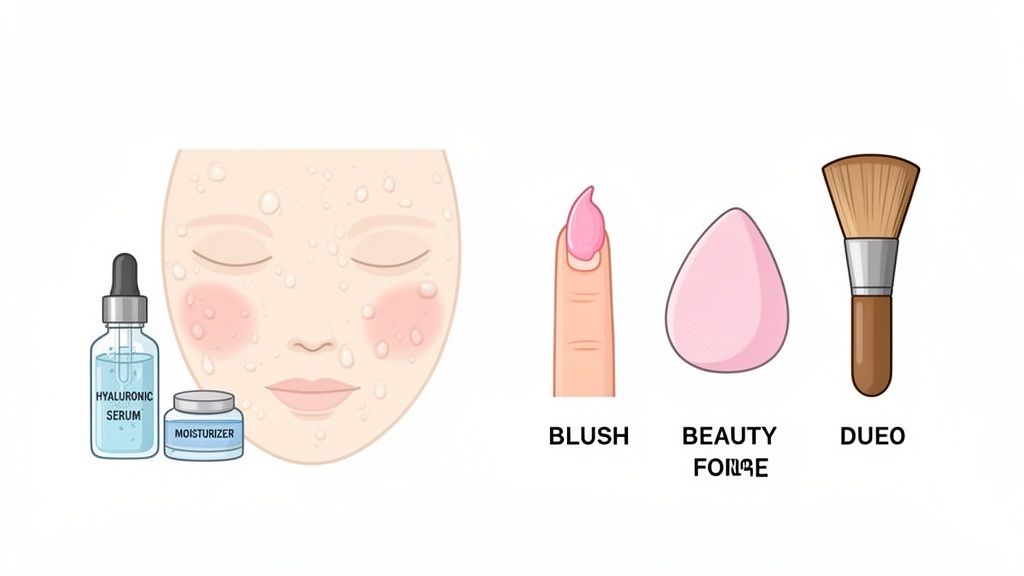
Want to know the secret to a perfect cream blush application? It all starts with happy, hydrated skin and picking the right tool for the job.
The key is to prep your skin with a good moisturizer, then use either your fingertips, a damp sponge, or a duo-fiber brush to gently tap and blend the color onto the apples of your cheeks. This simple process is what creates that seamless, natural-looking glow.
Starting with the Right Canvas and Tools
Before you even pop the cap on your blush, we need to talk about what’s happening underneath. The whole magic of cream formulas is how they melt into the skin, giving you a flush that looks like it's genuinely yours.
But if you put that gorgeous cream onto a dry, unprepared face, it's a recipe for disaster. It will cling to any rough patch it can find, look splotchy, and fade in the weirdest way. No thanks.
Think of your face like an artist's canvas. You wouldn’t start painting on a rough, unprimed surface, right? The same goes for makeup. A well-moisturized face gives the blush the perfect amount of slip to blend out like a dream.
For anyone with seriously dry skin, here’s a pro tip: try layering a hyaluronic acid serum under your moisturizer. It creates this incredibly plump, hydrated base that helps the blush just glide on. And if you're interested in going deeper on skincare, you can explore how to prep your skin with a food-first approach.
Choosing Your Application Tool
Okay, skin is prepped and glowing. Now for the fun part: picking your applicator. The tool you choose makes a huge difference in the final look, so think about the vibe you're going for. Each one has its own special power.
-
Fingertips: For a quick, super natural-looking flush, your fingers are your best friends. The warmth from your skin helps melt the product, making it fuse with your foundation for a truly skin-like finish. This is my go-to for a sheer, everyday look.
-
Damp Beauty Sponge: If you want a soft, airbrushed effect, a damp sponge is your hero. It naturally sheers out the pigment, so it's almost impossible to apply too much at once. The gentle bouncing motion deposits the color without messing up the makeup you already have on.
-
Duo-Fiber Brush: When you want a bit more precision or want to build up the intensity, grab a duo-fiber (or stippling) brush. The wispy bristles pick up just a tiny bit of product, which lets you build the color gradually from a soft hint to a vibrant pop.
For a quick reference, here's a little cheat sheet to pull it all together.
Your Quick Guide to Applying Cream Blush
| Phase | Key Action | Insider Tip |
|---|---|---|
| Prep | Cleanse and moisturize your face thoroughly. | For extra glow, mix a drop of facial oil into your foundation before applying blush. |
| Choose | Select your tool: fingers, a damp sponge, or a duo-fiber brush. | Match your tool to your desired finish—fingers for natural, sponge for sheer, brush for bold. |
| Apply | Smile to find the apples of your cheeks and dot the blush on. | Start with less than you think you need. It’s always easier to add more than to take away! |
| Blend | Use gentle tapping or stippling motions to blend the color up and out. | Blend the edges seamlessly into your skin to avoid any harsh lines. |
With these simple steps, you're well on your way to mastering that effortless, dewy flush.
Key Takeaway: The best application method is all about the finish you want. Use fingers for a natural melt, a sponge for a sheer and diffused look, and a brush for buildable, controlled color.
Nailing these basics—great skin prep and the right tool for the job—is the first real step in becoming a cream blush pro. With your hydrated canvas and chosen applicator, you're all set to get that perfect, seamless glow.
Finding Your Perfect Cream Blush Shade
Figuring out the right cream blush can feel a bit like a guessing game, but here’s a little secret: it’s not about finding one single “perfect” color. It’s really about getting to know your skin's undertones and seeing what makes them pop. Once you get the hang of that, you can pick shades that give you a natural, believable flush every single time.
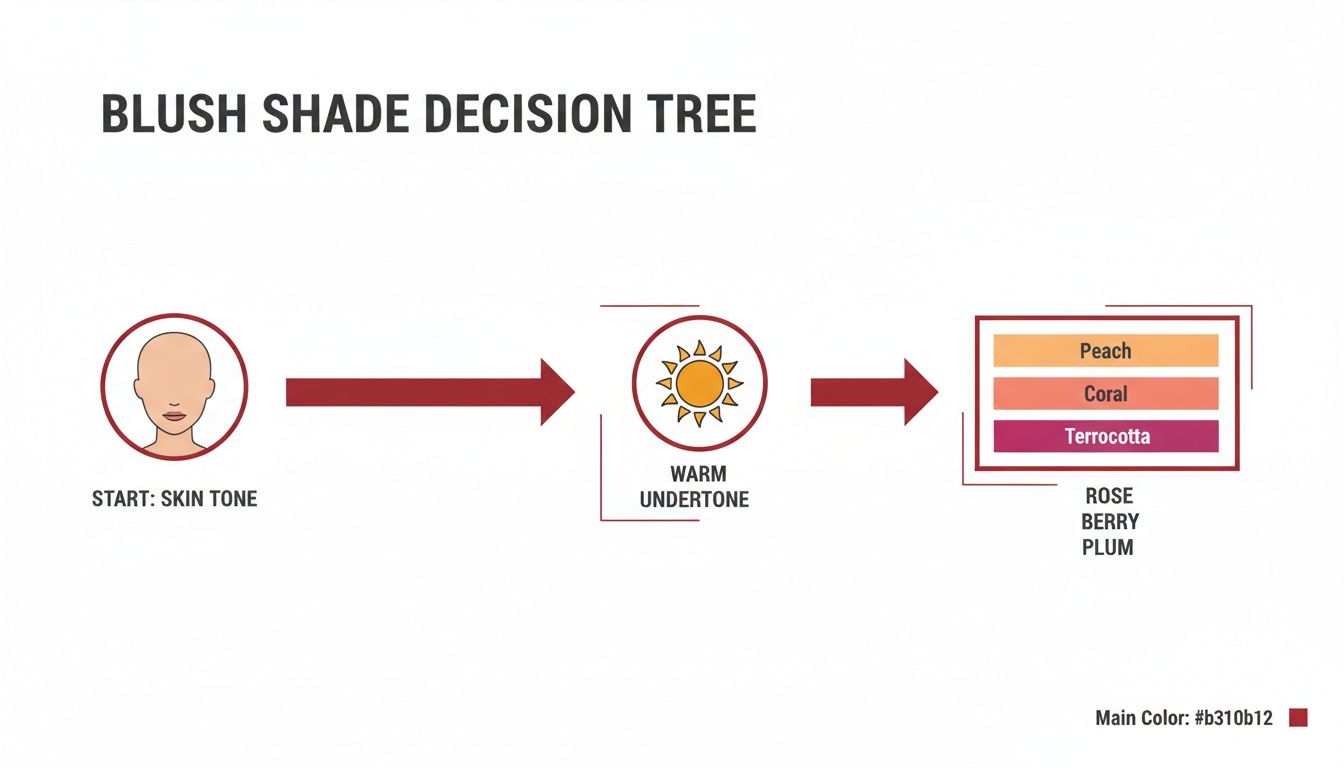
A good old-fashioned starting point is the "vein test." Just peek at the inside of your wrist in some good natural light. If your veins have a blue or purple tint, you're likely in the cool undertones camp. If they look more greenish, you probably have warm undertones. See a bit of both? That means you have neutral undertones, which gives you the freedom to play with pretty much any shade.
Matching Shades to Your Undertones
Once you've got your undertone figured out, the world of blush shades opens up and becomes way less intimidating. You can confidently sift through all the options and grab colors that are basically made for your complexion.
-
For Warm Undertones: Think sun-kissed and earthy. Bright peaches, warm corals, and rich terracotta hues will play up the golden or yellow tones in your skin for a super healthy, radiant look.
-
For Cool Undertones: You’ll want to lean into shades that have a blue or pink base. Think soft baby pinks, pretty mauves, and berry tones. These will work in harmony with your complexion and give you a fresh, bright-eyed vibe.
Of course, don't let these be strict rules! A bold, unexpected pop of color can look absolutely amazing. But knowing your undertones gives you a solid, reliable foundation for your everyday go-to look.
Considering Your Skin Type and Formula
Okay, so color is one thing, but the actual formula is just as important for how the blush looks, feels, and wears. Your skin type is the best guide here. If you've got oily skin, for example, you might want to look for lighter, almost serum-like formulas that won’t feel heavy or add extra shine.
On the other hand, if you have dry or mature skin, you'll probably love more emollient, hydrating options. Cream blushes that are packed with skincare ingredients can give you a dewy finish without settling into any fine lines.
This mashup of makeup and skincare is a huge reason why cream blush is having such a moment. The market was valued at a whopping USD 3.1 billion in 2023 and it’s still climbing. The demand for clean ingredients is a big driver, with the organic segment growing 12% faster than the rest. It's why 75% of beauty pros now recommend creams over powders, especially formulas like Axiology's that use reishi mushroom to cut down on redness by 15% right when you put it on. You can read more about the booming blush cream market if you want to geek out on the stats.
Customizing Your Blush Placement for Your Face Shape
You’ve probably heard the old advice: "smile and pop your blush right on the apples of your cheeks." It’s not terrible advice—it's a decent starting point—but it’s definitely not the whole story.
Strategic blush placement is one of the easiest ways to play up your bone structure. Think of it less like a rulebook and more like a roadmap. A tiny shift in where you place that color can completely change the vibe, taking your look from simply rosy to perfectly sculpted.
Before we even get to placement, though, let’s talk color. The right shade makes all the difference. This little guide helps you nail the perfect shade for your skin's undertone, which is step zero for a natural-looking flush.
Think of this as your cheat sheet. It connects your skin's undertones straight to the color families that will look most seamless and flattering on you.
Blush Placement for Different Face Shapes
Okay, let's get into the nitty-gritty. These are just some ideas to get you started—play around and see what feels best on your face.
-
For Round or Fuller Faces: The goal here is to create a little lift and definition. Instead of focusing on the roundest part of your cheeks, dot the blush a bit higher, right along the tops of your cheekbones. Then, blend upwards and outwards toward your temples. This diagonal line draws the eye up and works wonders for creating a subtle sculpting effect.
-
For Square or Angular Faces: If you want to soften stronger angles, concentrate the blush directly on the apples of your cheeks. A soft, circular blending motion works beautifully here. This adds a hint of roundness right at the center of your face, which creates a softer, more balanced look.
-
For Heart-Shaped Faces: To balance a wider forehead with a narrower chin, you’ll want to bring a little fullness to the lower part of your face. Apply your cream blush to the lower half of your cheek apples and blend it out toward your ears. Easy.
A Pro Tip to Remember: A super common mistake is applying blush too low on the face, which can visually pull your features down. As a rule of thumb, try to keep the color above the bottom of your nose for the most lifting effect. It’s a game-changer.
Achieving Different Blush Looks
Beyond your face shape, placement can also totally create a specific mood or style. Cream blush is perfect for this kind of experimentation.
Ever tried the sun-kissed look? It’s a favorite for a reason. Just drape a little blush not only on your cheeks but also lightly across the bridge of your nose. It mimics where the sun would naturally hit, giving you that healthy, just-back-from-vacation glow. It feels so fresh and modern.
Or maybe you’re going for the lifted look. This one is all about concentrating the color on the high points of the cheekbones and blending up towards the hairline. It creates a more sophisticated, sculpted finish that’s amazing for a night out or any time you want to feel a little more polished. Mastering a few different ways to apply cream blush basically gives you the power to customize your look for any occasion.
Mastering Blending and Layering Techniques
Here’s where the real magic happens. The secret to a gorgeous cream blush isn’t just the color you pick; it's all in the blend. When you get it right, the blush looks less like makeup sitting on your skin and more like a natural flush that comes from within.
Your goal is to diffuse the edges so seamlessly that you can't tell where the color stops and your skin starts. It's a subtle art, and your tools are your best friends here.
The Art of the Blend
Forget just rubbing color on your face. The key is to gently press and coax the product until it becomes one with your skin. Your technique will change depending on what you’re using.
-
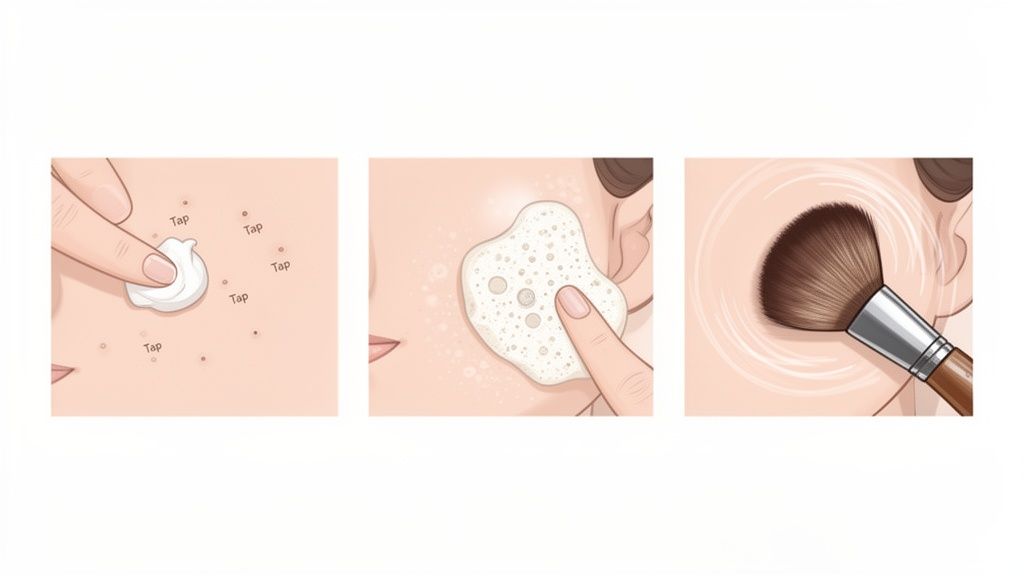
With Fingertips: Use a gentle tap-and-press motion. The warmth from your skin is a game-changer—it helps melt the cream so it blends beautifully. Whatever you do, don't drag or rub. That’s a surefire way to mess up the foundation underneath.
-
With a Damp Sponge: Go for a soft stippling or bouncing motion. This technique gently presses the blush into your skin for a sheer, almost airbrushed finish. It’s also a great way to apply foundation, and you can learn more about that in our guide on how to apply foundation with a sponge.
-
With a Brush: Grab a duo-fiber or stippling brush and use light, circular buffing motions. This lets you slowly build color and melt away the edges for a soft-focus look with zero harsh lines.
It's no surprise that the global cream blush market, currently valued at USD 3.24 billion, is expected to jump to USD 5.35 billion by 2030. We’re all catching on to how great these formulas are. And fun fact: dermatological studies have shown that using a damp beauty sponge can actually reduce skin irritation by 25% compared to brushes. Good to know if your skin is on the sensitive side!
Layering for Buildable Intensity
One of the absolute best things about cream blush is how buildable it is. You can go from a barely-there whisper of color to a vibrant pop, and it never has to look cakey. The trick? Work in thin layers.
Always start with way less product than you think you need. Seriously. A tiny dab is usually enough. Blend it out completely, then step back and see if you want more. If you do, just add another sheer layer and repeat the process. This slow-and-steady approach is your insurance against accidentally going overboard.
Troubleshooting Tip: If you did get a little heavy-handed, don't panic! Grab a clean foundation brush or your damp sponge (the one with a tiny bit of leftover foundation on it) and gently tap over the blush. This will instantly soften the color and blend out any harshness. Problem solved.
How to Make Your Cream Blush Last All Day
One of the biggest questions I get about cream blush is whether it will actually stick around. It’s a totally valid concern—that gorgeous, dewy flush you created in the morning can sometimes feel like a distant memory by lunchtime.
But don’t worry, you can absolutely get it to last. A few simple tweaks to your routine can dramatically boost its staying power, no matter your skin type. The key is just creating the right canvas for the cream to adhere to, then locking it in place.
Strategies for Oily and Combination Skin
If you have oily or combination skin, you already know the struggle of makeup seemingly melting away by noon. For you, the secret weapon is a technique affectionately known as the "blush sandwich." It sounds a little weird, I know, but it works wonders for controlling shine and locking in that color.
Here's how you do it:
- First Layer: After your foundation, grab a fluffy brush and apply a very light dusting of translucent setting powder over your cheeks. Think of this as a primer for your blush—it creates a slightly mattified base for the cream to grip onto.
- Second Layer: Now, go ahead and tap and blend your cream blush on top of that light powder layer, just like you normally would.
- Final Layer: Finish with one more sheer dusting of translucent powder right over the blush. This sets everything in place for the long haul.
This method essentially "sandwiches" the cream between two super-fine layers of powder, giving it incredible hold without ever looking cakey or heavy.
By creating this layered effect, you're not just setting the blush; you're also providing a barrier against the oils that can break down makeup throughout the day. It’s a total game-changer for longevity.
Tips for Dry and Normal Skin
For those with dry or normal skin, the goal is to lock in your blush without sacrificing that beautiful, dewy finish you love. Piling on powder isn't the answer here, as it can often make skin look flat and accentuate any dryness. We need a different approach.
Your best friend is a hydrating setting spray. After you've finished all your makeup, including your cream blush, hold the bottle about eight inches from your face and mist generously. This creates a flexible, breathable film over your makeup that seals everything in while giving your skin an extra boost of moisture. It’s a win-win.
Another great strategy is layering products with different textures. Try applying your cream blush first, then lightly tapping a tiny amount of a powder blush in a similar shade right on top. This powder-over-cream technique adds a layer of security that significantly extends wear time without drying you out.
For more ideas, check out our complete guide on how to make makeup last all day.
Whoops! Common Cream Blush Mistakes and How to Fix Them
Let's be real, even makeup pros have moments of blush-related panic. You get a little heavy-handed, or find a weird patch that just won't blend. It happens.
The great news is that cream blush is super forgiving. Almost every little slip-up has a quick, simple fix. Think of this as your cheat sheet for getting that perfect, natural-looking flush, every single time. No more fearing mistakes—just easy little adjustments.
Fixing "I Put on Way Too Much"
This is probably the most frequent one. You were aiming for a healthy, sun-kissed glow but ended up looking a little more... clown-like than intended. Don't you dare wipe it all off and start over!
The Quick Fix:
- Grab the foundation brush or damp sponge you used for your base makeup. Don't add any more product to it.
- Gently tap and stipple the tool over the edges of your blush.
- The leftover foundation on your brush or sponge will sheer out the color and melt the harsh lines right into your skin.
This trick is a game-changer because you're diffusing the pigment, not just wiping it away. It tones down the intensity while keeping that soft, believable flush you were going for in the first place.
Smoothing Out Patchy Spots
Ever notice your cream blush looking a little splotchy or clinging to certain areas? This is almost always a sign that the skin underneath is a bit dry, causing the product to grab on for dear life.
Moisture is your best friend here. A quick spritz of a hydrating facial mist can instantly bring some life back to that area. Then, just use a clean finger to gently press and blend over the patchy spots until they soften and disappear. Easy peasy.
Still Have Questions About Cream Blush?
It's totally normal. Getting the hang of cream blush has a few little quirks, but once you nail the details, you’ll be a pro. Let’s clear up a few of the most common questions we get.
I Have Oily Skin. Is Cream Blush a No-Go for Me?
Absolutely not! You can totally rock a cream blush. The secret is all in the skin prep to keep that extra shine in check. A great first step is to apply a mattifying primer, focusing on your T-zone or any other spots that tend to get slick.
Once you’ve applied and blended your cream blush, just take a fluffy brush and lightly dust a translucent setting powder over your cheeks. This tiny step is a game-changer—it locks the color in place so it won't slide around, giving you a fresh look that lasts for hours without adding any unwanted shine.
When Do I Apply It? Before or After Foundation?
Good question! This really comes down to the kind of vibe you're going for. Each approach gives a totally different finish.
- Before Foundation: If you want that super subtle, "I just woke up this radiant" kind of glow, try applying the cream blush directly to your bare skin. Then, layer your foundation lightly over the top. This technique diffuses the color and makes it look incredibly natural.
- After Foundation: For a more classic, vibrant pop of color, applying it after your foundation is the way to go. This is how most people do it because it gives you the most control over the color's intensity and exactly where you place it.
Our advice for beginners: Start by applying your cream blush after foundation. It’s way easier to control the pigment and blend out the edges perfectly without messing up your base.
What's the Best Tool for Applying Cream Blush?
Honestly, there's no single "best" tool—it really just depends on the finish you want.
Your own fingers are fantastic for warming up the product and melting it into the skin for a seamless, second-skin look. A damp beauty sponge is perfect for a sheer, airbrushed effect and is super beginner-friendly. And if you want more precision, a stippling brush or a dense synthetic brush will let you build up soft, even layers of color exactly where you want them.
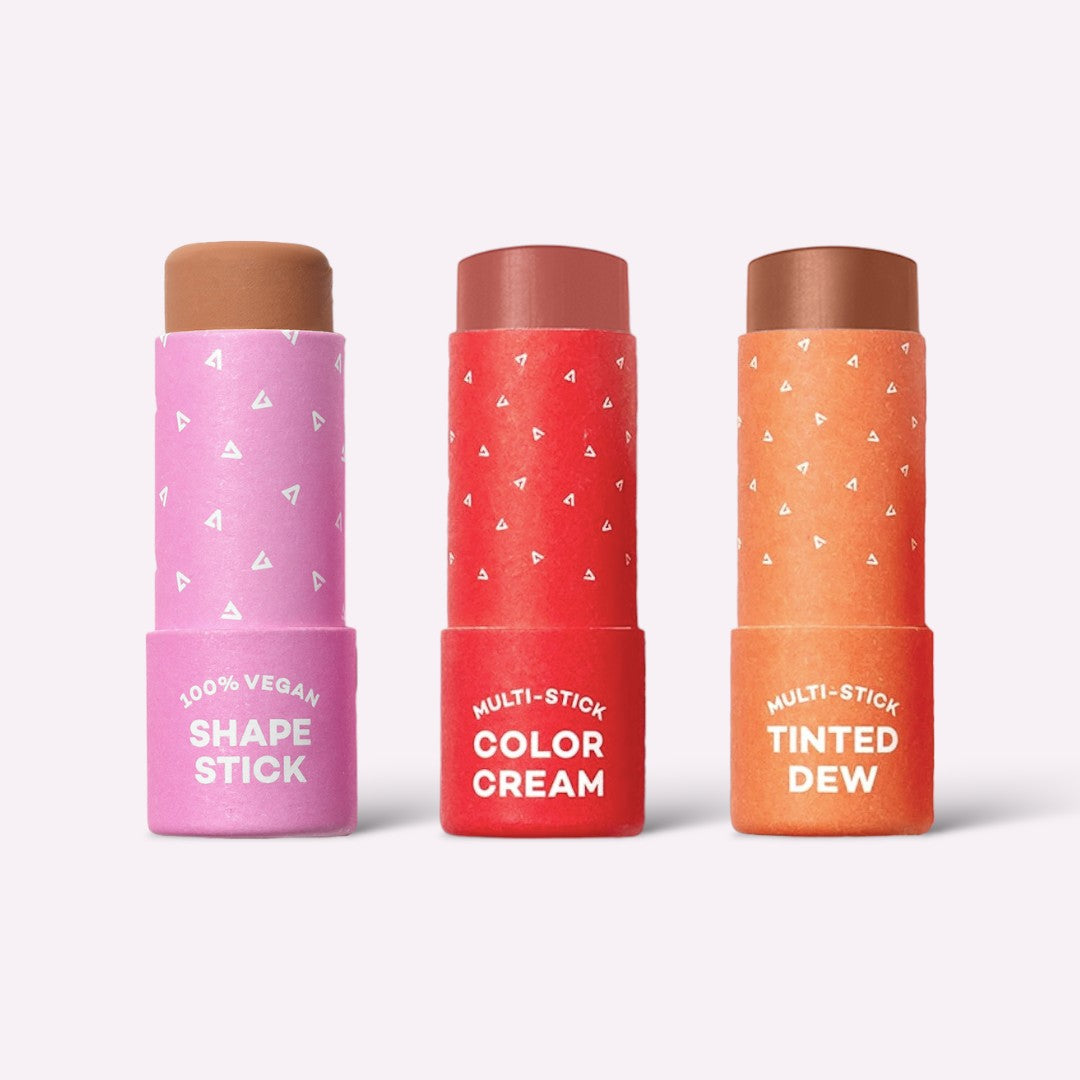
Here at Axiology, we’re all about makeup that’s as kind to your skin as it is to the planet. Our products are always vegan, cruelty-free, and come in zero-waste packaging.
Check out our multi-use Balmie sticks and more at https://www.axiologybeauty.com.