Applying cream eye shadow is way easier than it looks. Seriously. Just swipe the color right onto your primed eyelid and blend out the edges with your finger. You get a gorgeous, diffused look in seconds. It’s the perfect, low-effort alternative to fussy powder shadows.
The Modern Appeal of Cream Eye Shadows
There's a reason cream eye shadows are suddenly everywhere—they just work for modern life. Their smooth, buttery textures are a refreshing change from powders, giving you rich color without all the work. This isn't just some passing trend; it's a real shift toward products that are as simple as they are effective.
The market is exploding, too. Did you know the global eye shadow market went from $2.8 billion in 2021 to a projected $5.1 billion by 2031? A huge part of that growth comes from cream formulas, which are completely changing the game for eco-conscious beauty lovers. Unlike powders, cream sticks offer that swipe-and-go ease we all crave, blending out for a perfect dewy finish. You can dig into more of these market trends to see how much things are changing.
Effortless Application Meets Conscious Choices
The real magic of cream shadow is its laid-back versatility. You can forget about needing a whole collection of brushes and mastering complicated blending techniques. Most of the time, a quick swipe and a little pat with your finger is all it takes to look polished and put-together.
This simplicity fits perfectly with the growing desire for smarter, more sustainable beauty. Brands like Axiology are leading the charge here, creating amazing multi-use products that prove you don't have to choose between performance and principles.
By creating versatile, plastic-free color sticks, companies are showing that high-performance makeup and environmental responsibility can go hand in hand. Embracing these products is not just a makeup choice; it’s a smarter, more sustainable approach to your daily routine.
Why Cream Formulas Stand Out
So, what’s the big deal? These formulas have some unique perks that hit all the right notes for anyone who values their time and the planet.
- Impressive Staying Power: Most cream formulas are built to last, setting into a smudge-proof finish that won’t crease on you midday.
- Versatility in a Stick: One little stick can be your all-over lid color, a punchy liner, or even a shimmery highlighter.
- Minimalist-Friendly: Multi-use products mean less clutter in your makeup bag and less waste in the world. It’s a win-win.
How to Prep Your Lids for All-Day Wear
You know the saying: great makeup starts with a great canvas. This is especially true for cream eye shadows. Before you even think about swiping on that gorgeous color, prepping your lids is the real secret to a vibrant, crease-proof look that actually lasts.
The first step is non-negotiable: start with completely clean, dry eyelids. Any leftover oils or skincare products can cause your shadow to slip, slide, and pretty much disappear before lunch.
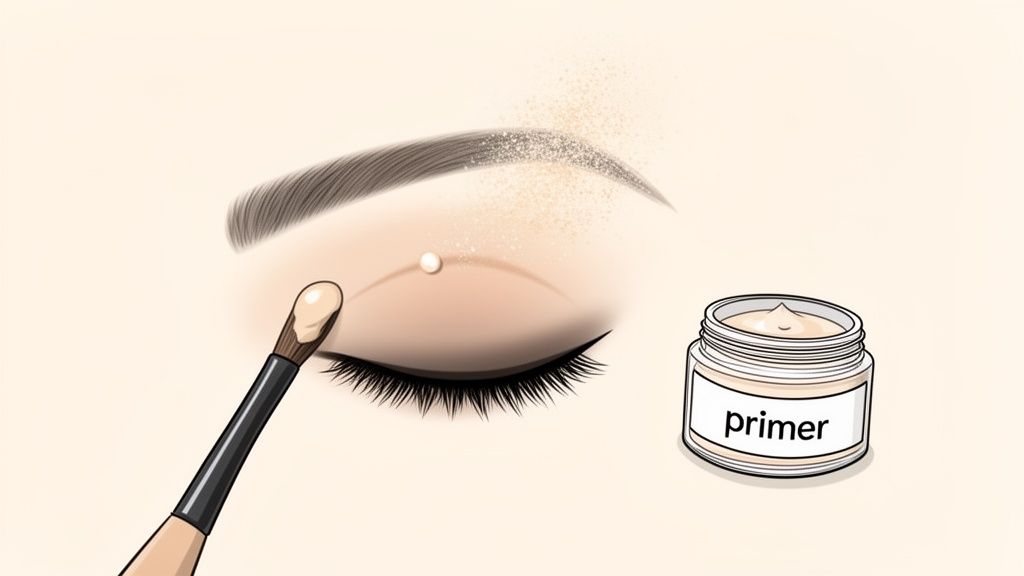
This simple foundation sets the stage for the most important product in your long-wear arsenal—an eye primer. Think of it like double-sided tape for your makeup. It gives the cream shadow something to grip onto, which is what prevents it from settling into fine lines. For more tips on making your look stick around, check out our guide on how to make your makeup last all day.
Choosing the Right Primer for Your Skin
Not all primers are created equal, and the right formula really depends on your skin type. Getting this choice right is the key to a smooth, comfortable application every time.
- For Oily Lids: If your shadow tends to melt away by noon, a mattifying primer is your best friend. It helps control excess oil and creates a shine-free base that locks color in place.
- For Dry Lids: A hydrating primer will keep cream shadows from looking cakey or emphasizing texture. These formulas often have ingredients that plump and smooth the skin, creating a perfect silky surface.
The eye shadow market is absolutely booming—it's projected to grow from $3.52 billion in 2025 to $5.42 billion by 2032, and a lot of that growth is thanks to innovative cream formulas. Applying them correctly starts with this crucial prep work. A little bit of hydrating eye cream before your primer can make a huge difference, especially if you’re using sustainable options like Axiology’s multi-use sticks.
The Pro Trick for a Flawless Glide
Here’s a final trick that makeup artists swear by. After applying your primer, give it a moment to become slightly tacky. Then, take a fluffy brush and sweep a whisper-light dusting of translucent setting powder over your entire lid.
This simple move creates an ultra-smooth, velvety surface. It lets cream formulas glide on without grabbing or skipping, solving common frustrations like patchiness before they even start.
This extra step takes just a few seconds but makes a massive difference in how well your shadow blends. It helps the color melt right into your skin for that seamless, professional finish you’re going for.
Choosing Your Tools for a Perfect Application
Once your lids are prepped and ready, it’s time for the fun part—applying the color. The tool you reach for can completely change the vibe of your cream eye shadow, taking it from a soft, subtle whisper to a bold, can't-miss statement.
Believe it or not, one of the best tools you can use is already attached to you and costs absolutely nothing.
Yep, I’m talking about your fingertips. They are fantastic for achieving a quick, lived-in wash of color. The natural warmth of your skin helps melt the product just enough, making it ridiculously easy to blend out. This method is my go-to for a beautifully diffused finish that’s perfect for a simple, everyday look. Just tap, blend, and you’re out the door.
The Case for Using Your Fingertips
Using your fingers is super intuitive and works incredibly well, especially with creamy formulas in pots or multi-use sticks like our Balmies.
The eye shadow market in North America, which holds a massive 38.0% global share, is on track to grow from $4.02 billion to $6.37 billion by 2032. Simple, effective techniques like finger application are exactly what people are looking for.
For vegan beauty lovers, gliding a cream shadow on with your ring finger gives you amazing control. You can pat it on the inner corners for a pop of brightness or sweep it along the outer V for some soft drama. It’s no wonder this technique is a favorite among 65% of makeup artists. It also prevents tugging on that delicate skin around your eyes, which can reduce potential irritation by 45% compared to some brushes. You can dig into more trends about the expanding eye shadow market here.
Selecting the Right Brushes
While fingers are my hero for speed and ease, brushes give you a lot more control for detailed or high-impact looks. But not just any brush will do the trick. The density and material of the bristles make a huge difference in how cream eye shadow applies.
- Dense Synthetic Brushes: These are your best friends for packing on pigment. A flat, dense shader brush made with synthetic fibers will pick up the perfect amount of product without soaking it all up. Use a gentle patting motion to build intense, even color exactly where you want it.
- Fluffy Blending Brushes: To soften any harsh edges and create a seamless gradient, a fluffy synthetic blending brush is a must-have. After you’ve laid down your color, use light, circular motions along the crease to diffuse the shadow for a flawless, pro-level finish.
Pro Tip: Always, always keep your brushes clean. This is non-negotiable for a flawless application every time. Dirty brushes can make your colors look muddy and even cause skin irritation. Learning how to sanitize makeup brushes properly is one of the most important steps in any makeup routine.
Choosing Your Cream Shadow Application Tool
So, when should you use your fingers versus a brush? It really comes down to the look you're going for and the formula you're working with. Here’s a quick breakdown to help you decide.
| Tool | Best For | Pro Tip |
|---|---|---|
| Fingertips | A quick wash of color, sheer looks, and blending out edges. | Always use your ring finger—it has the gentlest touch for the delicate eye area. |
| Dense Brush | Building intense pigment and precise, targeted placement. | Pat the color on instead of swiping to avoid a streaky, uneven finish. |
| Fluffy Brush | Diffusing harsh lines and creating a soft, airbrushed look. | Use a clean brush and a super light hand to avoid over-blending and muddying your colors. |
The right tool can make all the difference, so don't be afraid to experiment to find what works best for you and your favorite cream shadows.
For stick shadows, like our Axiology multi-use Balmies, you can swipe the color directly onto your lid for a bold effect and then blend out the edges with a brush or your finger. If you want a more controlled application, try rubbing a dense brush over the tip of the stick to pick up the product first.
When you're working with potted shadows, use your finger or a brush to scoop out a tiny amount. Remember, a little goes a long way with these formulas. This approach stops you from applying too much product at once, which is key to getting that smooth, crease-free result we’re all after.
Techniques for Different Eye Shapes and Finishes
Okay, so you've nailed the basics. But the real fun begins when you start tailoring your technique to your own unique features. How you apply cream eyeshadow can totally change the game, helping you create depth and definition exactly where you want it.
This isn't about a strict rulebook. It's about understanding how to make the product work for you. What looks amazing on an almond eye might not pop the same way on a hooded eye. Let's move beyond a simple wash of color and get strategic.
Working with Hooded Eyes
If you have hooded eyes, you know the struggle—a fold of skin covers your mobile lid, and eyeshadow can sometimes just... disappear. A lot of people make the mistake of only applying shadow to the part of the lid they see when their eye is open.
Here's a better way: look straight into a mirror, keeping your eyes open and relaxed. Take your cream shadow stick (or just your finger!) and apply the color above your natural crease, right onto that hooded part. This little trick keeps the color visible and gives your whole eye area a more open, lifted look.
Creating Depth on Monolids
For monolids, which don't have a visible crease, cream shadows are a dream for creating soft, dimensional gradients without any harsh lines. The whole idea is to build up the color right at the lash line and then blend it out.
Start by swiping the cream shadow along your upper lash line. Then, grab a fluffy brush or use a clean finger to gently buff the color upward and outward. You get this gorgeous, seamless fade from dark to light that adds depth and makes your eyes the star of the show.
This visual breaks down how placement changes everything.
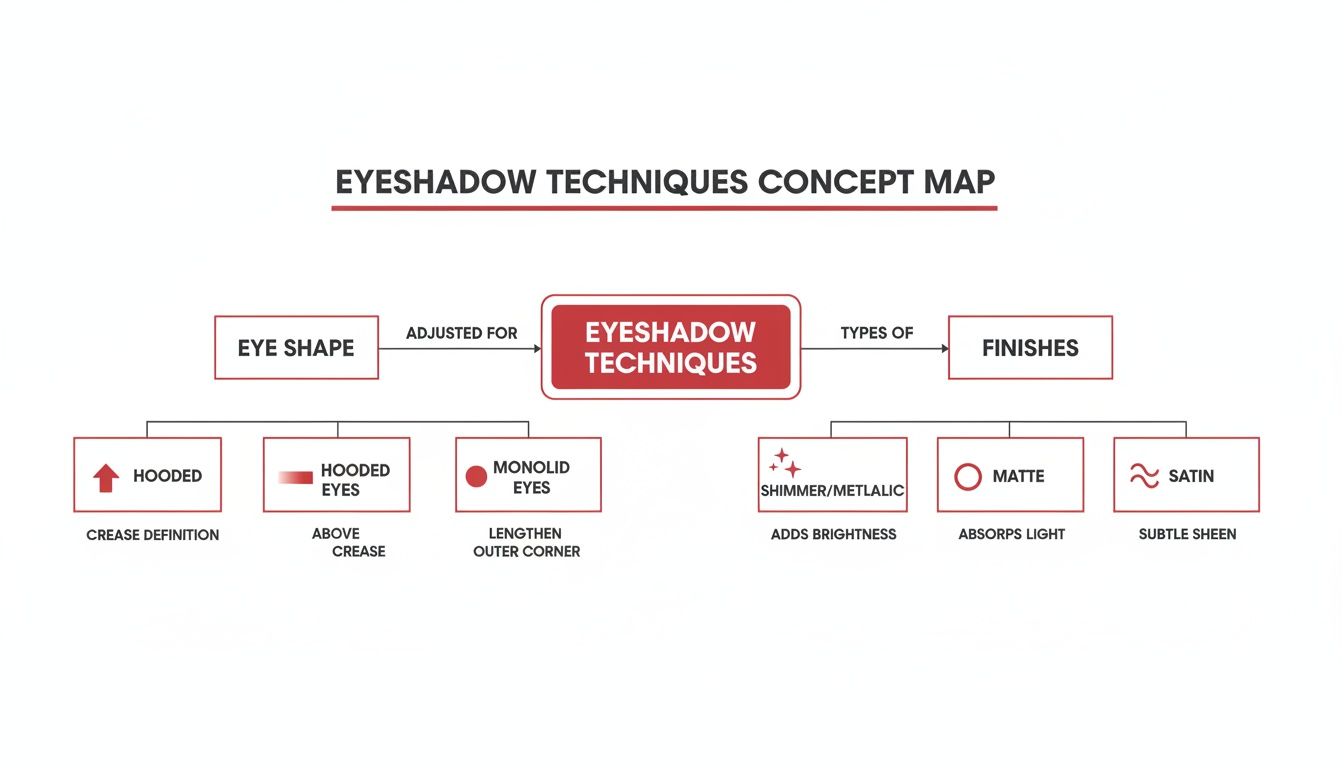
Seeing how you place shadow for a hooded eye versus creating that gradient for a monolid really simplifies it. It shows how tiny adjustments can make a huge difference.
Playing with Different Finishes
Beyond your eye shape, the finish of the shadow—matte, shimmer, or full-on metallic—is a huge part of the final vibe. Each one does something different, and layering them is where the real creativity comes in.
- Matte Finishes: These are your go-tos for creating structure. Use a neutral matte cream shadow to define a crease or lay down a solid base color all over the lid.
- Shimmer Finishes: Shimmers are all about catching the light. They bring forward any area you apply them to. Tapping a little shimmery shadow on the center of the lid is a classic move to make eyes look bigger and brighter.
- Metallic Finishes: Think of these as shimmer's bolder cousin. They give you a super-reflective, high-impact finish that’s perfect for a dramatic look or even as a statement liner.
My favorite easy-but-stunning technique? Lay down a neutral matte shade as a base. Then, just use your fingertip to press a shimmery or metallic shade right on the center of your lid and in the inner corner. It adds instant, eye-catching dimension with pretty much zero effort.
This layering trick is so versatile. It works for every eye shape and lets a single multi-use stick, like one from Axiology, create everything from a polished daytime look to something more glamorous for a night out.
How to Make Your Look Last and Remove It Gently
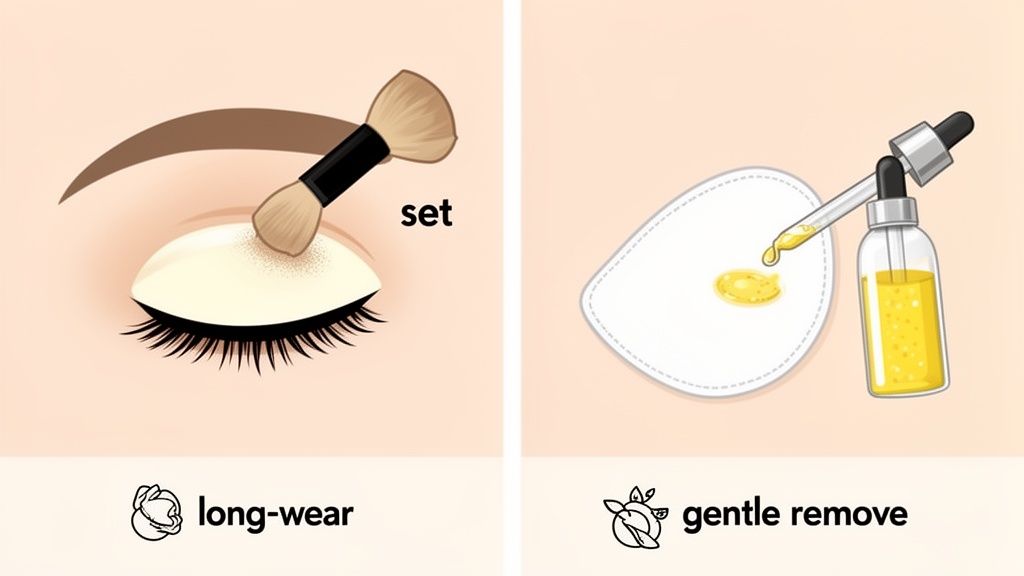
You’ve blended your shadow to perfection—now you just have to make sure it doesn't budge. Making cream shadow last all day is less about the product itself and more about one simple, game-changing final step. This is especially true if you struggle with oily lids or live somewhere humid.
The secret? Setting the cream.
Once your shadow is just right, grab a fluffy brush and lightly dust a coordinating powder shadow over the top. This little trick locks the cream in place, stopping it from migrating or creasing as the hours go by.
And you don't need a perfectly matched powder, either. A sheer, translucent setting powder works just as beautifully to absorb excess oil and create a smudge-proof finish that stays vibrant. Just a light tap is all you need.
Setting Your Cream Shadow for Longevity
Locking in your look is that crucial final touch. If you skip this, even the best primer might not be enough to combat your skin’s natural oils throughout the day. It's a non-negotiable step for a truly lasting finish.
- Coordinating Powder Shadow: Using a powder in a similar shade can actually intensify the color payoff while setting the cream base. This is perfect when you’re going for a more dramatic or evening look.
- Translucent Setting Powder: For a more natural vibe where you want the cream's true color to shine through, a light dusting of translucent powder is ideal. It sets without altering the shade one bit.
This setting technique is the difference between a look that stays flawless for eight hours and one that starts creasing before lunch. It’s a professional trick that anyone can master in seconds for reliable, all-day wear.
While a good primer sets the foundation (as you can learn in our guide to choosing a vegan makeup primer), this final step ensures everything on top stays put.
A Mindful Approach to Makeup Removal
At the end of the day, taking it all off shouldn't feel like a battle. Long-wearing formulas are designed to resist moisture, which is why your standard face wash often isn't enough. Scrubbing at your delicate eye area is a definite no-go.
The most effective—and gentle—way to remove stubborn cream shadow is with an oil-based cleanser or a bi-phase makeup remover. These formulas are specifically designed to dissolve makeup pigments without any harsh rubbing. The oil molecules bind to the oils in your makeup, melting everything away effortlessly.
Just soak a pad with the remover, hold it over your closed eye for about 10-15 seconds to let it break down the makeup, and then gently wipe away.
This method also connects to a more mindful beauty routine. Instead of disposable cotton rounds, think about switching to reusable makeup pads. They’re so much kinder to your skin and the planet, which aligns perfectly with a sustainable beauty philosophy.
Got Cream Eye Shadow Questions? We’ve Got Answers.
Even when you think you’ve got the hang of it, a few questions always pop up with cream eye shadows. This is your go-to guide for all those little troubleshooting moments, from stopping that dreaded midday crease to making a multi-use stick work for you.
Let's jump into the most common concerns. Getting these details right is the secret to applying your favorite cream formulas like you’ve been doing it for years.
How Do I Stop My Cream Eye Shadow from Creasing?
Ugh, creasing. It's hands down the biggest frustration with cream formulas, but I promise it's completely preventable with the right prep. The absolute key? Always, always start with an eye shadow primer on clean, dry lids. This creates a smooth, slightly grippy base that locks the shadow in place and stops it from migrating as your skin warms up.
If you have oily eyelids and need extra insurance, here’s a pro trick: After your primer has set for a minute, dust a super-light layer of translucent setting powder over it before you apply the shadow.
Also, remember that less is more.
It's much better to apply thin layers and build up the color gradually. A single thick coat is way more likely to move around and crease as you go about your day.
Can I Use Cream Eye Shadow on Mature or Textured Lids?
Totally! In fact, cream eye shadows are often way more flattering on mature or textured skin than powders, which can sometimes settle into and highlight fine lines. The secret is just picking the right formula and tweaking how you put it on.
Look for formulas with a satin or matte finish instead of super glittery or frosty ones. High-impact shimmer can sometimes draw unwanted attention to texture, while a soft satin gives a gentle, luminous glow that’s just gorgeous.
When it comes to application, use a gentle patting or tapping motion with your ring finger. Swiping or pulling can tug on the delicate eyelid area, but a light tap presses the product smoothly onto the skin for a seamless finish.
What Is the Best Way to Blend Multiple Cream Colors?
When you’re blending more than one cream shadow, you have to work relatively quickly before the formulas have a chance to set. I like to start by applying the lightest shade all over the lid as a base.
Next, add your deeper shade to the outer corner or into the crease. To blend them, grab a clean, fluffy synthetic brush or just use your fingertip. Use tiny circular motions or gentle back-and-forth "windshield-wiper" movements right where the two colors meet. The idea is just to soften the line without making the colors muddy.
If you’re using a multi-use stick, you can draw the colors right on and then blend out the edges. If a line still looks too harsh, no worries—just go back in with a clean brush and a little of your lighter color to diffuse it.
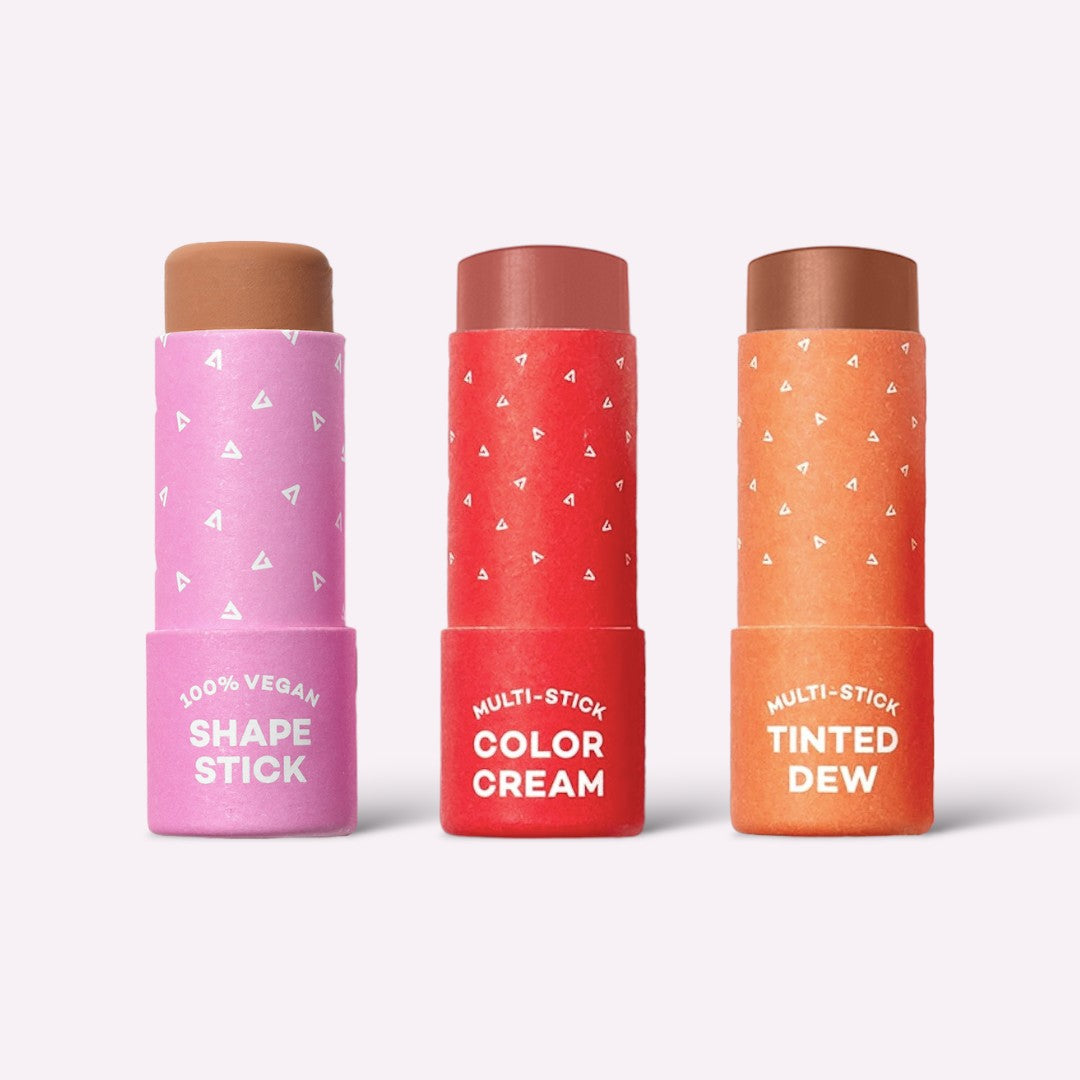
Can I Use a Multi-Use Stick on My Eyes?
Yes, and honestly, that’s one of the best parts of a simple, sustainable routine! Products like Axiology’s multi-use Color Cream sticks are made to be safe and beautiful on your eyes, lips, and cheeks. It’s a great way to streamline your makeup bag and cut down on waste.
Here are a few ways I love to use them on my eyes:
- For a quick wash of color: Just apply the stick directly to your lid and blend out the edges with your fingers. So easy.
- For more precision: Pick up product from the stick with a flat shader brush to really pack on the color.
- As an eyeliner: Use a small, angled eyeliner brush to create a soft, defined line along your lashes.
Their creamy, super-blendable formula is perfect for creating a cohesive, monochromatic makeup look with basically zero effort.
Ready to simplify your routine with a product that does it all? Discover the vibrant, plastic-free shades from Axiology and see how easy a beautiful, sustainable makeup look can be. Explore the collection at Axiology Beauty.