Ready to finally master cream contouring? It’s the technique that’s taken over from harsh, obvious lines, giving you a sculpted, defined look that feels like a second skin. It’s all about creating soft, believable shadows to enhance your bone structure, not hide it.
To do it right, you'll want a cool-toned cream product that's about two to three shades darker than your skin. This creates the illusion of a natural shadow. You’ll just draw lines in a few key areas and then blend, blend, blend until they melt seamlessly into your base makeup.
This method has absolutely exploded, going from a pro makeup artist's secret to an everyday staple. Just look at the numbers: the global contour stick market (which is mostly cream formulas) was valued at USD 1.3 billion in 2023 and is expected to climb to USD 2.5 billion by 2032. That’s a huge shift toward products that are not just effective, but also feel good on the skin. You can read more about the rise of contour sticks and see why everyone’s making the switch.
So, why cream? It’s all about the blendability. Cream formulas tend to have hydrating properties that melt into the skin instead of just sitting on top of it. This is the secret to getting that dewy, healthy glow that looks so incredibly natural.
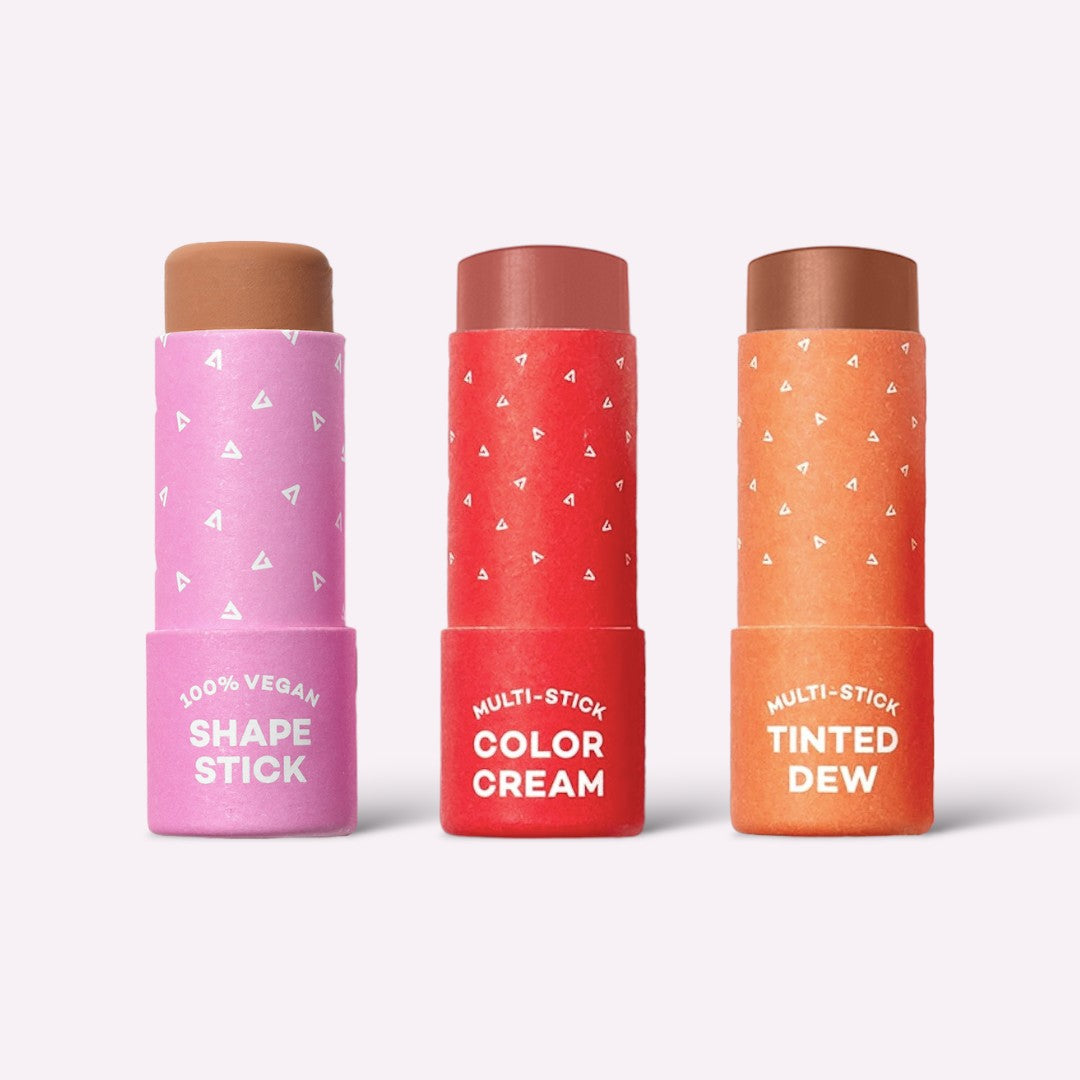
Brands like Axiology are leading the charge here, creating amazing multi-use, vegan options that make getting professional results easy, sustainable, and accessible for everyone. It’s about simplifying your routine without sacrificing an ounce of quality.
Key Takeaway: The goal of cream contouring isn't to change your face, but to enhance what's already there by creating soft, believable shadows for added dimension and definition.
Before we dive into the nitty-gritty, let's look at a quick overview. Getting a feel for the process will make each step feel much more intuitive.
For anyone who loves a good cheat sheet, here’s the process boiled down to the absolute essentials. Think of this as your roadmap to a flawless contour every single time.
Cream Contour Quick Start Guide
| Phase | Action | Key Takeaway |
|---|---|---|
| Prep | Start with clean, moisturized, and primed skin. | A smooth canvas is non-negotiable for seamless blending. |
| Place | Apply contour based on your unique face shape. | Placement is everything—it’s what creates the sculpted effect. |
| Blend | Use the right tools and techniques to diffuse harsh lines. | The goal is a soft shadow, not a visible stripe of color. |
| Set | Lightly powder to lock everything in place. | This ensures your hard work lasts all day long. |
This guide will walk you through each of these phases, step by step. I’ll share all the tips and tricks I’ve picked up to help you apply cream contour like you’ve been doing it for years. Let's get started.
Creating the Perfect Canvas for Your Contour
Think of your face as an artist's canvas. Before you even think about picking up your contour stick, the prep work you do is what makes the difference between a masterpiece and, well, a muddle. The real secret to a cream contour that blends like a dream and actually lasts all day is starting with a smooth, hydrated base.
First things first: a clean, moisturized face. This part is completely non-negotiable. Cream products have a knack for finding and clinging to dry patches, which is a fast track to a splotchy, uneven finish. A good moisturizer plumps up the skin and creates a supple surface, letting your contour glide on and basically melt right in. Seriously, dialing in a solid facial care routine can totally change your makeup game.
Choosing the Right Primer
After you’ve moisturized, primer is your next best friend. It’s like a buffer between your skin and your makeup, smoothing over pores and fine lines to create an almost-flawless texture for everything that comes next. The right primer also helps you work with your skin, not against it.
- For Oily Skin: A mattifying primer is a must. It keeps shine and oil in check, especially in the T-zone, and stops your cream contour from sliding around or looking greasy by lunchtime.
- For Dry Skin: Grab a hydrating or illuminating primer. These formulas pack in an extra layer of moisture, giving your skin a gorgeous dewy glow and keeping your contour from looking flat or cakey.
This one simple step helps your carefully blended contour stay put from your morning coffee straight through to your evening plans.
Pro Tip: Give your skincare and primer a few minutes to fully absorb before you start your makeup. If you try to apply products on a damp surface, they can sometimes pill up or break down way faster. No thanks.
When to Apply Your Cream Contour
This is one of the biggest questions we get: does cream contour go on before or after foundation? Honestly, it just depends on the look you’re going for. Neither way is wrong, they just give you different results.
For a really soft, natural sculpt that looks like it’s coming from within, try applying your contour before your foundation. This technique is often called "underpainting," and it diffuses the contour lines for a subtle, super believable shadow.
If you’re after a more defined, chiseled look, apply your contour after your foundation. This puts the pigment right on top, giving you more control over the intensity and sharpness for a more dramatic vibe. To really get into the nitty-gritty, check out our guide on whether to apply contour before or after foundation to figure out which method is best for you.
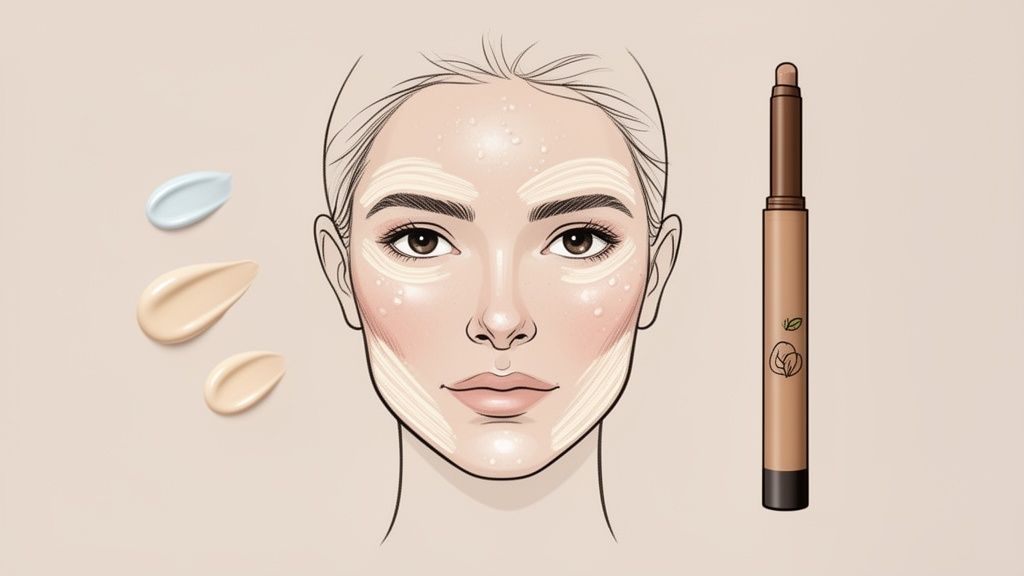
Mastering Contour Placement for Your Face Shape
Forget those one-size-fits-all contour maps you see all over social media. The real secret to a killer contour is understanding your own face shape and working with your unique bone structure. It’s all about creating subtle shadows that enhance what you’ve already got, not painting on a whole new face.
Think of it like getting a piece of clothing tailored—a few strategic tweaks make all the difference. The goal is always to create balance and definition in a way that looks totally natural.
Before we even get to the product, though, let's talk prep. A flawless finish starts with a flawless canvas.
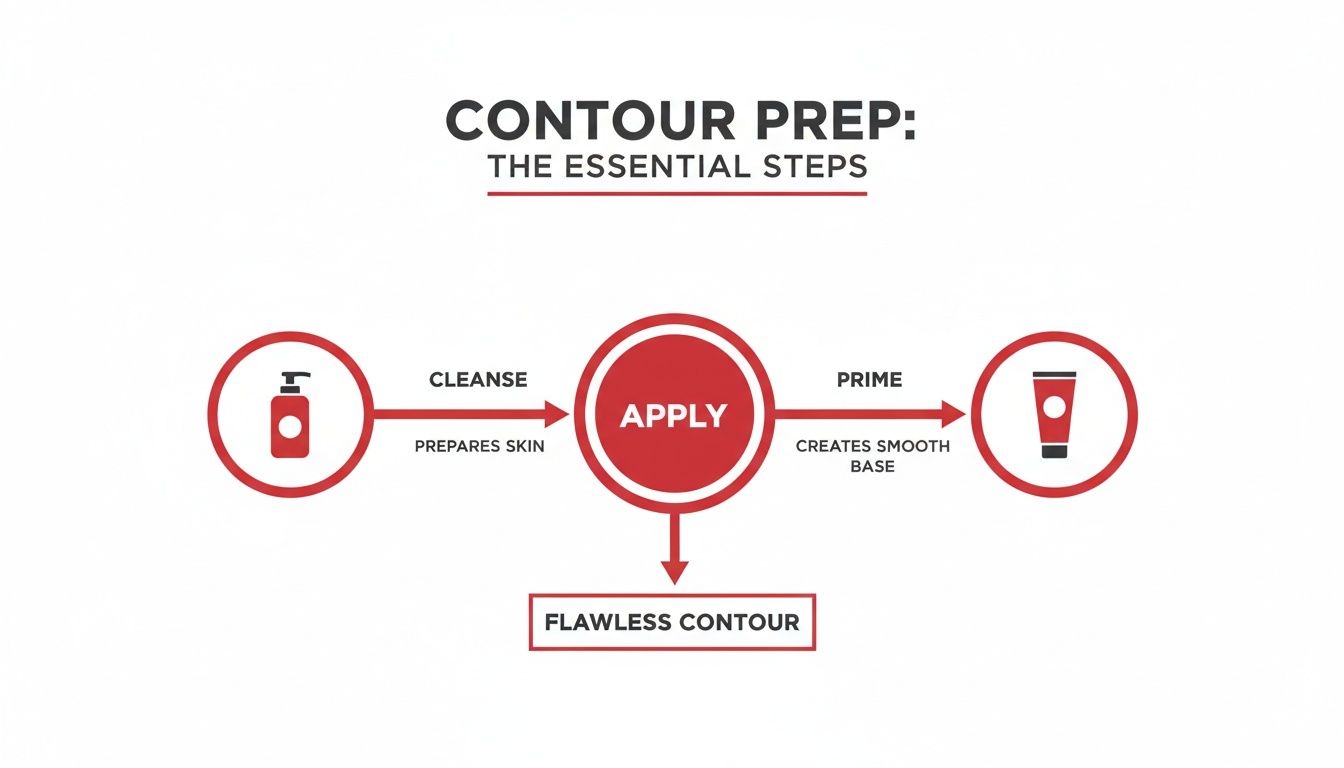
As you can see, a great contour application is built on a foundation of clean, primed skin. Don't skip these steps!
Where to Place Your Contour
Now for the fun part. Where you place that creamy contour stick depends entirely on your facial structure. We’ve broken it down by the most common face shapes to take the guesswork out of it for you.
| Cream Contour Placement by Face Shape |
| :--- | :--- | :--- |
| Face Shape | Cheekbones Placement | Forehead & Jawline Placement |
| Oval | Apply just below the cheekbones, from the ears toward the center of the face. | Add a light touch along the hairline for warmth. |
| Round | Create a "3" shape: starting at the temples, curving under the cheekbones, and tracing the jawline. | Focus on the temples and the entire length of the jawline to add angularity. |
| Square | Apply directly under the cheekbones, blending upwards slightly. | Focus on the corners of the forehead (temples) and just under the strong angles of the jaw to soften. |
| Heart | Place contour slightly higher and shorter on the cheekbones. | Apply along the hairline and temples to narrow the forehead. A tiny dab on the chin can soften its point. |
| Long | Keep cheekbone contour minimal or skip it. If you do, apply it more horizontally. | Contour along the hairline at the top of the forehead and just under the chin to create width. |
This table is a great starting point, but remember to always blend, blend, blend until the lines disappear and you’re left with a soft, believable shadow.
A Deeper Dive Into Each Face Shape
Contouring for an Oval Face
If you have an oval face, you’re in luck—your proportions are naturally quite balanced. The goal here isn't to reshape, but just to add a little soft definition.
A light touch is all you need. Sweep the contour just under your cheekbones, starting near your ears and blending in towards the middle of your cheeks. You can also add a little along the hairline for some warmth, but keep it minimal.
Sculpting a Round Face
For round faces, where the width and length are pretty similar, contouring is your best friend for creating the illusion of more angularity and length.
The classic "3" shape is perfect for this. Start at your temples, sweep the product down and under your cheekbones, and then curve back out to trace along your jawline. This technique is magic for slimming the face and carving out more defined features.
Expert Tip: To find the perfect spot for your cheekbone contour, make a "fish face" by sucking in your cheeks. The hollow that forms is your natural guide for where to apply the product.
Softening a Square Face
A square face is all about those beautiful, strong angles in the jaw and forehead. Our goal with contour is to gently soften those corners for a slightly more rounded look.
Concentrate your contour on the outer edges of your face. A little at the temples, blended downwards, will soften the top corners. Then, apply it just under your jawline—not on the edge—to soften its sharp angles without hiding that gorgeous structure.
Balancing a Heart-Shaped Face
Heart-shaped faces are widest at the forehead and taper down to a more delicate chin. To create a sense of balance, we want to soften the forehead's width and add a bit of definition to the lower half of the face.
- Sweep contour along your hairline and at your temples. This simple trick makes the forehead appear a little narrower.
- When you place contour under your cheekbones, keep it a bit higher and don't blend it down too far. This lifts the face without making the chin seem even more pointed.
- A tiny, well-blended dot of contour right on the tip of the chin can also help soften the point.
Adding Width to a Long Face
If you have a long or oblong face, the trick is to use contour to create the illusion of more width, making the face appear a touch shorter and more balanced.
Think horizontal. Apply your contour along the hairline at the very top of your forehead and sweep a little just under your chin along the jawline. These two horizontal lines will visually shorten the face. The key here is to avoid contouring the sides of your cheeks, which can accidentally make your face look longer.
Choosing Your Tools and Blending Like a Pro
You've mapped out your face and placed your contour with precision. Now for the fun part, the step that really separates a good contour from a great one: the blend.
The real magic of cream contour isn't just the placement, but how seamlessly you can diffuse the product until it becomes a believable, undetectable shadow. Your choice of tool is the first big decision in mastering this.
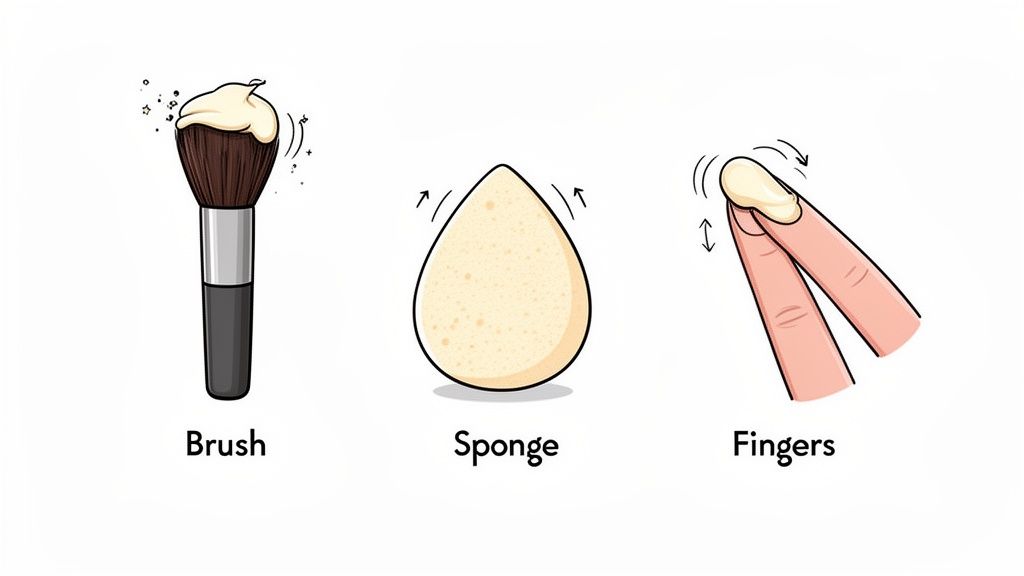
Honestly, there’s no single "best" tool. It all comes down to the finish you’re going for. Let's get into the top three contenders.
The Best Tools for the Job
Each tool gives you a totally different effect, so having more than one in your kit means you can customize your look on the fly.
- Dense Makeup Brush: If you want a more sculpted, defined finish, a densely packed brush is your best friend. It gives you maximum control to buff the product into the skin without sheering it out too much.
- Damp Beauty Sponge: For a softer, more natural, airbrushed vibe, a damp sponge is perfect. It presses the product into the skin while soaking up any excess, which is the key to that seamless, second-skin look.
- Your Fingertips: Never underestimate the power of your own hands! The warmth from your fingers is amazing for melting cream products, like Axiology's multi-use sticks. This makes them incredibly easy to blend for the most natural, lived-in finish of all.
No matter what you choose, starting with a clean tool is non-negotiable for a smooth application and, more importantly, for healthy skin. It's a great habit to learn how to properly sanitize your makeup brushes to keep breakouts and gunk at bay.
Mastering Essential Blending Techniques
Once you've got your tool, it’s time to get blending. The motion you use is just as important as the tool itself.
Stippling or Tapping: This is all about gentle patting or tapping motions. It’s fantastic for both sponges and brushes because it presses the product into place without dragging it around. This technique softly builds coverage and helps you avoid creating muddy patches.
Buffing: Using small, circular motions with a brush, buffing is my go-to for diffusing any harsh lines along the forehead and jawline. It creates a beautiful, soft-focus gradient where the contour just melts right into your foundation.
Key Takeaway: Always blend upwards. When you're working on your cheekbones, blend the contour line up and away from the center of your face. This little trick creates a lifted, more youthful look instead of accidentally dragging your features down.
It’s wild how much cream contouring has changed since it blew up around 2015. After a few key celebrity selfies, global searches for the technique spiked by 500% in just a few months, creating a huge demand for products that were actually easy to use.
Today, the total contouring market is valued at a massive USD 5.19 billion, and cream formulas are set to take the lead with a USD 2.5 billion share by 2025. This stuff is here to stay.
The whole goal is to leave no harsh lines behind. After your first blend, take a step back and check your work in natural light if you can. If you spot any obvious stripes, just go back in with your tool (no extra product!) and gently tap over the edges until everything looks soft and totally integrated.
Setting and Finishing for All-Day Wear
You’ve done the hard part—your cream contour is perfectly placed and blended, creating those beautiful, soft shadows. Now, it’s time to lock it all in. This last step is crucial for making sure your sculpted look lasts through your day without fading or sliding off.
The big question is always how to set a cream product without losing that gorgeous, dewy finish you just worked so hard to achieve. The key is to be really strategic and light-handed. A heavy layer of powder can instantly suck the life out of your look and make it appear cakey, which is the exact opposite of the natural vibe we’re going for.
Instead, reach for a finely milled translucent powder. Using a small, fluffy brush, you’ll want to lightly dust it only where you truly need it. For most of us, this means the T-zone or any other areas that tend to get oily. You can also press a tiny bit right under your contour line to help sharpen that edge.
The Power of Setting Sprays
If you're all about that glow, a setting spray might just be your new best friend. A good one will melt all your makeup layers together seamlessly, lock in your cream contour, and give your skin a luminous, hydrated look that lasts for hours on end.
- For a Dewy Look: Choose a spray with a radiant or hydrating formula.
- For Extra Hold: If you have oily skin or need your makeup to survive a humid day, look for a long-wear or even a mattifying spray.
Just mist the spray over your entire face in an "X" and "T" motion. This ensures everything gets an even coat. It’s such a small step, but it makes a huge difference. For more tricks on extending the life of your look, check out these expert tips on how to make makeup last all day.
Harmonizing with Blush and Highlighter
Your contour shouldn’t live on an island. Layering blush and highlighter is what really brings the entire look to life, adding color and light to complement the shadows you’ve created. Think of it this way: contour is the structure, blush is the life, and highlighter is that final pop of light.
Key Takeaway: Always apply cream blush and highlighter before you set with powder. If you try to put a cream over a powder, you’ll end up with a patchy, uneven texture. If you're using powder blush and highlighter, apply them after you’ve set your face.
Apply a cream blush right on the apples of your cheeks, then blend it upwards and slightly back to meet your contour. This creates a really healthy, seamless flush of color that looks like it’s coming from within.
Next, grab your highlighter and gently tap it onto the high points of your face—anywhere light would naturally hit. This usually means the tops of your cheekbones, the bridge of your nose, your brow bone, and your cupid's bow. This strategic glow works in harmony with your contour to create stunning, multi-dimensional definition that looks both polished and completely effortless.
Whoops! How to Fix Common Cream Contour Mishaps
Look, even those of us who contour in our sleep can have an off day. It happens. The good news is that most cream contour mistakes are surprisingly easy to fix—no need to wash your face and start from scratch. Nailing these little troubleshooting tricks is what separates the beginners from the pros.
Probably the most common slip-up is going in a little too heavy-handed, leaving you with harsh, obvious lines. Your first instinct might be to wipe it off, but don't! Instead, grab a clean, damp makeup sponge and add a tiny bit of your foundation to it.
Gently tap the sponge right over the edges of the contour. This will soften and diffuse the color, melting it back into your base for a finish that looks intentional and seamless. It's a total look-saver that dials back the intensity without making a muddy mess.
Correcting Placement and Patchiness
What about when your contour looks muddy or patchy? This can happen if the cream formula catches on dry skin, or if you've blended it a little too enthusiastically. To fix it, take a clean, dense brush and lightly buff the patchy spots using small, circular motions. This helps redistribute the product for a smoother appearance.
Another frequent boo-boo is placing the contour too low on the cheekbones, which can visually drag your face down. This fix is pure magic.
- The Fix: Grab a concealer that matches your foundation shade and a small, precise brush.
- Action: Carefully draw a clean line directly underneath the contour you want to lift.
- Result: Blend that concealer line downward. This simple move acts like an eraser for the misplaced contour, instantly making your cheekbones look higher and more sculpted.
Pro Tip: Your contour should always mimic a real shadow. This means you need a shade that's cool-toned and only two or three shades deeper than your skin. If it’s too warm or orange, it’s going to read as bronzer, not a shadow.
Cream contour has become a daily go-to for so many of us, with 58% of users applying it as part of their regular routine. A lot of people even follow the simple "three-finger rule" for placement on the cheeks, forehead, and chin to quickly enhance their features. With its popularity exploding on social media, more and more people are learning these quick fixes. If you're curious, you can learn more about the global rise of contour cosmetics and application trends.
Still Have Questions? Let's Talk Contour.
Even after you've got the basics down, a few questions always seem to pop up. Don't worry, that's totally normal. Here are some of the most common things people ask when they're figuring out how to work with cream contour.
Can I Actually Use Cream Contour if I Have Oily Skin?
Yes! A thousand times, yes. It's a total myth that oily skin types have to stick to powders. The secret isn't about avoiding creams—it’s all in the prep and finish.
First things first, get yourself a good mattifying primer. Apply it just to your T-zone or anywhere you tend to get a little extra shine. Then, after you’ve applied and blended your contour, the final step is key: lightly dust a translucent powder over the contoured areas. This little trick locks everything in place and keeps the oil under control without making your skin look heavy or cakey.
Should I Contour Before or After My Foundation?
Ah, the million-dollar question. The honest answer? It really just depends on what kind of vibe you're going for. There’s no hard and fast rule here, just different techniques for different results.
- Going for that "I woke up like this" sculpt? Apply your cream contour before your foundation. This is a pro technique called "underpainting," and it's amazing. Your foundation goes on over the top, softening and diffusing the contour lines for a shadow that looks like it’s genuinely part of your face.
- Want a more defined, glam look? Then you'll want to apply the cream contour after your foundation. This gives you way more control and intensity, letting you build up a sharper, more chiseled look.
My two cents: Play around with both! I love underpainting for my everyday look, but if I'm going out, I'll almost always contour over my foundation for that extra pop.
How on Earth Do I Pick the Right Shade?
This is where a lot of people get tripped up. The goal is to mimic a real shadow, so you're not looking for warmth—that's what bronzer is for.
Always go for a shade that's about two to three shades deeper than your natural skin tone. The most important part? It needs to have a cool or neutral undertone. If it looks even slightly orange or warm in the tube, it's going to look like a misplaced stripe of bronzer on your face, not a natural shadow.
Ready to stop guessing and find a contour shade that looks truly natural? Check out the clean, vegan, multi-use color sticks from Axiology. They make sculpting feel simple, and you can feel good about what you're putting on your skin. Find your perfect match at https://www.axiologybeauty.com.