Let's be real: cleaning your makeup tools often feels like a chore. But what if we started thinking about it as a non-negotiable part of a healthy skincare routine? It's true. Dirty brushes and sponges are a playground for bacteria, which can lead to annoying breakouts, irritation, and sometimes even nasty infections.
This simple habit isn't just about protecting your skin. It also makes your tools last way longer and helps you get that smooth, flawless makeup application every single time.
Why Clean Makeup Tools Are Your Skin's Best-Kept Secret
When we reframe tool hygiene as an act of self-care, it suddenly shifts from a dreaded task to a rewarding little ritual.
Think about it. Every time you sweep a brush across your face or dab with a sponge, it picks up makeup, dead skin cells, and your skin's natural oils. This cocktail creates the perfect storm for bacteria to multiply. The next day? You're just putting all that gunk right back onto your skin.
This cycle of contamination is a super common—and often totally overlooked—reason for stubborn skin issues. If you've been battling random breakouts or irritation that you just can't seem to figure out, your makeup tools could be the sneaky culprit.
To really get why this matters so much, it helps to understand the difference between cleaning and disinfecting. A little bit of knowledge here goes a long way in keeping your tools (and your face) truly clean.
A More Conscious Approach to Beauty
Sticking to a regular cleaning schedule is a huge part of a conscious, healthy beauty philosophy. It’s not just about keeping your complexion clear; it's also about protecting the money you've spent on your tools.
Properly maintained brushes and sponges just work better and last so much longer, which means less waste and more savings for you. It seems like everyone is catching on, and there's been a major shift in what beauty lovers are prioritizing.
The global market for makeup brush cleaning tools was valued at around USD 680.50 million and is expected to hit USD 1,125.40 million by 2032. This explosion shows a clear trend toward better hygiene and making our products last.
This movement is proof that taking a few minutes to care for your tools is a cornerstone of modern beauty. And for those times when your tools do cause a reaction before you get to them, our guide on how to calm irritated skin has some gentle solutions to help get your skin back on track.
The Definitive Method for Cleaning Makeup Brushes
Keeping your makeup brushes pristine doesn't have to be a huge, complicated chore. I promise. The real secret is getting into a simple rhythm with three key routines: a quick daily spot-clean, a more thorough weekly wash, and a periodic deep sanitization. Think of it as a tiered approach that keeps your tools in top condition, which is better for your skin and your investment.
Your first line of defense is the daily wipe-down. After you use a brush, especially with super-pigmented stuff like eyeshadow or foundation, just mist a gentle brush spray onto a paper towel. Then, swirl the bristles on the towel to get the surface-level makeup off. It literally takes seconds but makes a huge difference in preventing color transfer and product buildup.
This simple habit is so important. We've all seen what happens when you don't clean your brushes, right? Suddenly, you're dealing with breakouts you can't explain.
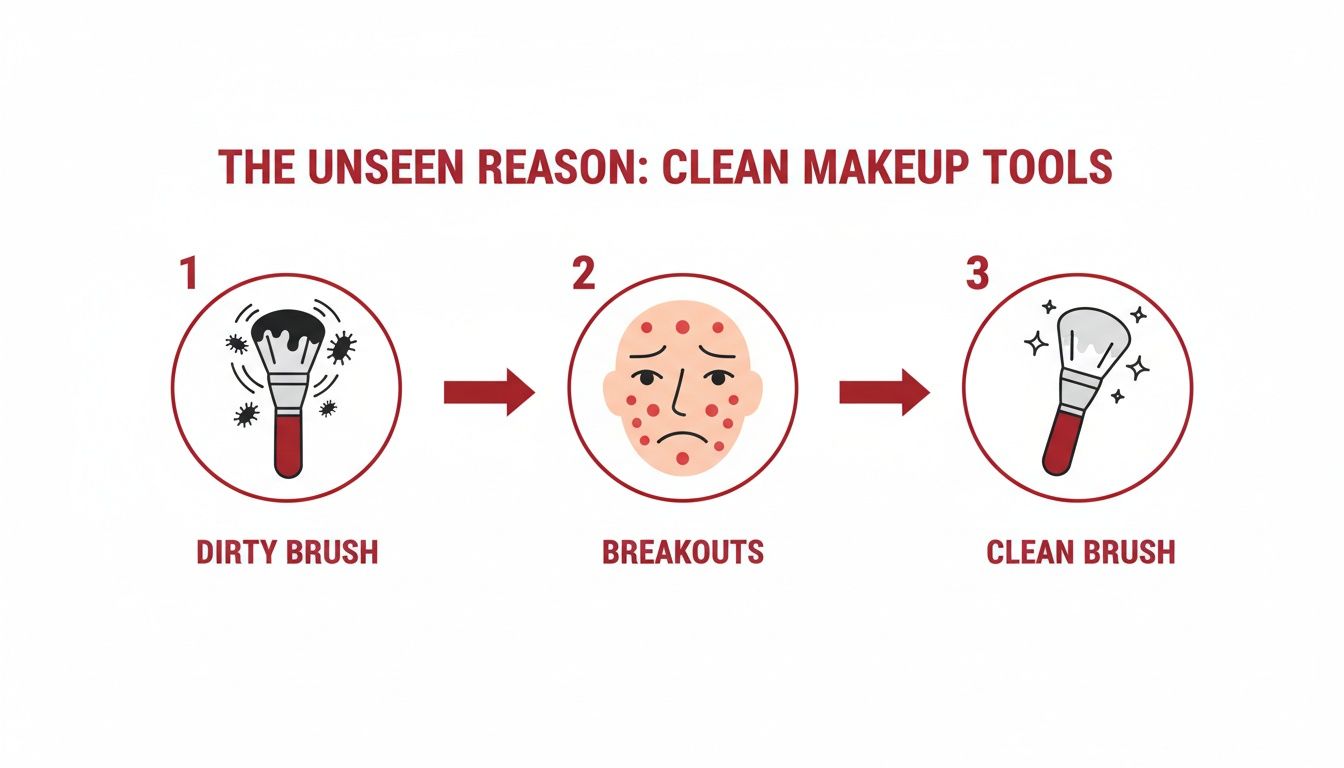
That little visual is a great reminder of how skipping a quick clean can directly mess with your skin's health, turning your favorite tools into a source of irritation. No thanks.
Your Weekly Gentle Wash Routine
Once a week, it's bath time. This is especially non-negotiable for the brushes you use most often, like foundation and concealer applicators. They’re the ones that collect the most oil and product, so they need a proper wash regularly.
-
Wet the Bristles: Get the tips of the brush bristles under some lukewarm water. Here's the most important part: always point the bristles downward. This keeps water from sneaking into the ferrule (that metal bit connecting the handle to the bristles) and dissolving the glue. I’ve seen so many good brushes ruined this way.
-
Lather Up: Squeeze a tiny bit of a gentle cleanser—castile soap or a dedicated brush shampoo works great—into your palm. Swirl the damp bristles into the soap until you see a nice, light lather.
-
Rinse It All Out: Keep rinsing the bristles under the running water, still pointing down, until the water is completely clear. You might want to gently squeeze the bristles a bit to make sure all the soap and makeup gunk is gone.
This weekly ritual is a must for any brushes that touch liquid or cream products. If you want to take it a step further, you can look into other ways to sanitize makeup brushes for an even deeper clean.
The Monthly Deep Clean and Sanitization
About once a month, it's time to give all your brushes a really deep clean. Yes, even the powder brushes you don’t use as often. The process is pretty similar to the weekly wash, but you might need to give a little extra love to stubborn stains, especially on natural fiber brushes since they're more porous.
For synthetic brushes that have been dealing with heavy creams or long-wear foundation, try a dual-cleansing method. First, work a tiny drop of oil (jojoba or olive oil are good options) into the bristles to break down all that built-up makeup. Then, wash it with your regular gentle soap to get rid of the oily residue. This trick is a total lifesaver for making stained white bristles look new again.
Pro Tip: After the final rinse, gently squeeze out any extra water with a clean towel and use your fingers to reshape the bristles. This helps them keep their shape and stops them from fraying as they dry.
The best way to dry your brushes is to lay them flat on the edge of a counter, with the bristles hanging over the side. This allows air to circulate all around them and makes sure zero moisture drips back into the ferrule.
It’s funny how the same principles of care apply to other tools. For example, the same delicate handling is needed for things like cleaning boar bristle brushes, which also require a specific technique to keep them in good shape.
How to Properly Deep Clean Makeup Sponges
Those amazing porous makeup sponges? They're brilliant for getting that seamless, second-skin finish we all love. But that same texture also makes them a perfect little home for bacteria and stubborn foundation stains.
Unlike brushes, where makeup mostly sits on the surface, sponges soak it all up. That means a quick rinse isn't enough; they need a much deeper clean to get everything out.

Running your sponge under warm water after each use is a great habit to get into. It stops the immediate buildup. But a weekly deep clean is absolutely non-negotiable. This is what really banishes the oils, dead skin cells, and old product lurking deep inside. Skipping this step doesn't just mess with your makeup application—it can also lead to breakouts and skin irritation.
The Gentle Hand-Washing Method
Honestly, the most reliable way to get your sponges truly clean is a gentle hand-wash. It gives you total control, letting you work the cleanser all the way through the sponge without accidentally tearing it.
First, get your sponge completely saturated with lukewarm water until it puffs up to its full size. Then, squeeze a bit of gentle cleanser directly onto the most stained spots. A solid sponge cleanser works great, but a mild liquid soap (like castile soap) is also a fantastic option.
Gently work the cleanser in with your fingers, squeezing the sponge over and over. You’ll see the water run cloudy with old makeup. Just keep squeezing and rinsing under the tap until the water finally runs clear.
Pro Tip: Got a really stubborn, long-wear foundation stain? Try this trick. Pre-treat your dry sponge with a cleansing oil. Massage a small amount of oil into the stained areas to break down the makeup before you add water and soap. It’s a little dual-cleansing magic that makes the final wash way more effective.
Once you've rinsed it for the last time, gently squeeze out all the extra water. Whatever you do, don't wring or twist it! That's a surefire way to cause rips. Just place your clean sponge on a paper towel or a drying stand in a spot with good airflow and let it dry completely.
Making sure your tools are clean is step one, but knowing how to apply foundation with a sponge the right way helps you get the most out of your now-pristine tool.
The Microwave Sanitization Trick
If you’re concerned about killing any hidden bacteria, the microwave trick is surprisingly effective. But, and this is a big but, you have to be careful. Do it wrong, and you could melt your sponge.
Never, ever put a dry sponge in the microwave.
Here's the safe way to do it:
- Grab a microwave-safe cup or bowl and fill it with enough water to completely cover the sponge.
- Add a few drops of a gentle soap to the water.
- Pop your sponge in the soapy water and let it get totally soaked.
- Microwave the whole thing for one minute, and keep an eye on it.
- Let the cup cool down for a few minutes before you even think about touching it—that water will be seriously hot.
Once it's cool enough to handle, you can take out the sponge, give it a final rinse, and squeeze out the excess water. This method cleans and sanitizes with heat, giving you an extra layer of hygiene.
Whip Up Your Own Gentle DIY Cleaning Solutions
While store-bought cleansers are undeniably convenient, mixing up your own gentle, vegan, and eco-friendly solutions is surprisingly easy and so rewarding. You get total control over the ingredients, meaning you know exactly what’s touching your skin and your favorite tools.
Plus, it's a fantastic way to cut down on plastic waste and make your beauty routine a little more intentional.
This shift toward sustainable beauty isn't just some fringe movement; it's a real and powerful change in how we shop. The demand for eco-friendly products is skyrocketing, and more of us are actively looking for brands with biodegradable or sustainably sourced options. It's a massive market driver, and you can see the data on this sustainable beauty trend to understand just how much impact our conscious choices are making.
When you make your own cleaners, you're plugging right into that mindset. It’s about more than just getting your brushes clean—it’s about doing it in a way that feels good for you and the planet.
The Simple Castile Soap Fix
For a basic but incredibly effective daily or weekly cleanse, you really can't beat the simplicity of good old castile soap. This plant-based wonder is gentle enough for both natural and synthetic bristles but still tough on everyday grime.
- What you'll need: A bottle of unscented liquid castile soap and some warm water.
- How to do it: Just add a few drops of soap to a small bowl of warm water, or even right into the palm of your hand. Swirl your damp brush or sponge in the suds, lather it up, and rinse until the water runs completely clear. Seriously, that's it.
This is my personal go-to for my weekly brush bath. It gets them squeaky clean without making the natural fibers feel stripped or brittle, which is crucial if you want your investment brushes to last.
The Deep-Clean Duo: Oil and Soap
Got stubborn, long-wear foundation or concealer stains that just won't budge? You need to bring in the big guns. This two-step recipe uses oil to dissolve the heavy makeup before the soap comes in to wash it all away.
- First, the oil: Drizzle a tiny bit of a carrier oil—like fractionated coconut, olive, or jojoba oil—into a small dish.
- Break it down: Take your dry, stained brush or sponge and swirl it directly in the oil. You’ll literally see the makeup start to melt away from the bristles or sponge surface. It's pretty satisfying.
- Now, wash it off: Follow up with the castile soap method from above. This will cut through all the oily residue and leftover pigment, leaving your tool fresh and clean.
This little trick is an absolute game-changer for light-colored brushes that look permanently discolored. The oil acts as a pre-treatment, making the final soap wash way more effective at bringing your tools back to life.
A little tip: using pretty glass jars and bottles for your DIY mixes not only looks chic on your vanity but also helps shrink your environmental footprint.
And if you want a few more options in your arsenal, here's a quick rundown of some easy-to-make, eco-friendly cleaners you can tailor to your needs.
DIY Vegan Cleaner Recipes At A Glance
Here's a quick comparison of three simple, homemade cleaning solutions to help you pick the perfect one for the job.
| Cleaner Type | Best For | Key Ingredients | Pro-Tip |
|---|---|---|---|
| Simple Castile Soap | Daily or weekly maintenance of all tool types. | Liquid castile soap + warm water | My go-to for a quick, effective clean that's gentle on natural bristles. |
| Deep-Cleaning Oil & Soap | Stubborn, oil-based makeup like foundation and concealer. | Carrier oil (jojoba, olive) + castile soap | Use on a dry brush first to break down makeup before washing. |
| Sanitizing Alcohol Spritz | Quick-drying spot cleans between uses or for sanitizing. | 70% Isopropyl alcohol + water (2:1 ratio) | Perfect for makeup artists or anyone needing to quickly sanitize tools on the go. |
Each of these recipes leverages simple, powerful ingredients you might already have at home. They prove you don't need a cabinet full of commercial products to keep your beauty tools in pristine condition.
How to Properly Dry and Store Your Beauty Tools
Alright, you've done the hard part and given your tools a deep clean. Now what? Don't stumble at the finish line. How you dry and store everything is just as important as the wash itself.
Getting this part wrong can completely undo all your hard work, potentially wrecking your brushes and turning your favorite sponge into a mildewy mess. Proper drying isn't just about letting things air out; it's an active step in making your beauty investments last.
One of the most common mistakes I see is people standing their wet brushes upright in a cup. It seems logical, I get it, but it’s the fastest way to ruin them. Water inevitably trickles down into the ferrule—that little metal part holding the bristles—and dissolves the glue. Hello, shedding.
The number one rule of brush drying is simple: never let water run back into the handle. Protecting that glue is non-negotiable if you want your brushes to last for years.
The goal here is simple: maximum air circulation. You want air to hit the bristles from all sides so they dry evenly and completely. Stuffy, damp bathrooms are a major no-go.
The Best Drying Techniques for Brushes and Sponges
For your makeup brushes, gravity is your best friend. After you’ve gently squeezed out the excess water with a clean towel and fluffed the bristles back into shape, you’ve got a couple of great options.
- Lay Them Flat: This is the easiest method. Just lay your brushes flat on a clean towel right at the edge of a counter or table. Let the brush heads hang over the edge so air can circulate all the way around the bristles.
- Hang Them Upside Down: This is the gold-standard technique because it guarantees zero water seeps into the ferrule. You can get a dedicated brush drying rack, but honestly, a few hair ties looped around a towel bar works just as well.
For makeup sponges, it’s all about airflow. Squeeze out as much water as you can, then pop your sponge on a dedicated stand or even just a clean paper towel. The key is to leave it in a well-ventilated spot. Whatever you do, never toss a damp sponge into a drawer or a sealed makeup bag.
Smart Storage for Lasting Hygiene
Once everything is 100% dry, storing it correctly keeps it clean and ready for action. The right storage protects your tools from dust, airborne bacteria, and getting squashed.
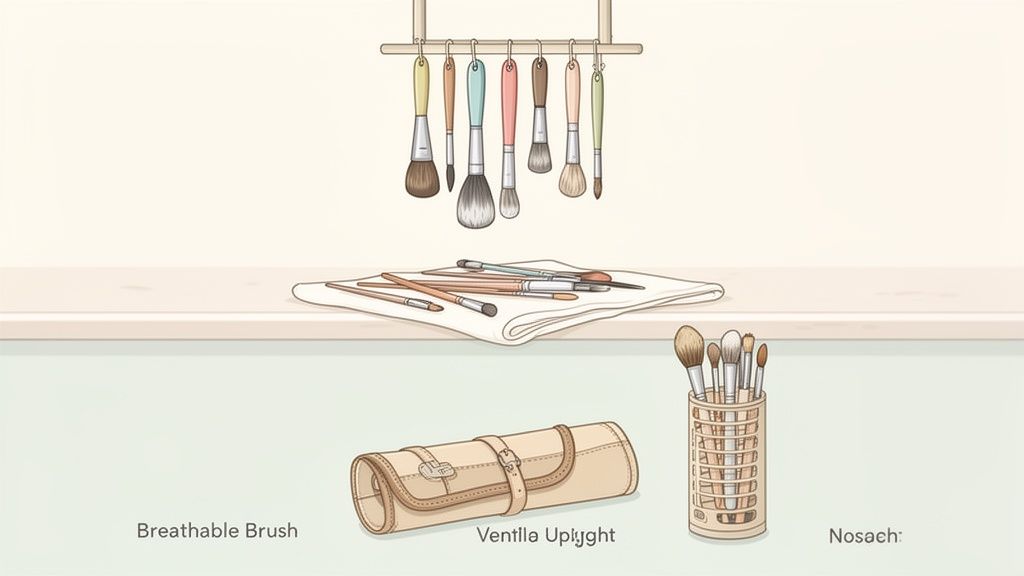
For day-to-day use, an upright holder or cup is perfect. It keeps brush heads from getting misshapen and makes them easy to grab. When you’re traveling, a breathable brush roll or case is a must. They stop the bristles from getting bent and mangled in your luggage.
People are really starting to get how crucial this all is. The market for makeup brush cleaning tools is set to grow, which just shows that a complete care routine—from washing to storing—is becoming a top priority for beauty lovers. You can even explore the data on this beauty market shift if you want to geek out on the trends. It’s clear we’re all finally taking tool care seriously.
Your Top Questions About Cleaning Makeup Tools, Answered
Even with the best intentions, questions always pop up. Once you start a new routine, you run into real-world situations that most guides just don't cover. So, let's get into some of the most common questions I hear about cleaning makeup sponges and brushes.
Think of it this way: understanding the "why" behind each step makes it so much easier to actually stick with the habit. This isn't about following a bunch of rigid rules—it's about learning what your tools and skin really need to be happy.
How Often Should I Really Clean My Tools?
This is the big one, and the honest answer is: it depends. There’s no single schedule that works for every tool in your bag.
For anything that touches liquid or cream products—think your foundation brush or concealer sponge—a deep clean once a week is an absolute must. Those products are loaded with moisture, which is basically a perfect breeding ground for bacteria. Sponges you use daily should get a quick rinse after every single use, plus that weekly deep clean.
Powder brushes, like the ones you use for blush or bronzer, are a little more forgiving. You can usually get away with washing these every two to four weeks. And what about eye brushes? I’d aim for at least every two weeks, especially if your eyes are on the sensitive side.
A consistent cleaning schedule is your best defense against product buildup, bacteria, and potential skin irritation. For anyone with acne-prone or sensitive skin, sticking to the weekly timeline for foundation tools is particularly important.
Can I Just Use Dish Soap or Shampoo?
In a true emergency, you could, but it's really not the best move for your tools or your skin in the long run. Many dish soaps have harsh detergents designed to slice through grease, and they'll do the same to the natural oils in your brush bristles. Over time, that leaves them brittle and scratchy. No thank you.
Regular hair shampoo might seem like a gentler bet, but it often has ingredients like silicones or heavy conditioners. These can leave a film on the bristles, messing with how your makeup applies and, ironically, even trapping more bacteria. A simple, fragrance-free cleanser like castile soap is always a safer and more effective choice.
My White Brushes Are Permanently Stained. Help!
Don't toss them just yet! Stains from super pigmented products like lipstick or a full-coverage foundation can be incredibly stubborn, especially on light-colored bristles. The secret is a two-step approach that’s a lot like double-cleansing your face.
- Start with an Oil: Before you even touch the water, work a little bit of oil (jojoba or olive oil are great) into the stained bristles. Gently massage it in to start breaking down that concentrated pigment.
- Follow with Soap: After the oil has worked its magic, wash the brush like you normally would with a gentle soap and warm water. This second wash whisks away the oily residue and all the makeup it loosened up, leaving your bristles looking so much brighter.
This little trick is a game-changer for lifting deep-set color without having to scrub your brushes into oblivion, which helps protect their shape and softness.
When Is It Time to Replace My Tools?
Knowing when to say goodbye is just as important as keeping things clean. Even the best tools have a lifespan.
For brushes, keep an eye out for these telltale signs:
- Constant shedding every time you use or wash them.
- Bristles that have lost their shape and just won't fluff back up.
- A scratchy or rough feeling against your skin.
Sponges have a much shorter life. It's time for a new one if you see permanent stains that won't wash out, little nicks or tears, or if it just stops giving you that smooth, flawless application it used to. For hygiene's sake, it’s best to replace your main makeup sponge every three months, no matter how good it looks.
At Axiology, we believe that a conscious beauty routine includes caring for your tools with gentle, effective methods. Our commitment to vegan, cruelty-free, and sustainable practices extends to every part of your regimen, ensuring your skin and the planet are treated with kindness. Explore our collection to build a routine that feels good from start to finish.