Knowing how to blend your contour is what separates a natural, sculpted look from, well, obvious stripes of makeup. It’s all about using soft tapping or stippling motions to gently diffuse the edges of the product until there are no harsh lines left.
Think of it as creating believable shadows, not just drawing on your face.
The Art of a Truly Seamless Contour
Let's be real, the harsh, super-obvious makeup of the past is not the vibe anymore. Today’s contouring is all about creating soft, believable shadows that bring out your features, not mask them. The blend is everything—it’s the magic that transforms a strategically placed line into subtle, gorgeous definition.
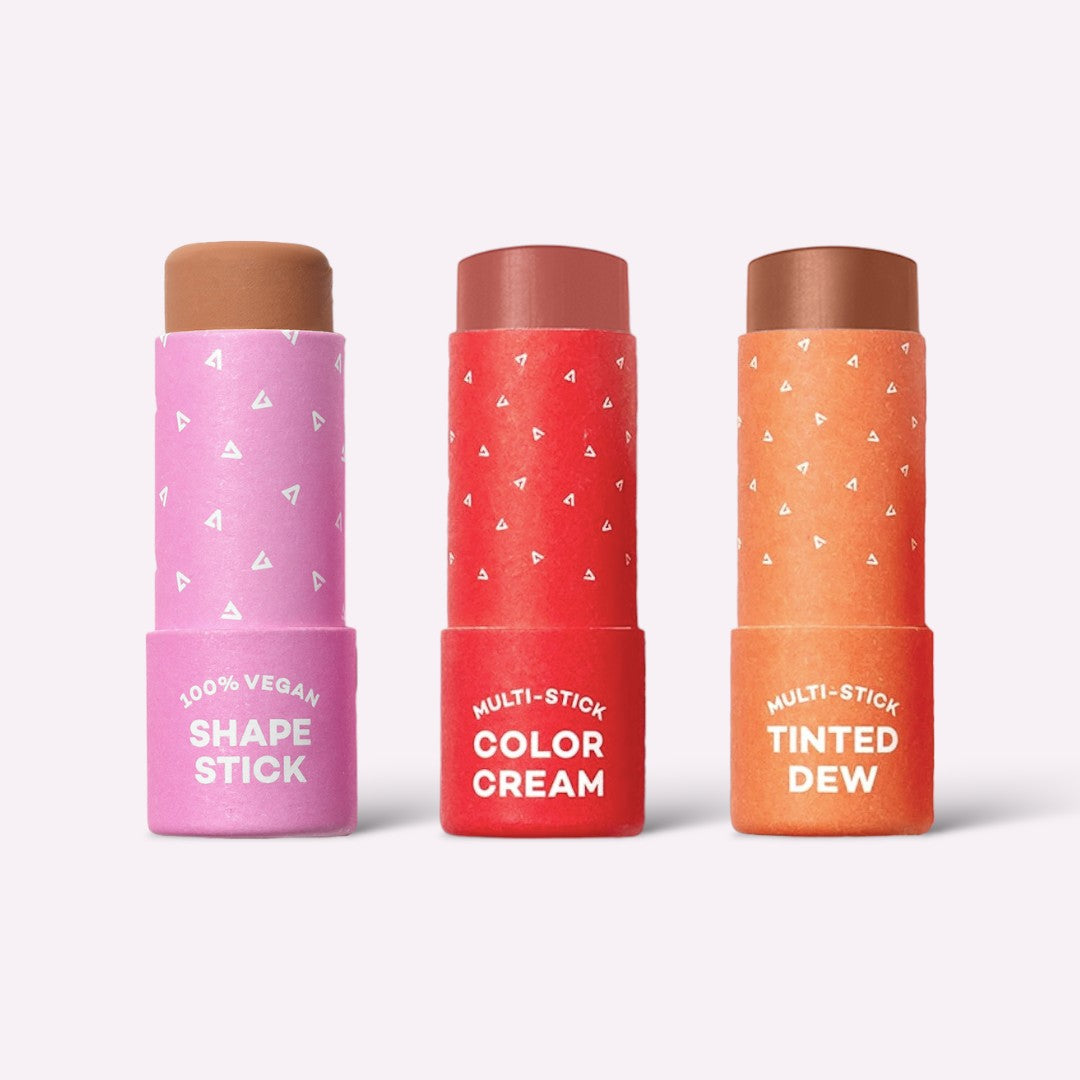
A big part of this shift comes from moving away from heavy, cakey powders and embracing breathable, skin-loving cream formulas. I mean, who doesn't love a good multi-use stick? They're literally designed to melt right into your skin for a finish that looks and feels like you, just a little more sculpted. It makes the whole process way more intuitive and forgiving.
The Pillars of a Perfect Blend
Getting that seamless, "I woke up like this" blend isn't about one single trick. It’s a combination of a few key things working together. Once you nail these fundamentals, you’ll have the foundation you need to perfect your technique.
- Good Skin Prep: This is totally non-negotiable. Makeup glides beautifully over a smooth, hydrated canvas instead of clinging to dry patches and looking blotchy.
- Strategic Placement: Knowing exactly where to apply contour for your face shape is a game-changer. It ensures you’re actually enhancing your bone structure, not just putting makeup in random places.
- The Right Tools: Your choice of a brush, sponge, or even your fingers can completely change the final look. Each one offers a different level of precision and diffusion.
This whole technique has completely taken over, with the global contouring product market valued at over $5 billion and expected to nearly double by 2035. A lot of that growth is thanks to social media, where tutorials on how to blend contour have racked up billions of views.
Interestingly, 70% of users say they get better results with multi-use sticks. It makes sense—products like Axiology’s Balmies are 100% vegan and plastic-free, so you get buildable, easy-to-blend coverage without the waste. You can read more about the growing contour product market and see for yourself.
Creating the Perfect Canvas for Blending
Let’s be real: a gorgeous, seamless blend starts way before you even think about picking up your contour stick. I like to think of my skin as a canvas—the smoother and more hydrated it is, the better my makeup will glide on without getting all patchy or cakey. Skipping this step is honestly one of the biggest reasons contour just doesn't look right.
Proper skin prep is the absolute, non-negotiable foundation for a pro-level finish. It’s what makes your makeup work with your skin, not against it.
Your Hydration Strategy
The goal here is a plump, hydrated surface that isn't slick or greasy. This is especially true when you're working with cream formulas. If your skin is too dry, that contour is going to cling to every little rough spot. But if it's too oily, the product might just slide right off. No thanks.
A simple, solid routine is your best friend. Always start by cleansing to get rid of any impurities or excess oil. This just gives your products a fresh, clean slate to stick to.
Next up is a lightweight moisturizer. This is a must for all skin types—and yes, I’m looking at you, oily-skinned friends. Hydrated skin actually produces less oil and creates that perfect smooth surface for blending.
Pro Tip: Keep an eye out for moisturizers with amazing vegan ingredients like hyaluronic acid (a total moisture magnet) or mushroom extracts that plump and soothe. These help create a perfectly balanced canvas that grips makeup just enough.
Lock It in With the Right Primer
Once your moisturizer has had a minute to sink in, primer is your next move. It acts as the perfect buffer between your skincare and your makeup, filling in fine lines, blurring pores, and giving your contour something to hold onto all day long.
- For Dry Skin: Grab a hydrating primer. It’ll add an extra layer of moisture and keep your contour from looking flat or dull.
- For Oily Skin: A mattifying or pore-filling primer is a game-changer for controlling shine, making sure your sculpted look stays exactly where you put it.
- For Combination Skin: Don't be afraid to multi-prime! A little mattifying primer on your T-zone and a hydrating one on your cheeks can make all the difference.
This careful prep work is what sets you up for that effortless, "I woke up like this" blended finish. And when you're ready to figure out your game plan, we've got a whole guide on whether you should be contouring before or after foundation.
Mapping Contour for Your Unique Face Shape
Let’s be real: contouring isn't a one-size-fits-all kind of deal. It’s all about enhancing your own beautiful bone structure. Where you place your contour completely changes the effect, which is why just copying a tutorial you saw online rarely works out the way you want it to.
The secret to a truly flattering sculpt is making it personal. Instead of just drawing lines where everyone else does, take a second to figure out your face shape. This one little step turns contouring from a guessing game into an art form, making sure you’re adding shadows that actually complement your features.
But before you start mapping anything, remember that a smooth base is everything. Your contour needs a happy, hydrated canvas to glide onto.
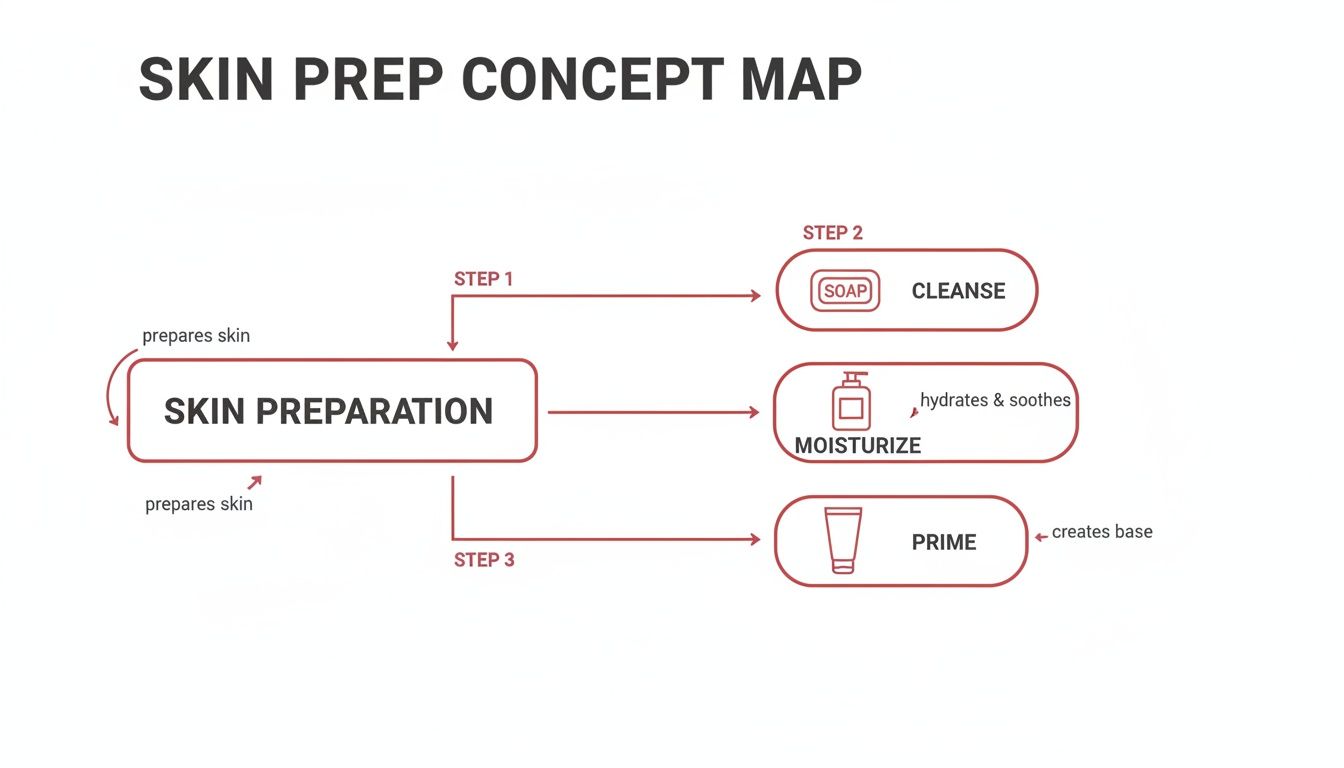
This simple trio—cleanse, moisturize, prime—is non-negotiable. It preps your skin so your products blend seamlessly instead of catching on any dry patches.
To make things even easier, I've put together a quick cheat sheet for contour placement based on the most common face shapes. Think of it as your starting point for sculpting.
Contour Placement by Face Shape
| Face Shape | Where to Apply Contour | Goal of Contouring |
|---|---|---|
| Round | Temples, under cheekbones, and along the jawline (the "3" shape). | To create angles and add length to the face. |
| Square | Sides of the forehead and along the jawline. | To soften the angular corners of the face. |
| Heart | Along the hairline/temples and on the tip of the chin. | To balance a wider forehead with a narrower chin. |
| Oval | Just under the cheekbones and a touch on the hairline (optional). | To enhance the natural bone structure without altering proportions. |
This table is a great guide, but don't be afraid to play around! Your face is unique, and finding what makes you feel amazing is the whole point.
Sculpting for a Round Face
If you have a round face, the goal is to create the illusion of more angles and a bit of length. Your new best friend is the classic "3" shape. It sounds simple, and it is.
Imagine drawing the number three on both sides of your face. Start at your temples, curve down to just under your cheekbones, then sweep it back and along your jawline. This trick adds dimension and gently slims the softer parts of the face, drawing the eye upward.
Defining a Square Face
Square faces have that gorgeous, strong jawline and a broader forehead. For contouring, we just want to soften those sharp angles a tiny bit to create a more rounded silhouette.
You’ll want to focus on two main spots: the temples and the jawline. A light touch of contour along the sides of your forehead and right onto the corners of your jaw will instantly soften everything. By adding a shadow here, you’re subtly rounding out the frame of your face.
A Quick Tip: When you're working on a square jaw, always blend the product downward. This creates a soft, receding shadow rather than a harsh line that actually brings more attention to the area.
Balancing a Heart-Shaped Face
Heart-shaped faces typically have a wider forehead that tapers down to a narrower, more pointed chin. The strategy here is all about creating balance between the top and bottom halves of your face.
Sweep some contour along your hairline and temples—this will help minimize the width of your forehead. You can probably skip your cheeks, as they often have a lovely natural definition. Instead, add just a tiny dab of contour to the very tip of your chin to soften its point. Easy, right?
Enhancing an Oval Face
Oval faces are often considered the most balanced, so you don't really need to do any "corrective" contouring. It’s more about just enhancing your natural bone structure for a little extra pop.
Your placement map is super straightforward.
- Apply a light touch of contour right below your cheekbones. Start near your ear and blend toward the corner of your mouth, stopping about midway.
- If you have a taller forehead, you can add a little along your hairline, too.
That's it! This minimal approach adds just enough dimension without changing your natural symmetry. It’s all about working with what you've got.
Blending Techniques for Cream and Powder Formulas
This is where the real artistry happens. Once you’ve mapped out your placement, your blending technique is what makes the contour look like a seamless, believable shadow. The whole point is to diffuse the product so it looks like it’s part of your skin, not just a stripe of color sitting on top.
We'll focus a lot on cream formulas because their emollient texture is just perfect for that natural, skin-like finish. But don't worry, the principles for blending powder are just as important for getting a polished look.
Mastering Cream Contour Blending
Cream contour is a dream to work with—it’s incredibly forgiving and buildable, which is why it's a favorite for both beginners and pros. The trick is to work in light layers and use motions that press and melt the product into your skin, rather than just dragging it around.
There are three main ways to blend cream contour, and each one gives a slightly different finish.
-
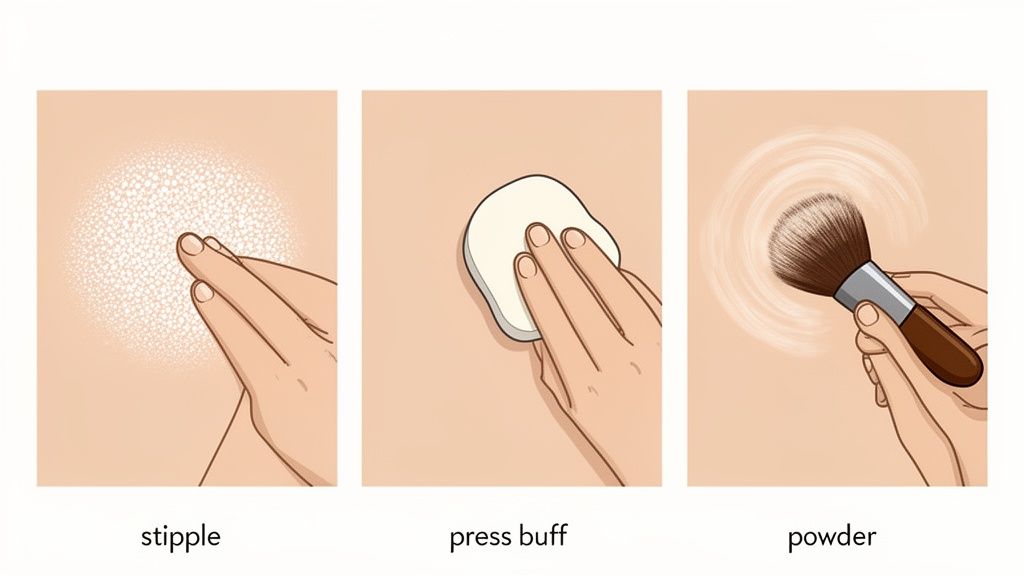
Stippling with a Dense Brush: This method gives you amazing precision and control. Just grab a dense, angled, or flat-top brush and gently tap or "stipple" over the contour line. The short, quick motions push the product right into the skin and soften the edges without smearing it everywhere. Pro tip: always blend upwards on your cheekbones to create a lifted effect.
-
Pressing with a Damp Sponge: If you want a truly airbrushed finish, a damp beauty sponge is your best friend. The moisture helps to sheer out the product, letting it meld beautifully with your foundation. Use gentle bouncing or pressing motions to blend out the edges. It’s a fantastic way to avoid that heavy, over-applied look.
-
Warming with Your Fingertips: Never underestimate the power of your own fingers! The natural warmth from your skin helps melt cream products, making them incredibly easy to blend. Use your ring finger for the gentlest touch, tapping along the edges of your contour to create a sheer, seamless finish. This is perfect for quick touch-ups or a very subtle, everyday sculpt.
The Underpainting Technique
Ready for a more advanced approach? It’s a method called underpainting, and it’s a total game-changer. This involves applying your contour and highlight before your foundation.
You start by placing your cream contour directly onto your prepped skin and blending it out just a little. Then, you apply a sheer layer of foundation over the top, gently tapping it in with a sponge. The result is an incredibly natural, dimensional effect where the shadows look like they’re coming from within your skin. For all the details on this method, check out our full guide on how to apply cream contour.
How to Blend Powder Contour
While creams are definitely having a moment, powder contour is still a fantastic option, especially if you have oilier skin or want to set a cream product. The rules for blending powder are a bit different, though.
Key Takeaway: The biggest mistake people make with powder is applying too much at once. Always, always tap the excess product off your brush before it touches your face. This one move prevents harsh lines and muddy patches right from the start.
To blend, use a soft, fluffy brush and apply the powder with light, circular motions. Think of it as buffing the color into your skin, not painting it on. Just like with cream, blend upwards and outwards to lift your features. You're aiming for a soft diffusion of color, not a visible stripe. And if you ever feel like you've gone too far? A clean powder brush with a tiny bit of translucent powder will help soften everything out.
Choosing the Right Tools for the Job
The contour formula you pick is only half the battle; the tool you use to apply it is what really brings the magic. Seriously, the right applicator can be the difference between a harsh, obvious stripe and a soft, believable shadow that just melts into your skin. Think of your tools as your partners in crime for a flawless blend.
From the sharp precision of a brush to the soft-focus finish of a sponge, let's get into which tool is right for you and the look you’re going for.
Brushes: The Sculptor's Choice
If you're after control and precision, a brush is your best friend. They're perfect for carving out specific areas and getting that chiseled look. But, of course, not all brushes are created equal.
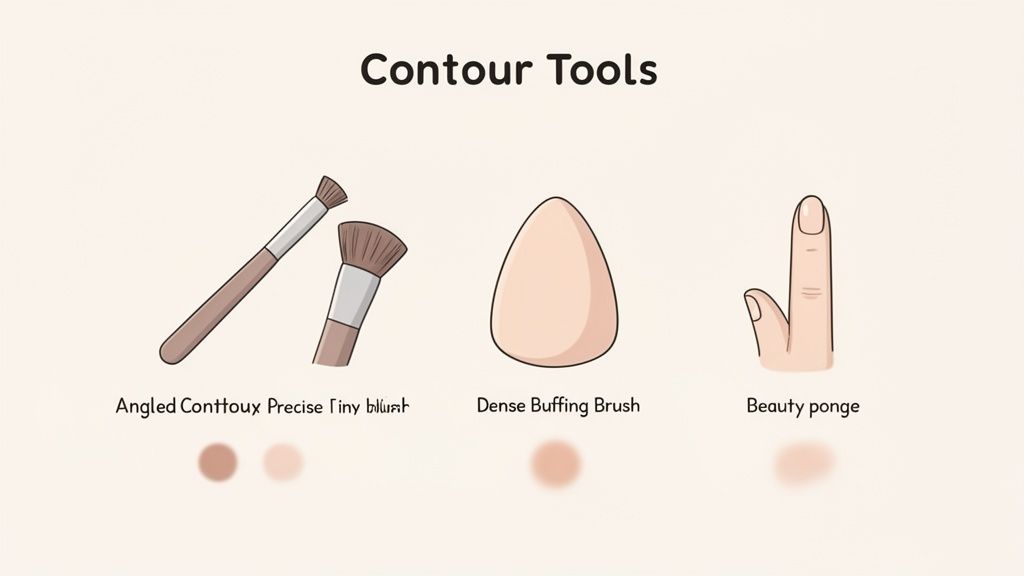
- Angled Contour Brushes: The slanted shape of these is a game-changer. It fits so perfectly into the hollows of your cheeks, making placement for a sharp, defined contour almost foolproof. I like to stamp the product on with the brush and then use gentle upward flicks to blend it out.
- Dense Buffing Brushes: A small, densely packed brush works wonders with cream contour. It’s amazing for stippling and buffing the product right into the skin without smearing it all over the place. The result? A seamlessly sculpted, yet still defined, look.
Opting for high-quality, cruelty-free vegan brushes isn't just an ethical move—it's a practical one. Synthetic bristles won’t soak up your cream products the way natural hair brushes do, which means less product waste and a much smoother application. And please, keep them clean! Our guide on how to sanitize makeup brushes can help you keep them in perfect shape for a perfect blend.
Sponges: The Airbrush Effect
Want an incredibly natural, diffused finish? A damp beauty sponge is the way to go. Sponges are my personal favorite for melting cream contour into foundation for a look that’s truly undetectable.
The moisture in the sponge sheers out the product just enough to prevent it from ever looking heavy or cakey. The key is to use gentle tapping or bouncing motions. Whatever you do, don't drag it across your skin! This technique is super forgiving, which makes it fantastic for beginners since it builds color so gradually.
A reusable sponge is a great sustainable staple for any makeup bag. Just remember to wash it after each use to keep bacteria away and ensure it performs at its best.
Fingertips: The Natural Warmer
Never, ever underestimate the power of the tools you were born with. Your fingertips are incredible for blending cream contour, especially when you're in a hurry or aiming for that no-makeup makeup vibe.
The natural warmth from your skin helps melt the product, making it blend out effortlessly. I just gently tap along the edges of my contour with my ring finger (it has the lightest touch) to diffuse the color. This method gives you a sheer, skin-like finish that’s perfect for on-the-go application with products like our multi-use Balmies.
Finishing Touches: How to Set and Perfect Your Contour
Getting your contour blended just right is a huge part of the process, but the final steps are what really bring the whole look together. It’s all about layering other products in a way that creates a seamless, dimensional finish that actually lasts.
Think of it this way: contour creates the shadows. Now it’s time to add back the warmth and light. This is where bronzer and highlighter become your best friends, working with your contour instead of against it for that professional, just-left-the-makeup-artist's-chair look.
Layering for a Cohesive Finish
The secret to a polished face is making sure all your products melt into one another. It shouldn't look like you have separate stripes of contour, blush, and highlight.
If you’ve used a cream contour, like one of our super versatile Axiology Balmies, sticking with other cream products for blush and highlight will give you a stunning, dewy finish that looks like real skin.
- Bring in the Warmth with Bronzer: Remember, contour is for shadow, bronzer is for warmth. Gently sweep a bit of bronzer where the sun would naturally kiss your face—think the top of your forehead and a little across the bridge of your nose. This brings so much life back into your complexion.
- Catch the Light with Highlighter: A little highlighter goes a long way. Dab some on the high points of your face, like the very tops of your cheekbones, under the arch of your brow, and on your cupid's bow. This creates a beautiful contrast to your shadows and makes your best features totally pop.
This kind of strategic layering is what keeps your makeup from looking flat or muddy. The goal is a soft, believable transition from shadow to light.
My favorite tip: When you’re layering cream products, always tap or press them into the skin. If you rub or swipe, you’ll just end up moving the contour you worked so hard on.
Lock It In for All-Day Wear
Okay, you love your sculpted look. Now, let's make it stay that way. Setting your makeup is a non-negotiable step, especially if you have oily-prone skin or you've been working with creamy formulas. It’s the difference between a look that lasts through dinner and one that’s gone by lunch.
For a modern, soft-focus finish, a light dusting of translucent setting powder is perfect. I like to focus just on the areas that tend to get a little shiny, like my T-zone and under my eyes.
If you want a more intense, super long-lasting contour, you can even apply a powder contour right on top of your cream one. This is a technique called "double contouring," and it adds serious depth and staying power.
To finish everything off, a few spritzes of a setting spray will melt all the powders into your skin, getting rid of any cakey-ness and leaving you with a flawless look that lasts for hours.
Your Top Contour Blusting Questions, Answered
Even when you feel like you've got the hang of it, contouring can throw a curveball. Let's walk through some of the most common blending hurdles I see all the time. Think of this as your personal cheat sheet for getting that perfect, seamless sculpt.
"Help! Why Does My Contour Look Muddy or Patchy?"
Ah, the classic contour conundrum. This almost always boils down to one of two things: you're either over-blending, or your formulas are fighting each other.
When you get a little too enthusiastic with rubbing or swirling, you end up mixing your contour right into your foundation. The result? A muddy mess. Applying a cream contour over a powder foundation that hasn't been set can also cause it to grab and look patchy.
The fix is simple: always work in thin layers. And instead of aggressively rubbing, gently tap or stipple to blend only the edges of your contour line. This softens the line without smearing the product all over your face.
Pro Tip: Your contour shade choice is everything. A common mistake is using a warm, orange-y bronzer to contour. Real shadows are cool-toned, so stick to a cooler brown to avoid that muddy look.
"Is It Okay to Use My Fingers to Blend Contour?"
Yes, absolutely! Your fingers are one of the best tools in your kit, especially for cream products like our plastic-free Axiology Balmies. The warmth from your skin is magic—it helps melt the product just enough so it blends into your skin like a dream.
For the most delicate application, use your ring finger. It has the lightest touch. Just tap gently along the edges of the product to diffuse the color. It's my go-to method for a fast, natural-looking sculpt when I'm in a hurry.
"Should I Contour Before or After Foundation?"
The age-old question! For the most part, especially with cream formulas, you'll want to apply your contour after foundation but before you lock everything in with setting powder. This lets the creams blend together seamlessly for a really skin-like finish.
That said, there's a technique called "underpainting" that's become a huge favorite for a super subtle, natural effect. You apply your contour directly onto your prepped skin before your foundation. Then, when you layer a sheer foundation over the top, it automatically softens and diffuses the contour. The result is a shadow that truly looks like it’s coming from within. It’s a fantastic trick to guarantee a flawless blend every time.
Ready to create your own seamless, sculpted look with products that are kind to your skin and the planet? Discover the perfect multi-use shades for contouring, blush, and more with Axiology. Explore our 100% vegan and plastic-free makeup at AxiologyBeauty.com.